
Attach files from Twake Drive to an email
Twake Mail allow you to add files stored in your Twake Drive while composing an email. You can send them as regular email attachments or share them using Drive links.
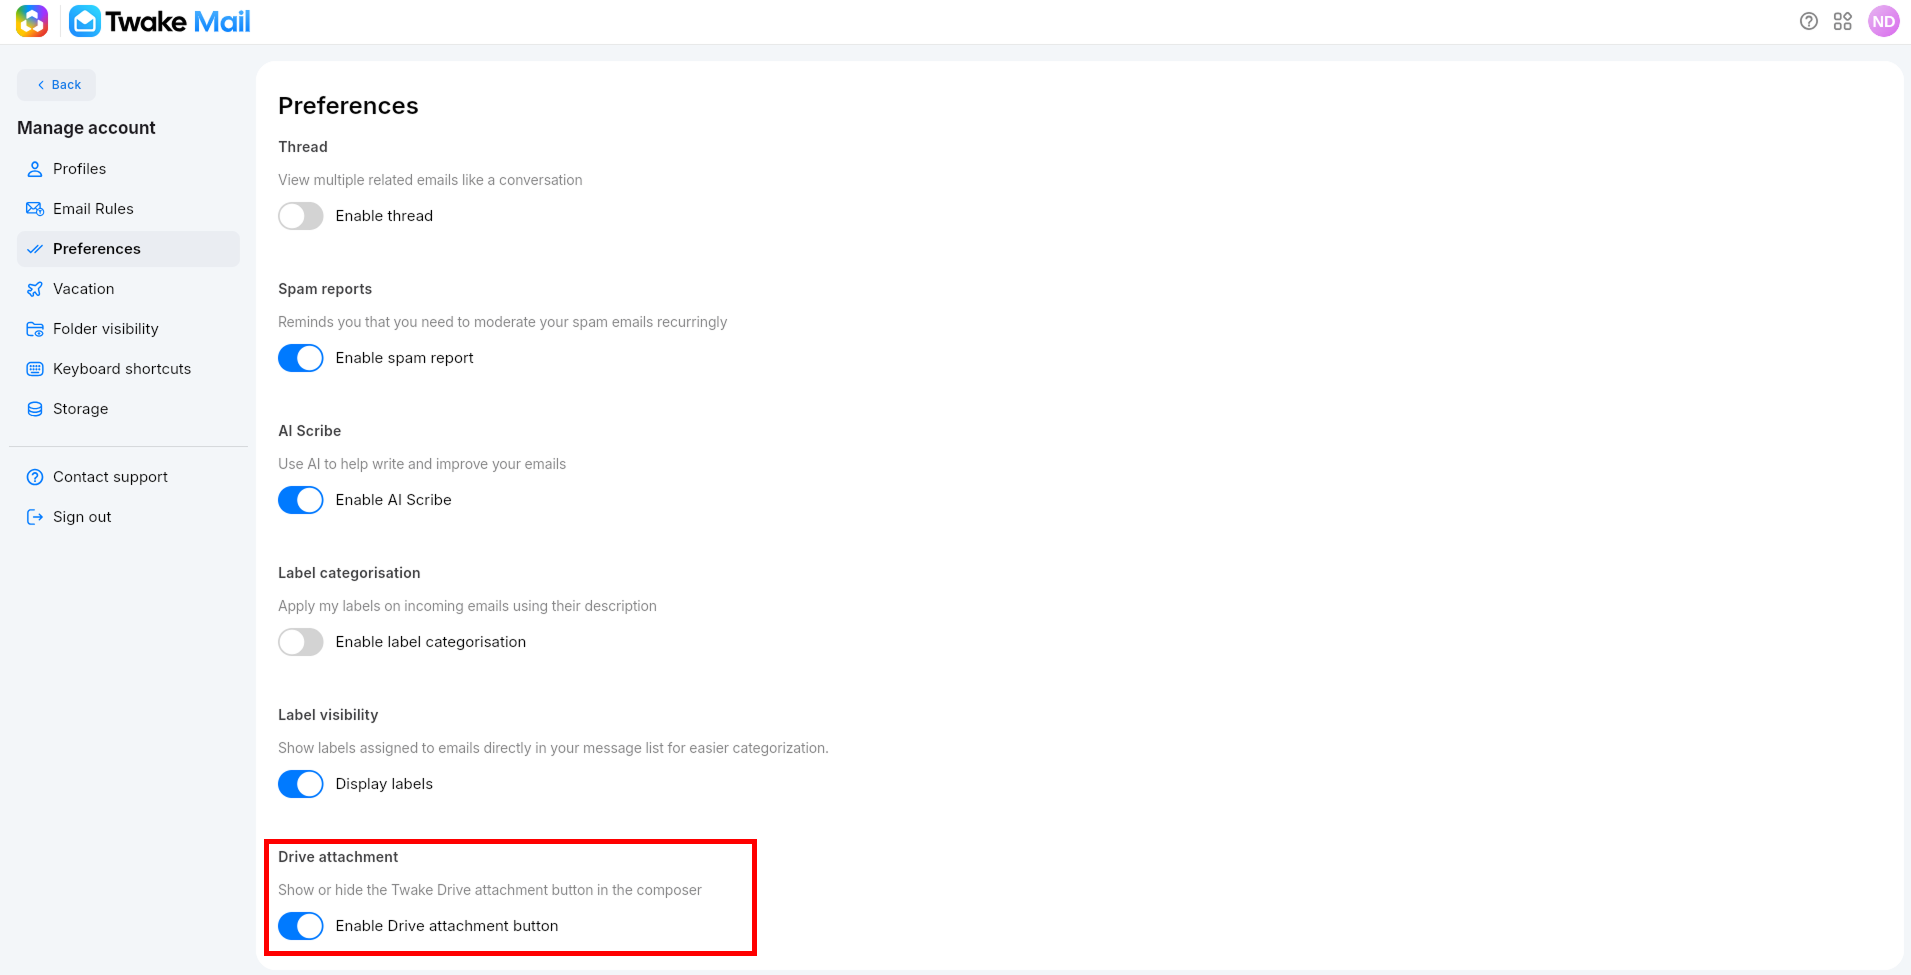
Enable the Twake Drive attachment button
Before attaching files from Drive, make sure the Drive attachment button is enabled:
- Open Twake Mail.
- Click the Settings icon => Manage account
- Select Preferences.
- Enable the toggle Enable Drive attachment button.
The Twake Drive attachment button will appear in the toolbar when you compose an email.
To hide the button, return to Preferences and disable the setting. Disabling the button does not delete files from Twake Drive.
Select files from Twake Drive
- Click Compose to create a new email.
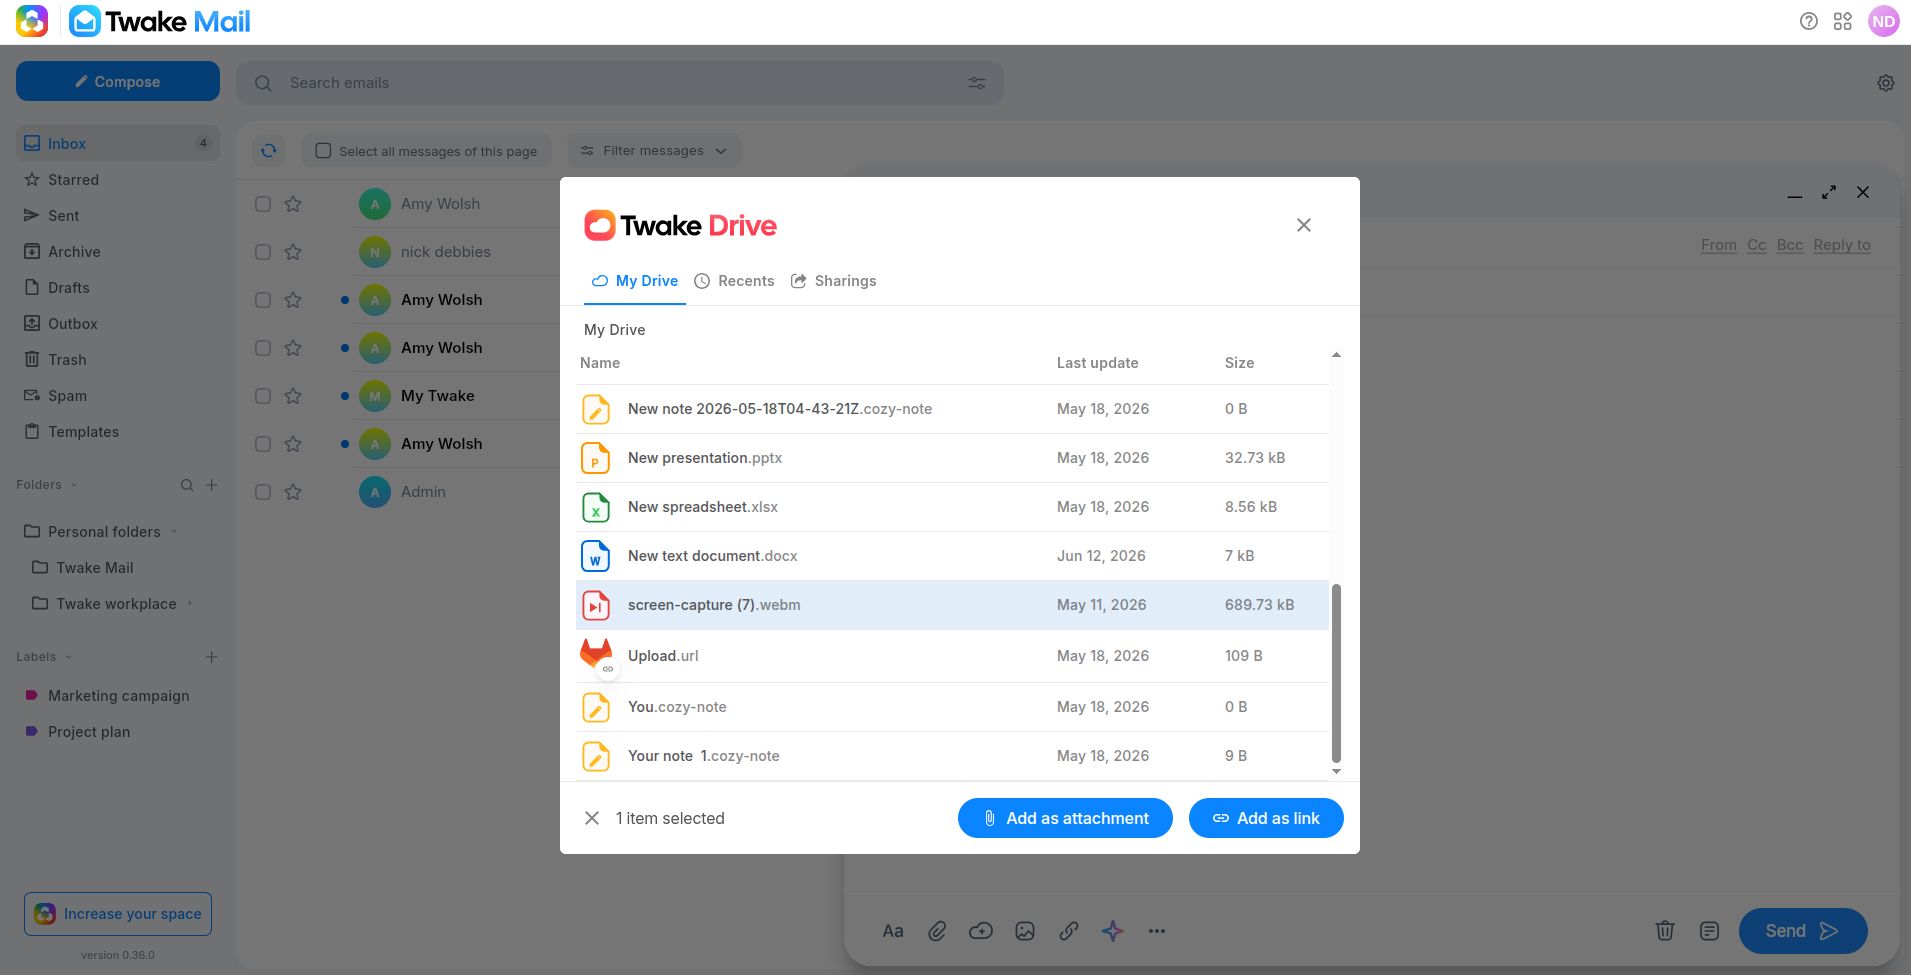
- Click the Twake Drive attachment button in the composer toolbar.
- Browse for your files using one of the available tabs:
- My Drive: Browse the files and folders stored in your Drive.
- Recents: Find files you recently opened or modified.
- Sharings: Access files that have been shared with you.
- Select one or more files.
- Choose Add as attachment or Add as link.
Add files as email attachments
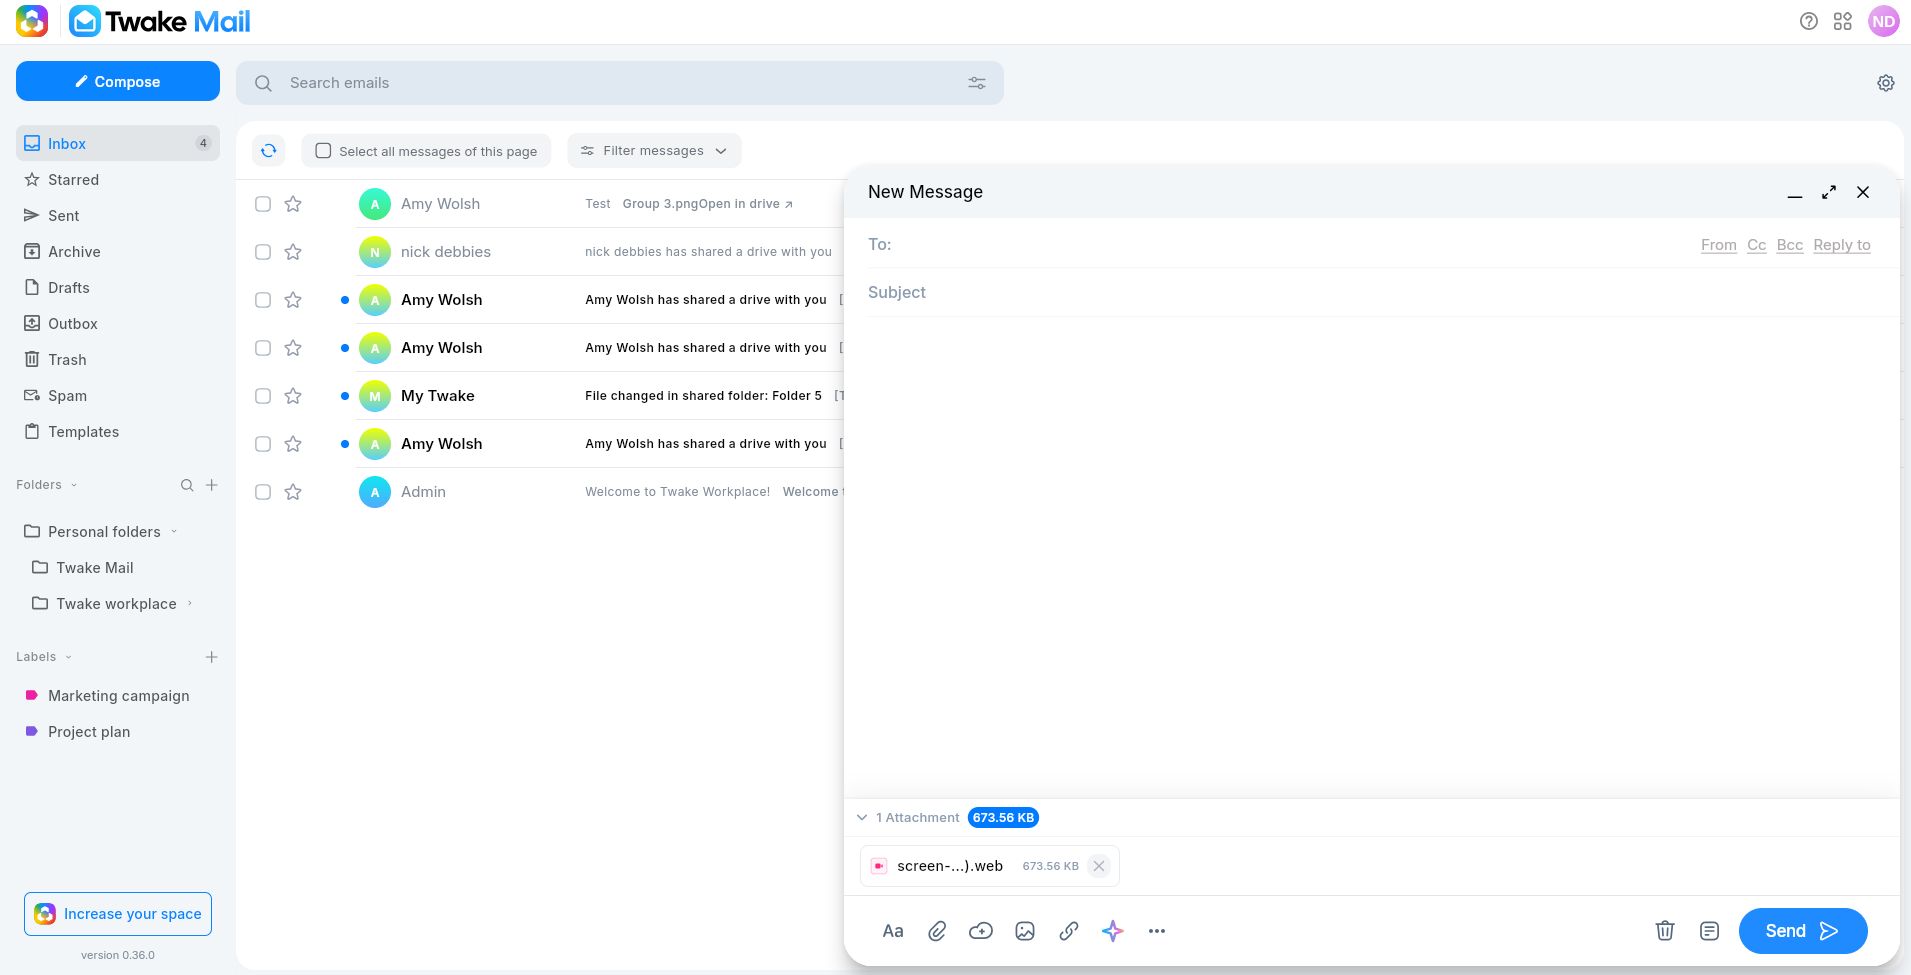
Select Add as attachment to add copies of the selected files directly to your email.
The files appear in the attachment area at the bottom of the composer. You can remove a file before sending the email by clicking the X next to it.
Recipients receive the files as standard email attachments and do not need access to your Twake Drive.
Note: Regular email attachment-size limits apply when you use this option. And this option is not applied for folders.
Add files/folders as Drive links
Select Add as link to insert links to the files in the email body.
Before adding the links, configure how recipients can access the files:
- Under Set link access, choose the recipient permission:
- Viewer: Recipients can open and view the files/folders
- Editor: Recipients can modify the files/folders
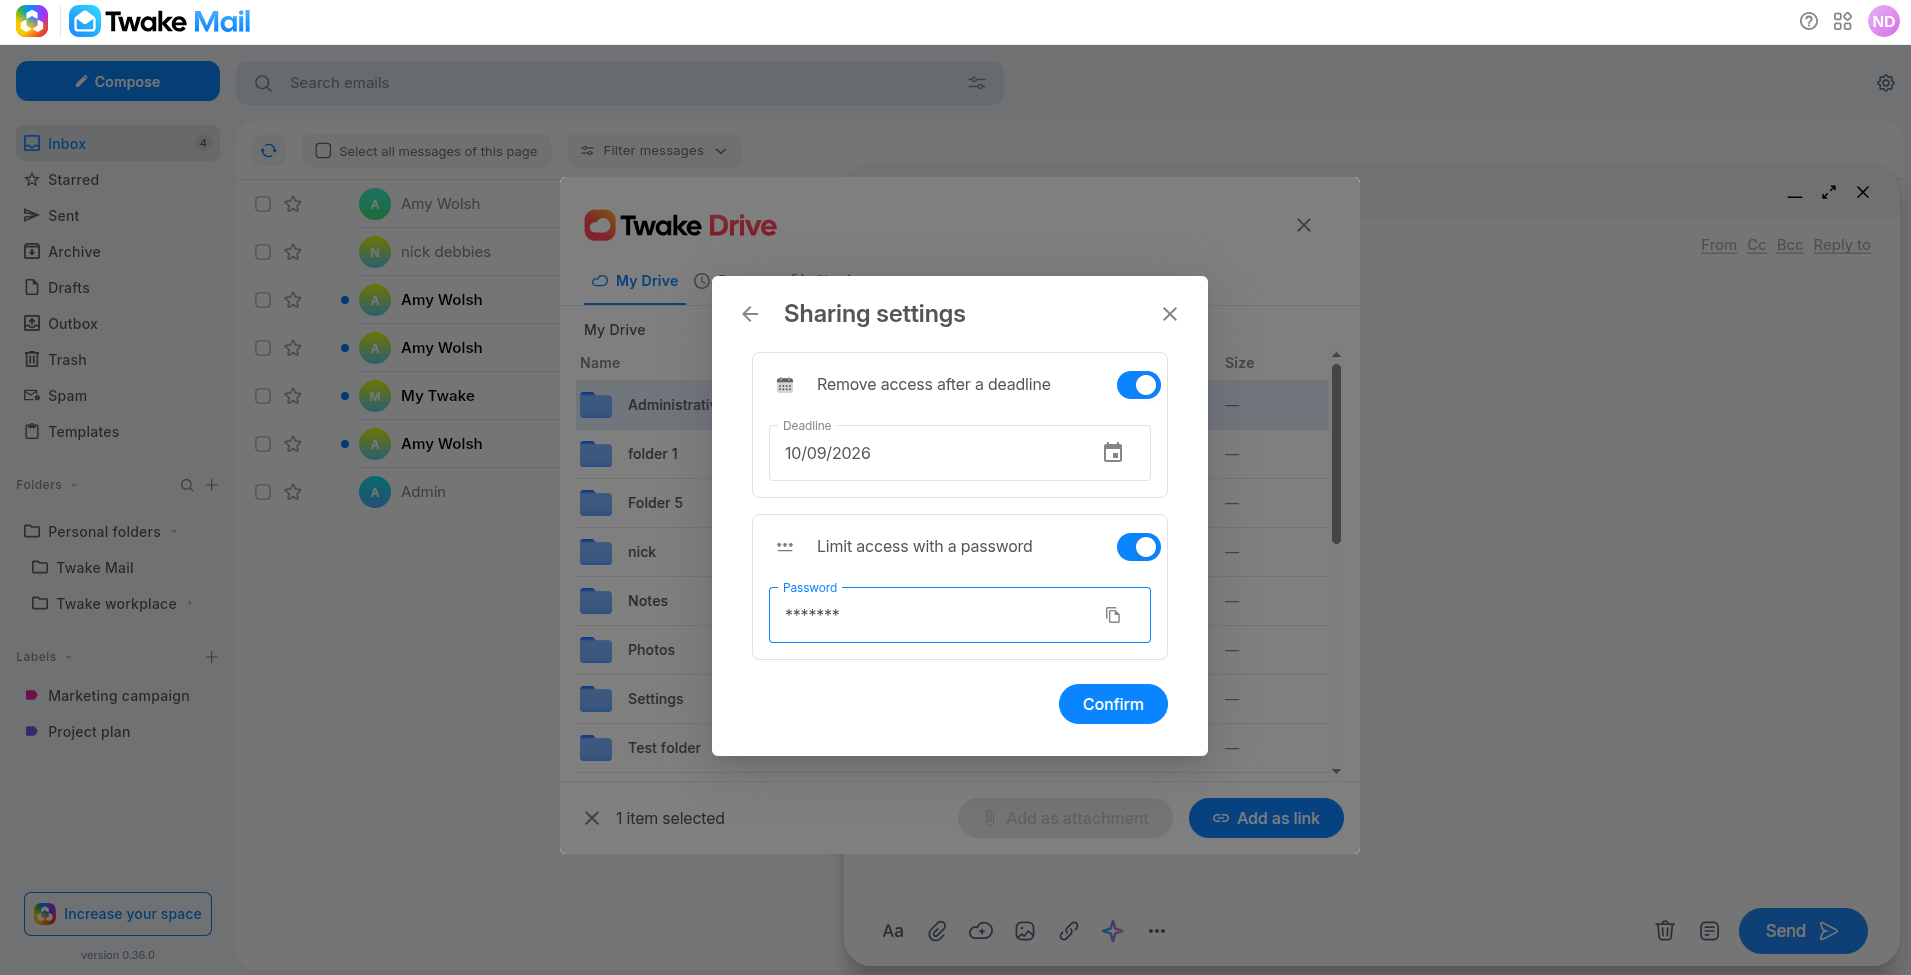
- If needed, click the Sharing settings icon to add extra protection:
- Remove access after a deadline: Choose a date after which the links will no longer provide access.
- Limit access with a password: Enter a password that recipients must provide to open the files/folders
- Click Confirm to save the additional sharing settings.
- Click Add links.
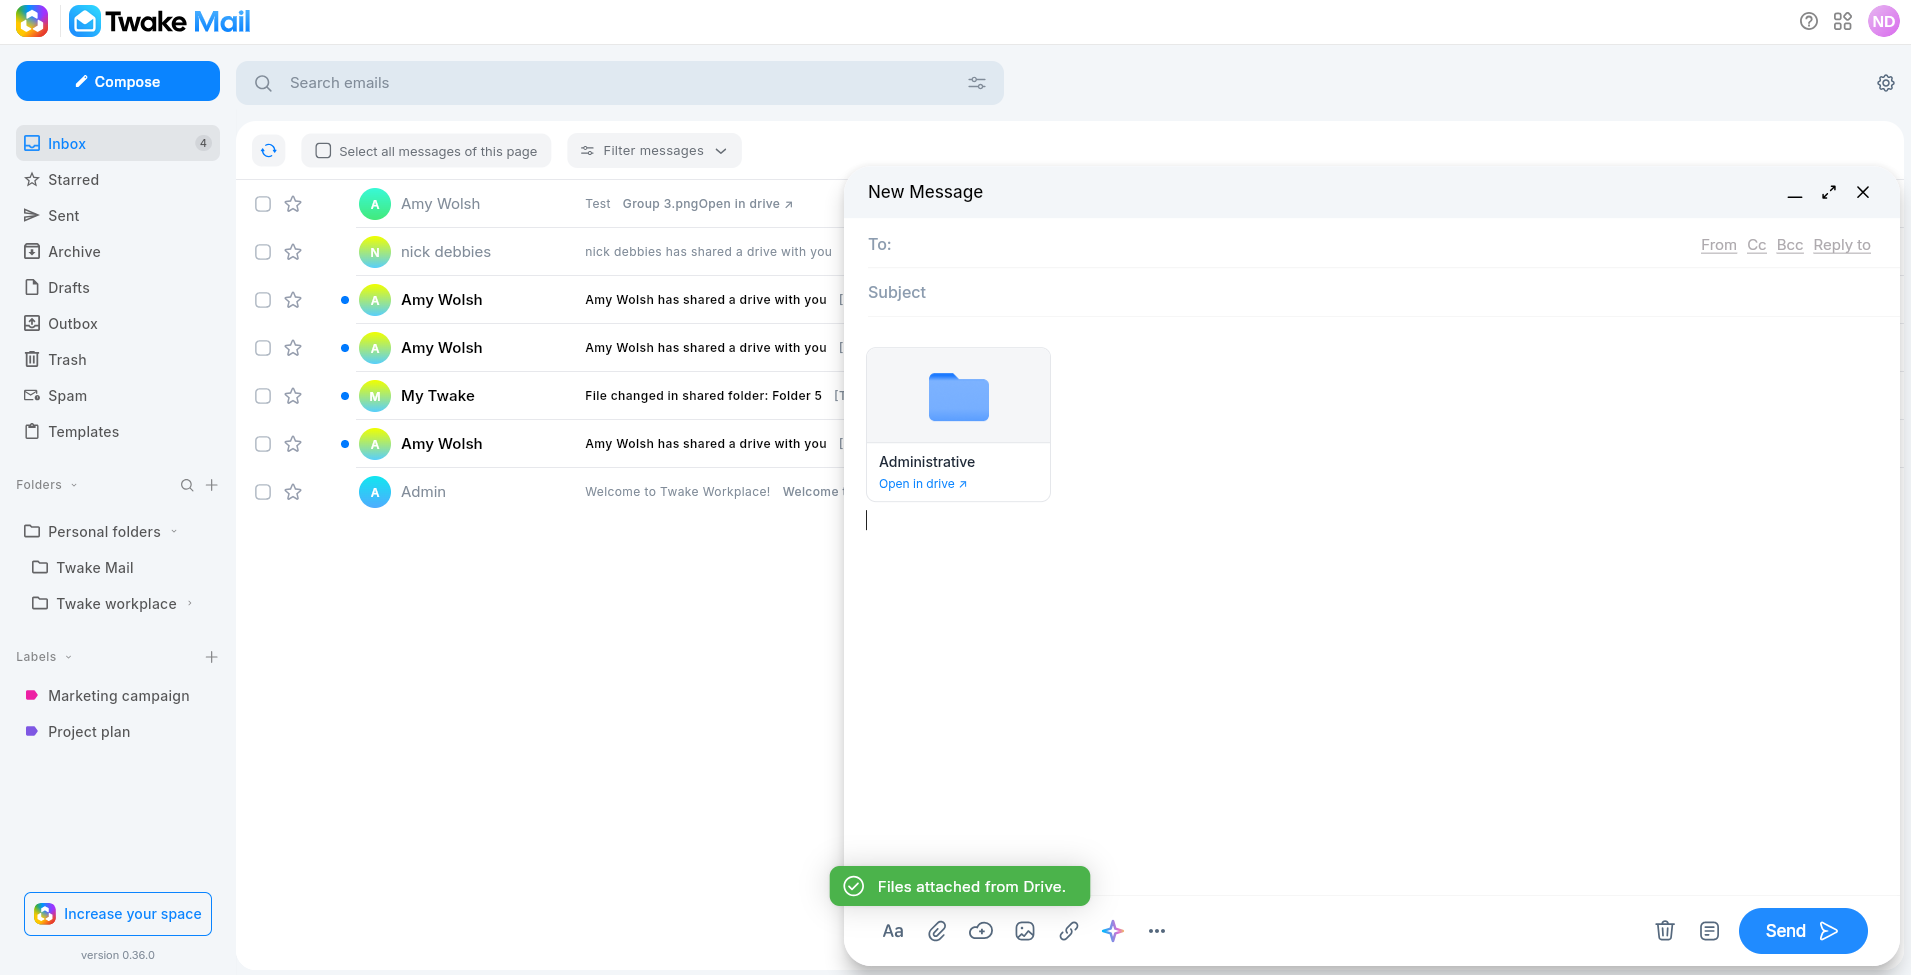
A card for each selected file/folder appears in the email body. Recipients can select Open in Drive to access the file/folder
Important: When Allow anyone with the link to access is enabled, anyone who receives or obtains the link can access the file/folder with the permission you selected. Use a deadline or password when sharing sensitive content.