Manage your identities and signatures
Email identities allow you to use different sender names, reply addresses, signatures, and default settings from the same mailbox. This is useful when you send emails for different roles, teams, or projects.
To access your identities:
- Click your profile avatar in the top-right corner.
- Select Manage account.
- Click Profiles from the left menu.
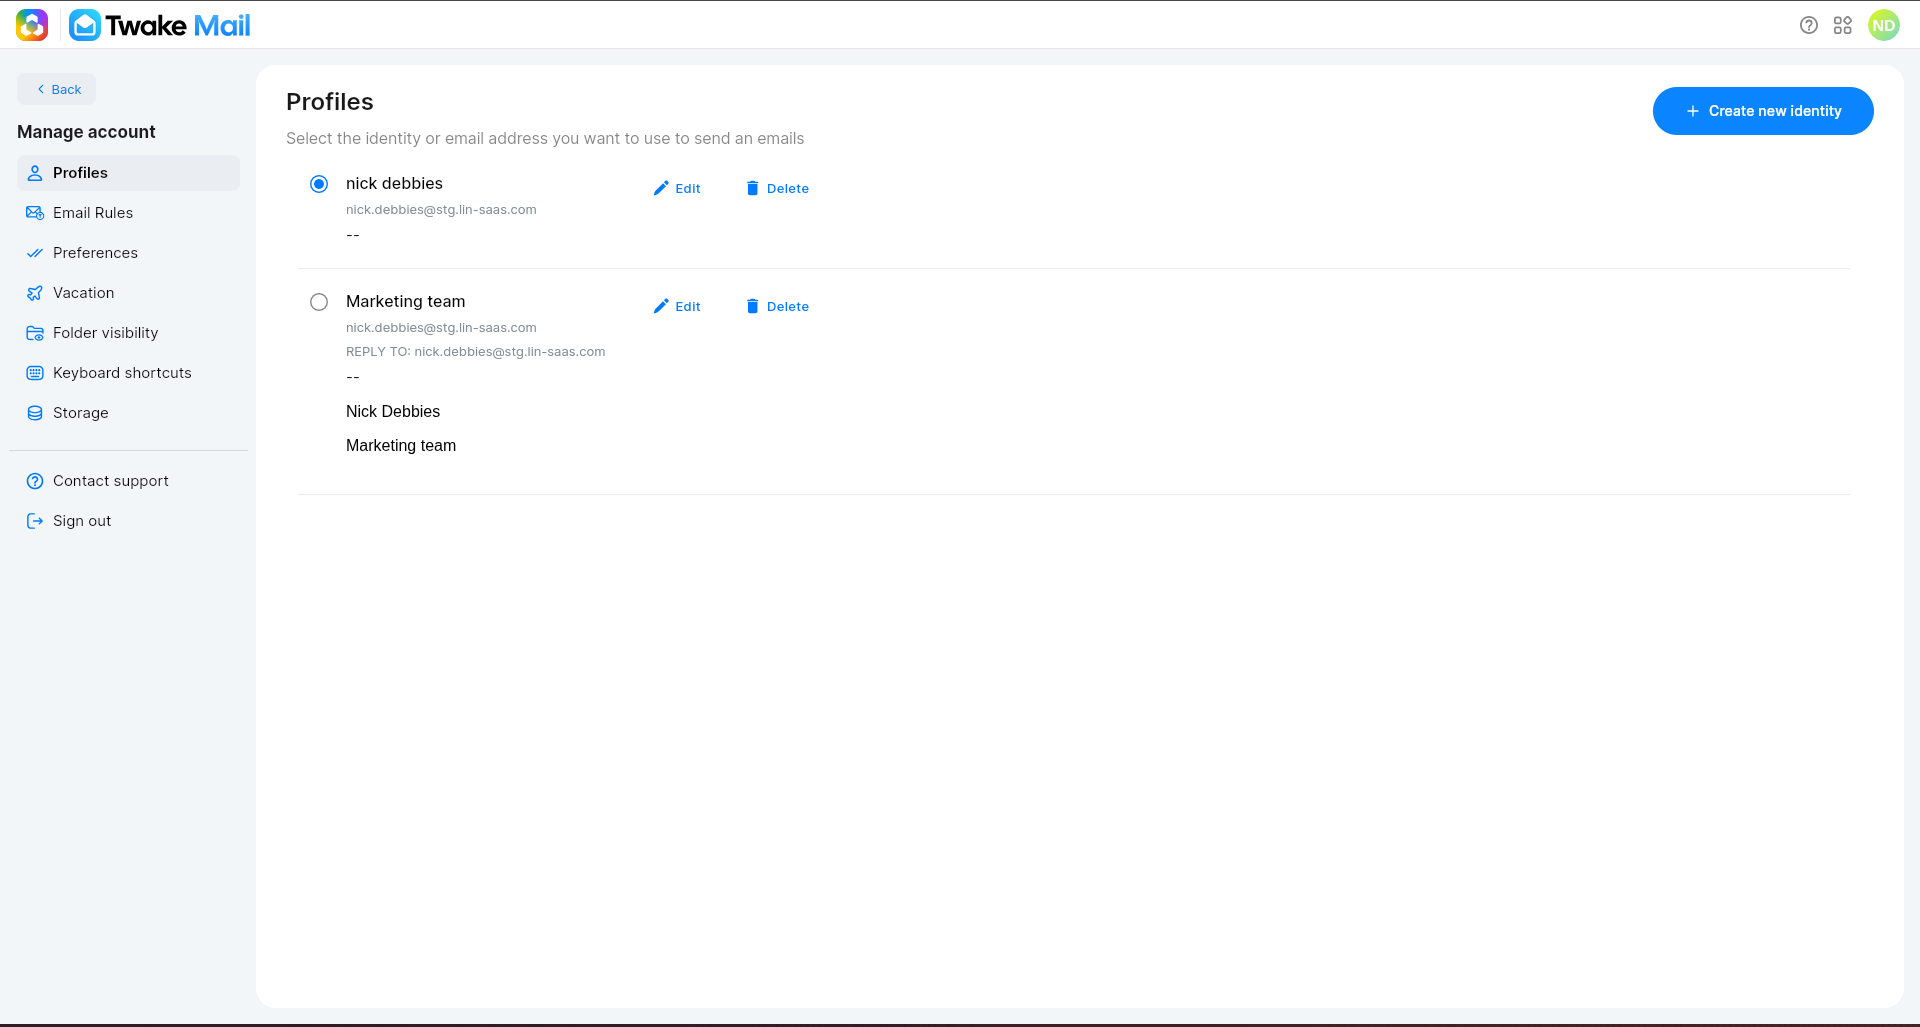
The Profiles page displays all available identities. You can create, edit, delete, and select a default identity.
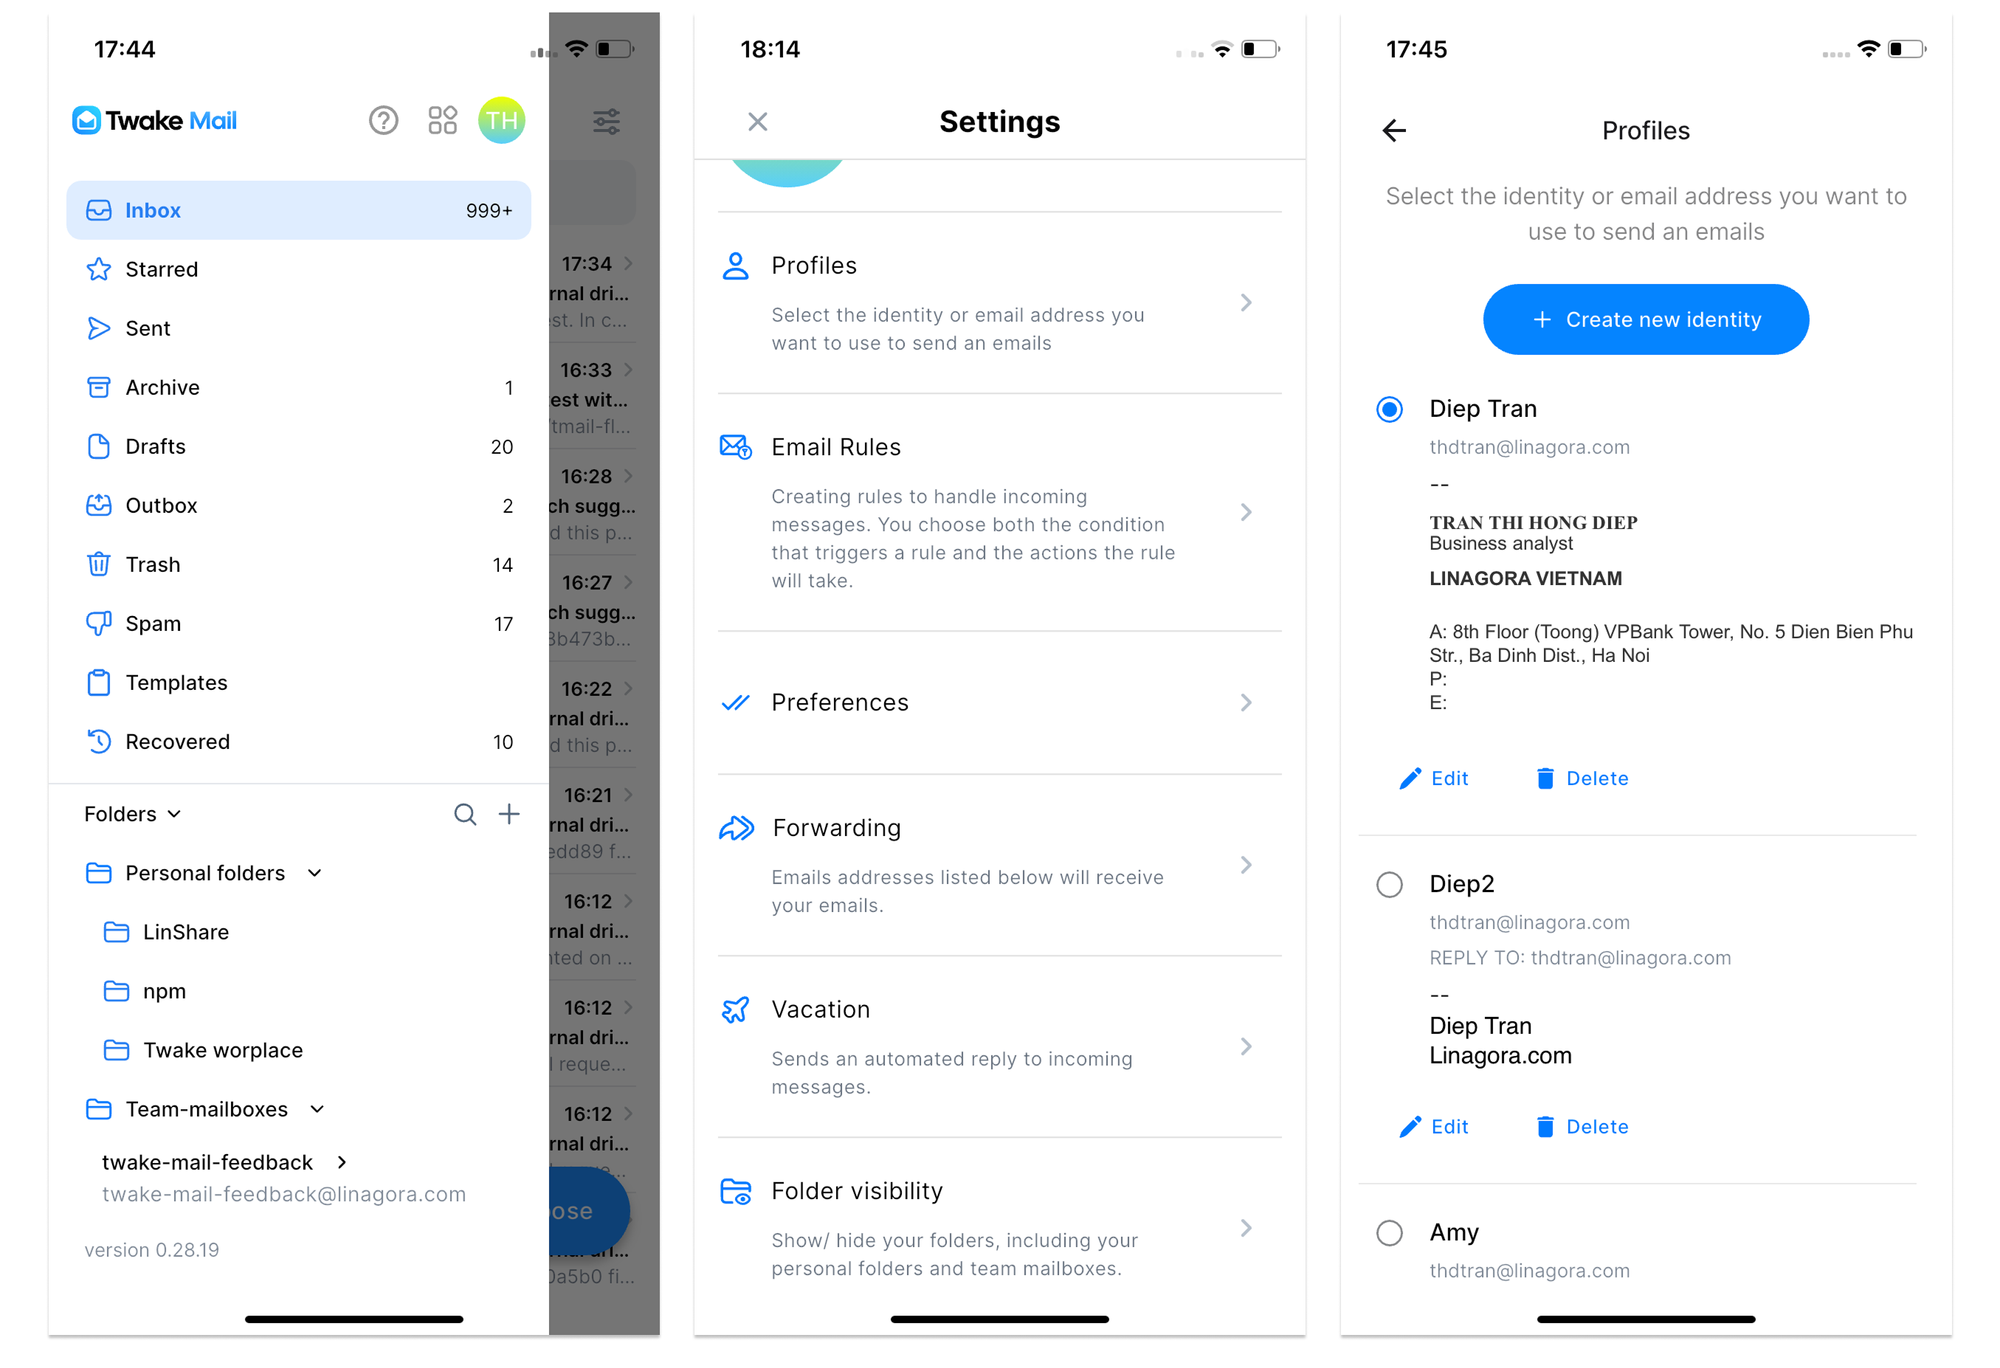
On mobile app, Click on hamburger button => then select avatar icon, the Settings screen will be displayed => select Profiles:
Create a New Identity
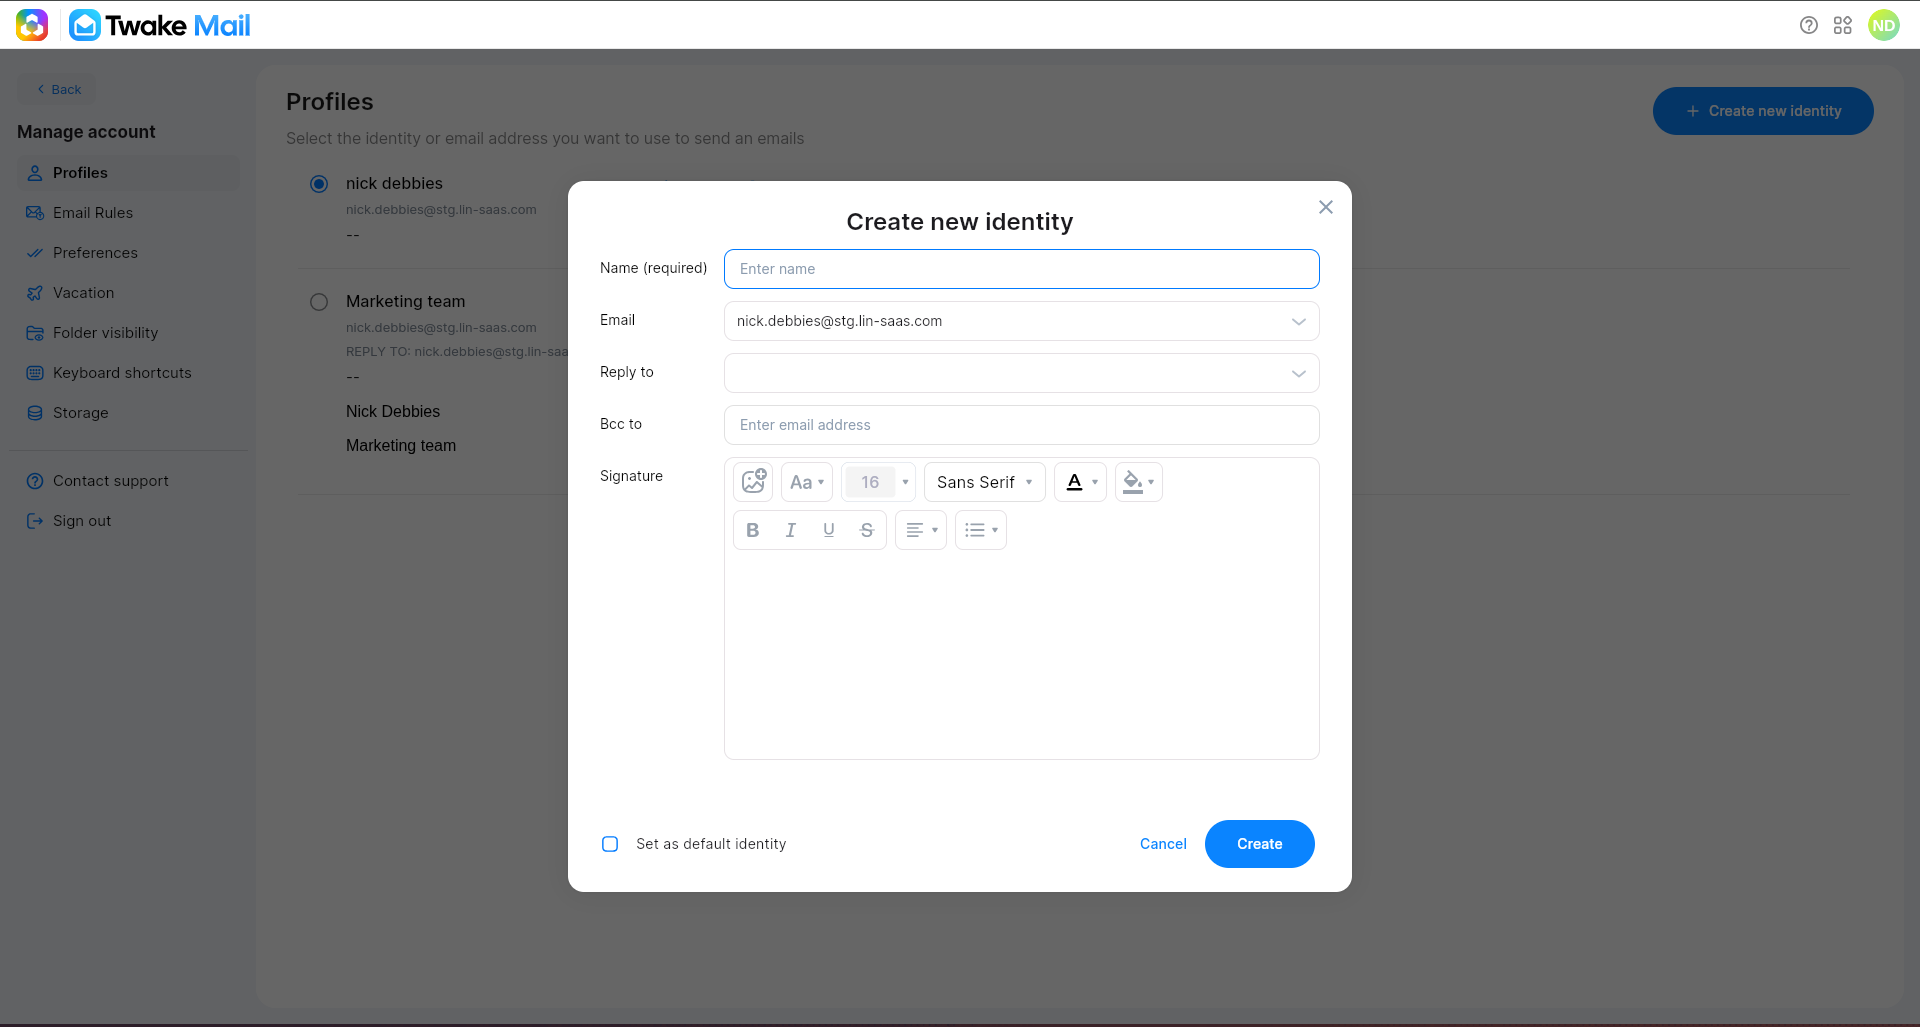
- From the Profiles page, click Create new identity.
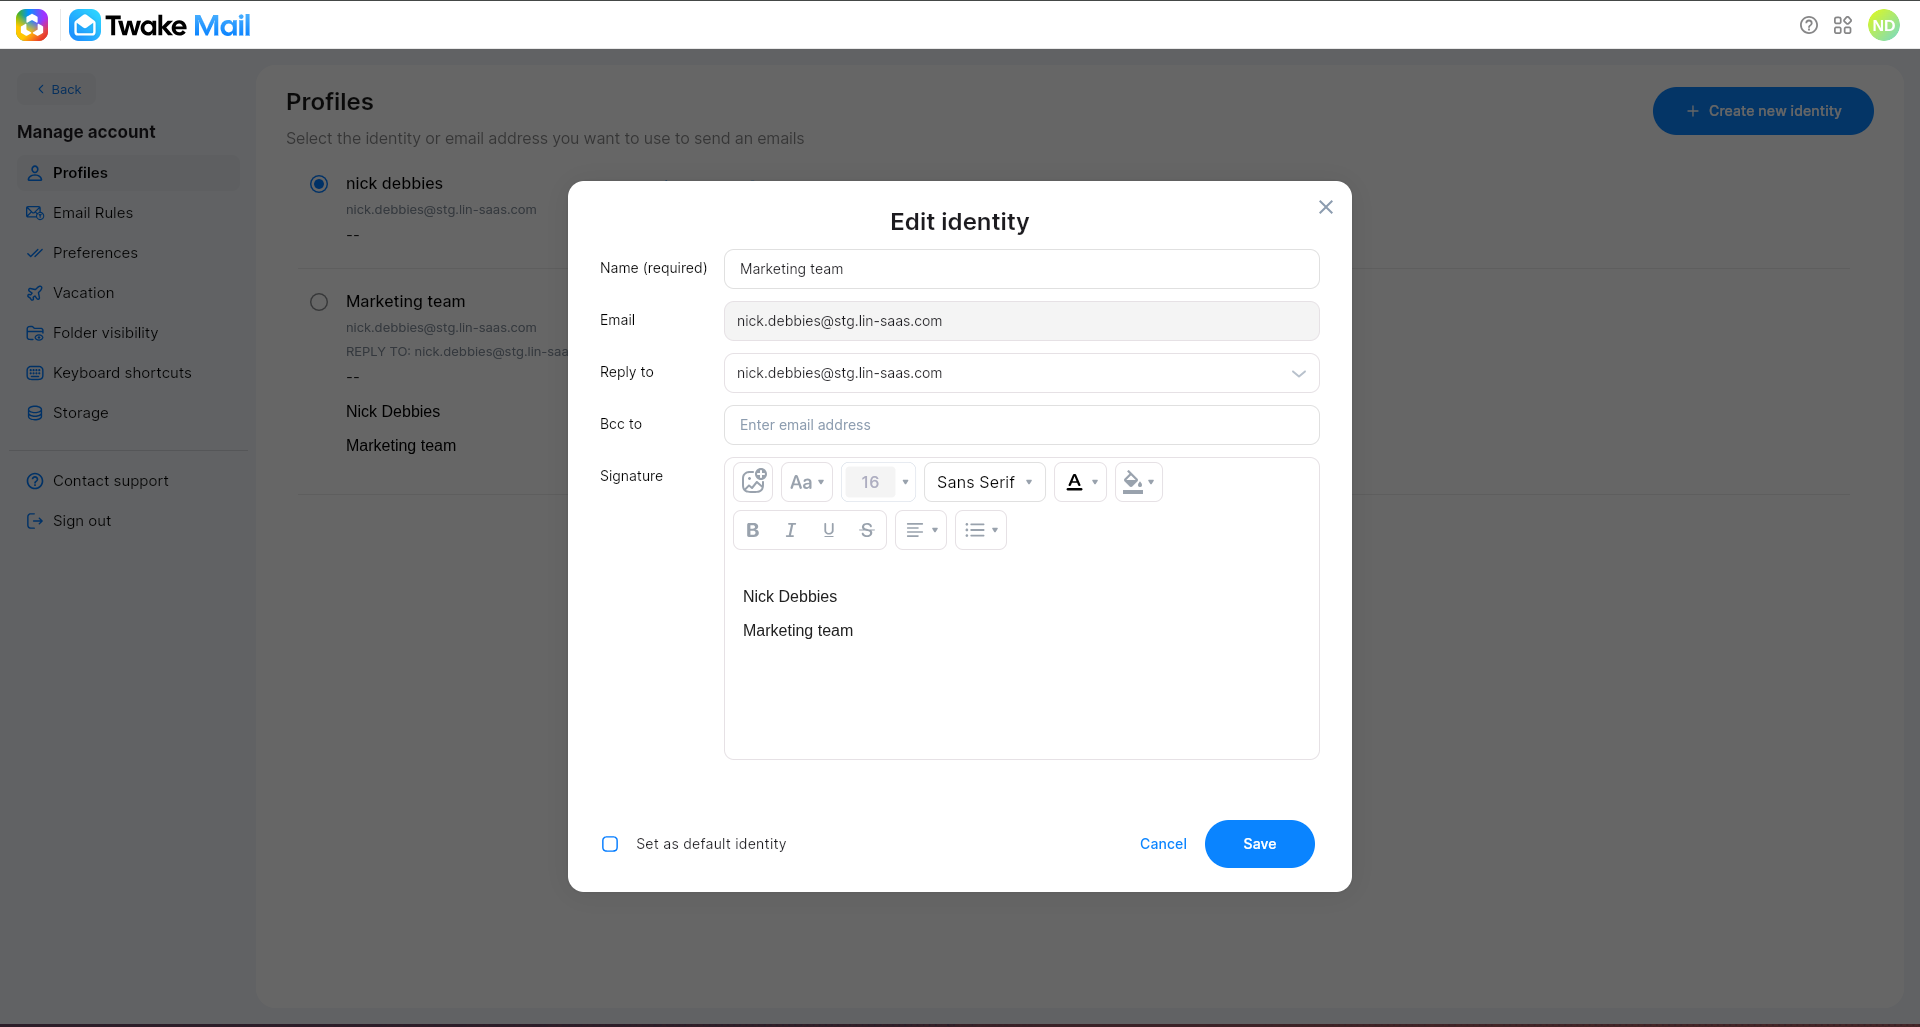
- Complete the identity settings:
- Name (required): The sender name displayed to recipients.
- Email: Select the email address associated with this identity.
- Reply to: Specify the email address that will receive replies.
- Bcc to: Enter one or more email addresses to automatically receive a blind copy of every email sent using this identity.
- Signature: Create a custom email signature using the formatting toolbar. You can include an image in signature of the identity, .eg company logo, product logo, project logo.... The image is sent in every email, so it should be an small image (less than 16KB).
- (Optional) Enable Set as default identity if you want this identity to be automatically selected when composing new emails.
- Click Create.
Notes
- Each identity can have its own signature.
- The default identity is automatically selected when composing new emails.
- You can change the identity manually from the email composer when needed.
Edit an Identity
- On the Profiles page, locate the identity you want to modify.
- Click Edit.
- Update any of the following settings:
- Name
- Reply-to address
- Bcc recipients
- Signature
- Default identity status
- Click Save.
Note
The email address associated with an identity cannot be changed after the identity has been created.
Delete an Identity
- On the Profiles page, locate the identity you want to remove.
- Click Delete.
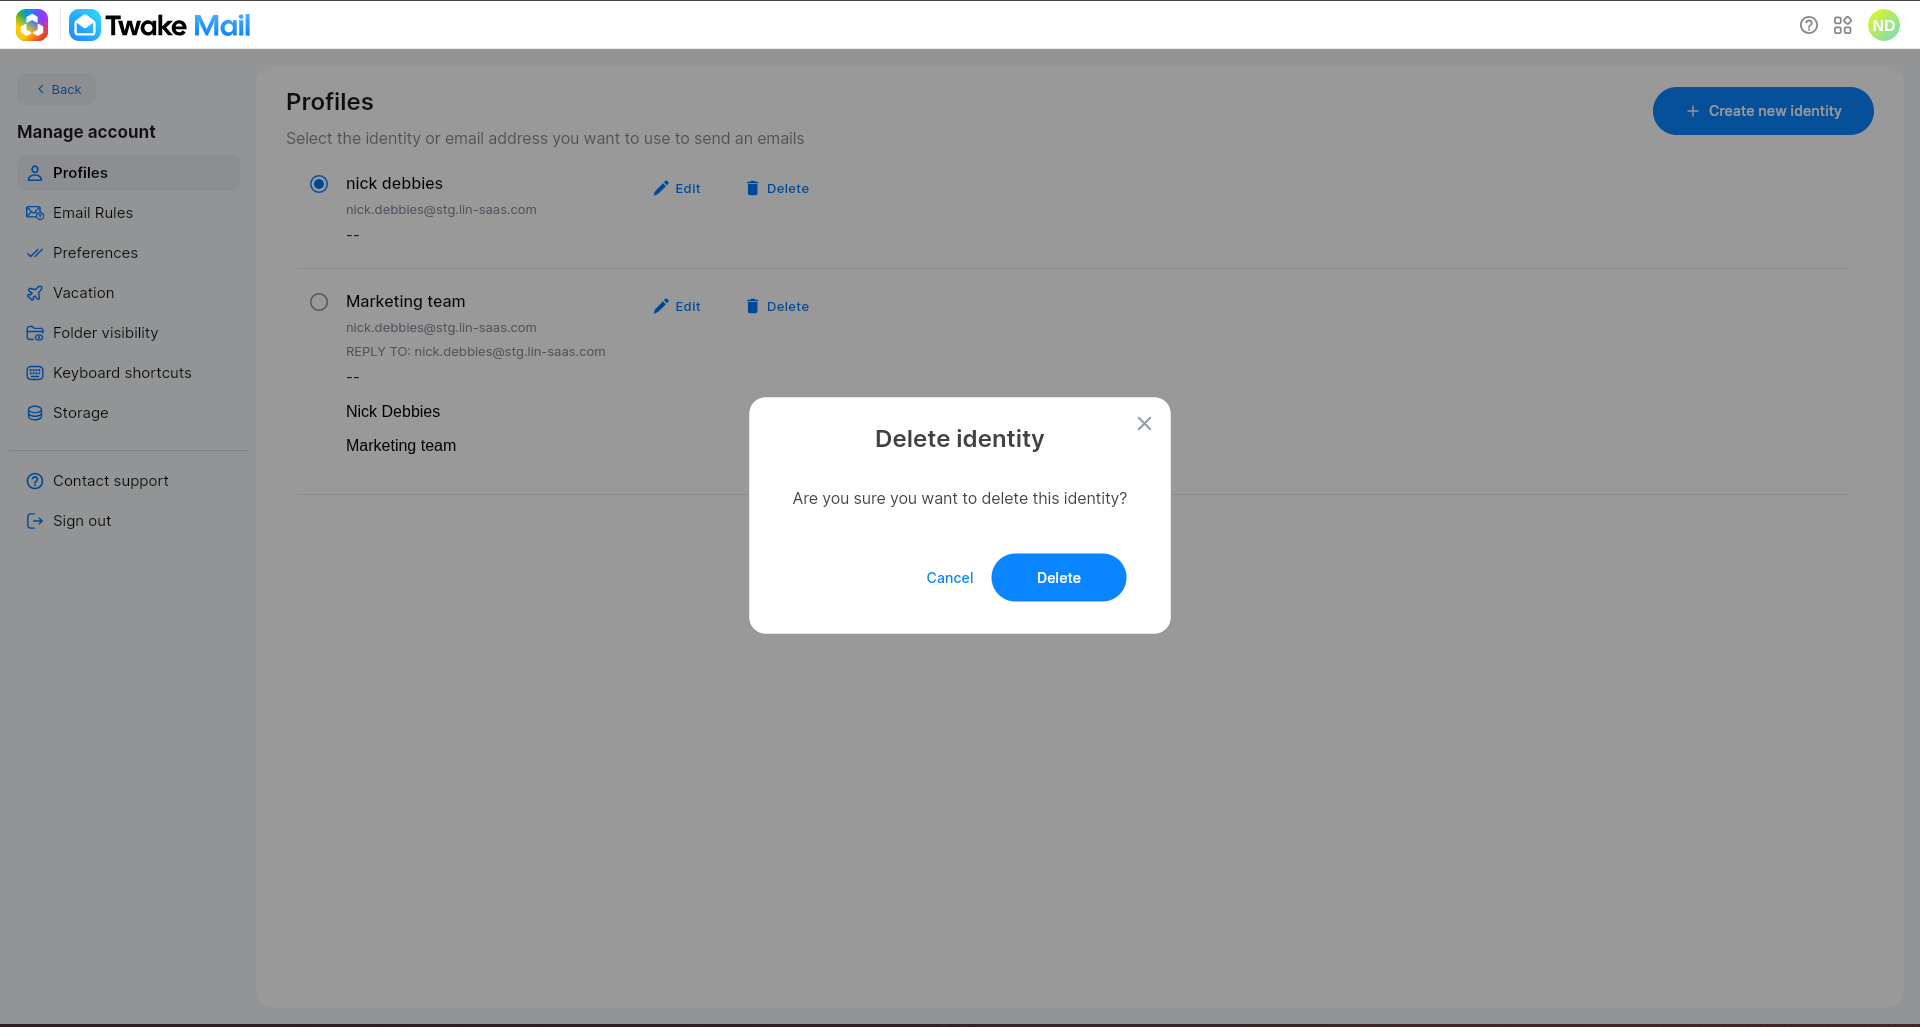
- Review the confirmation message.
- Click Delete to confirm.
The identity will be permanently removed from your account.
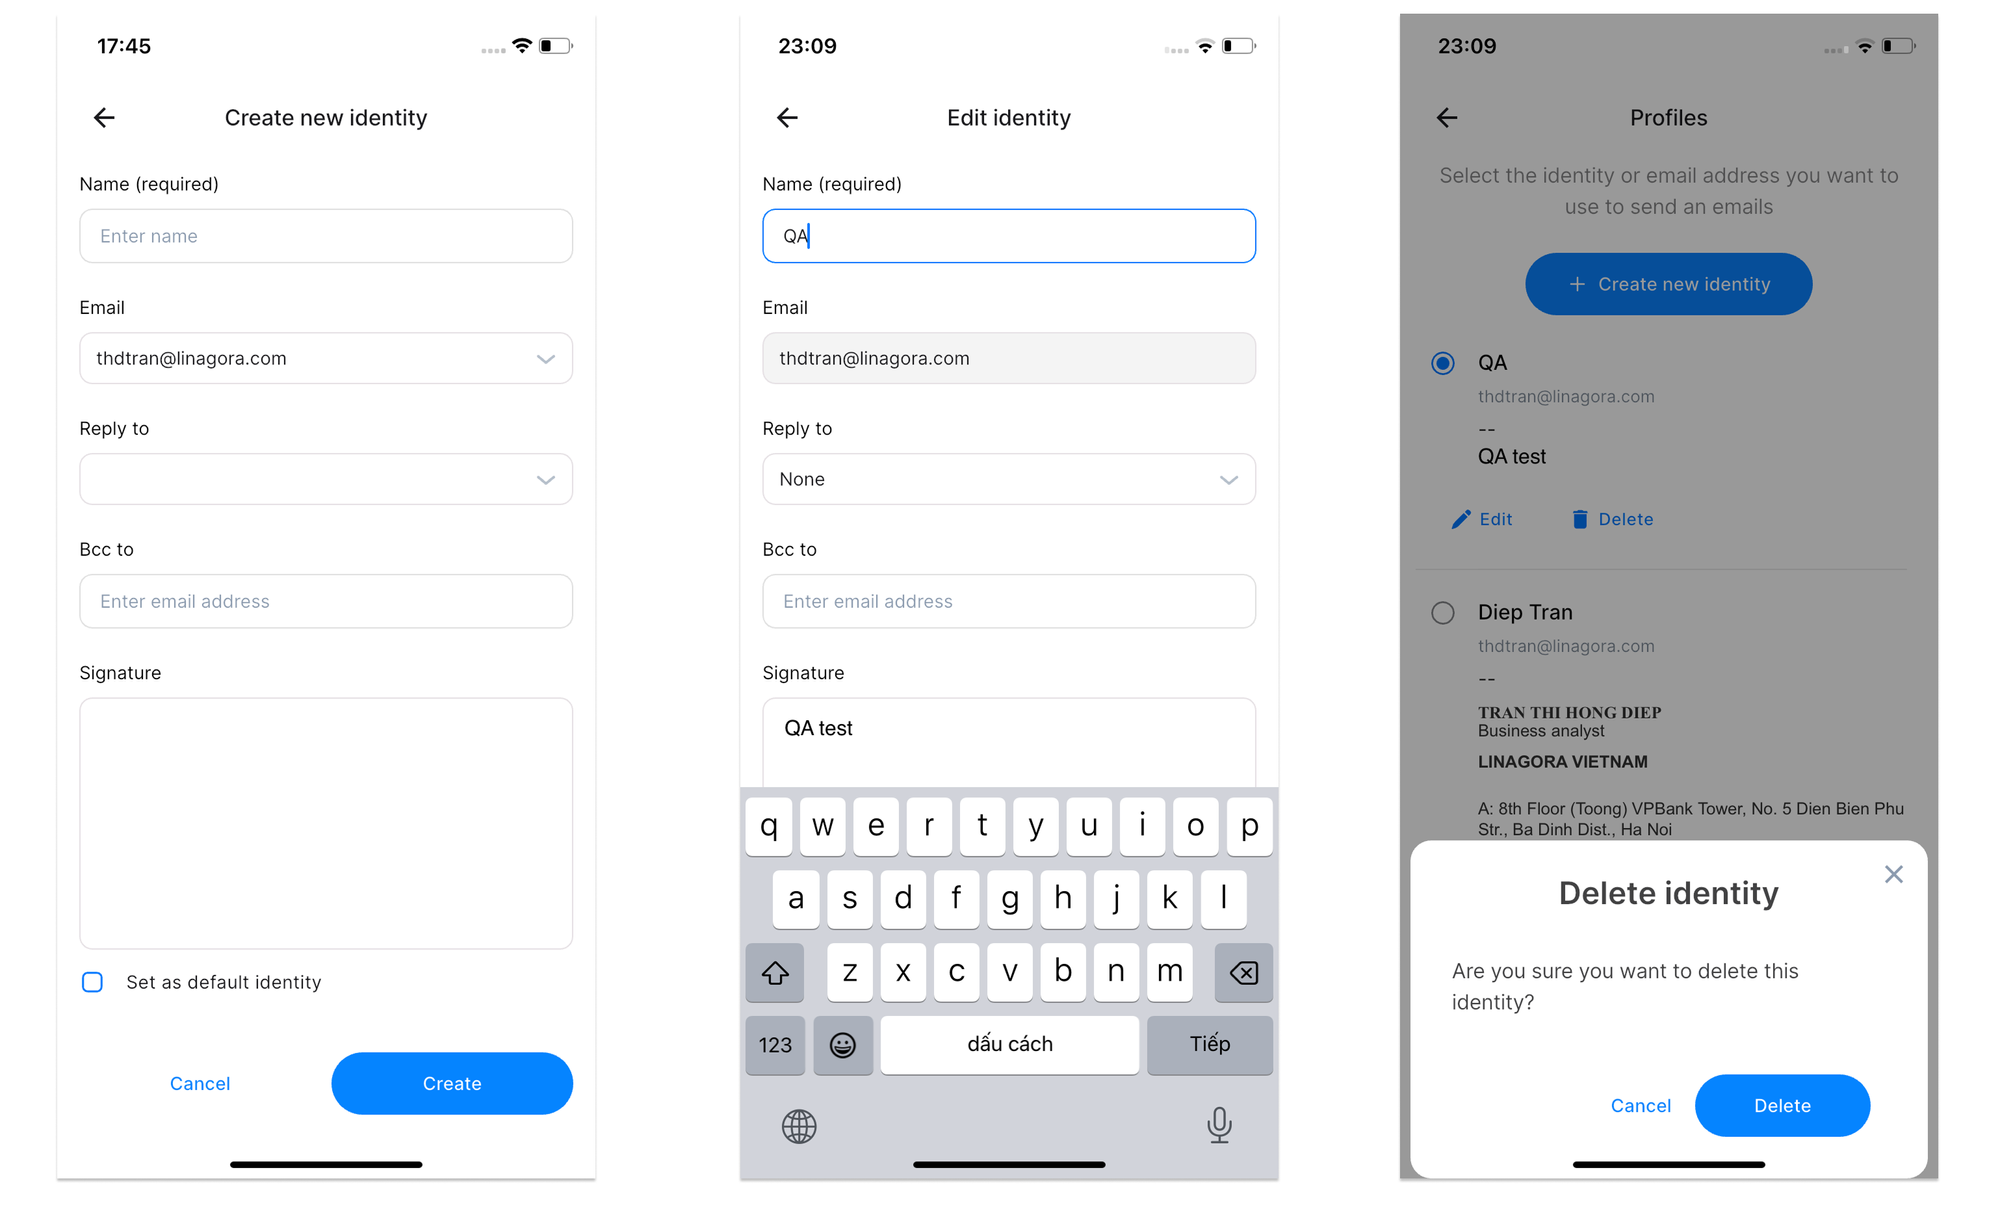
Ob mobile: