Preferences
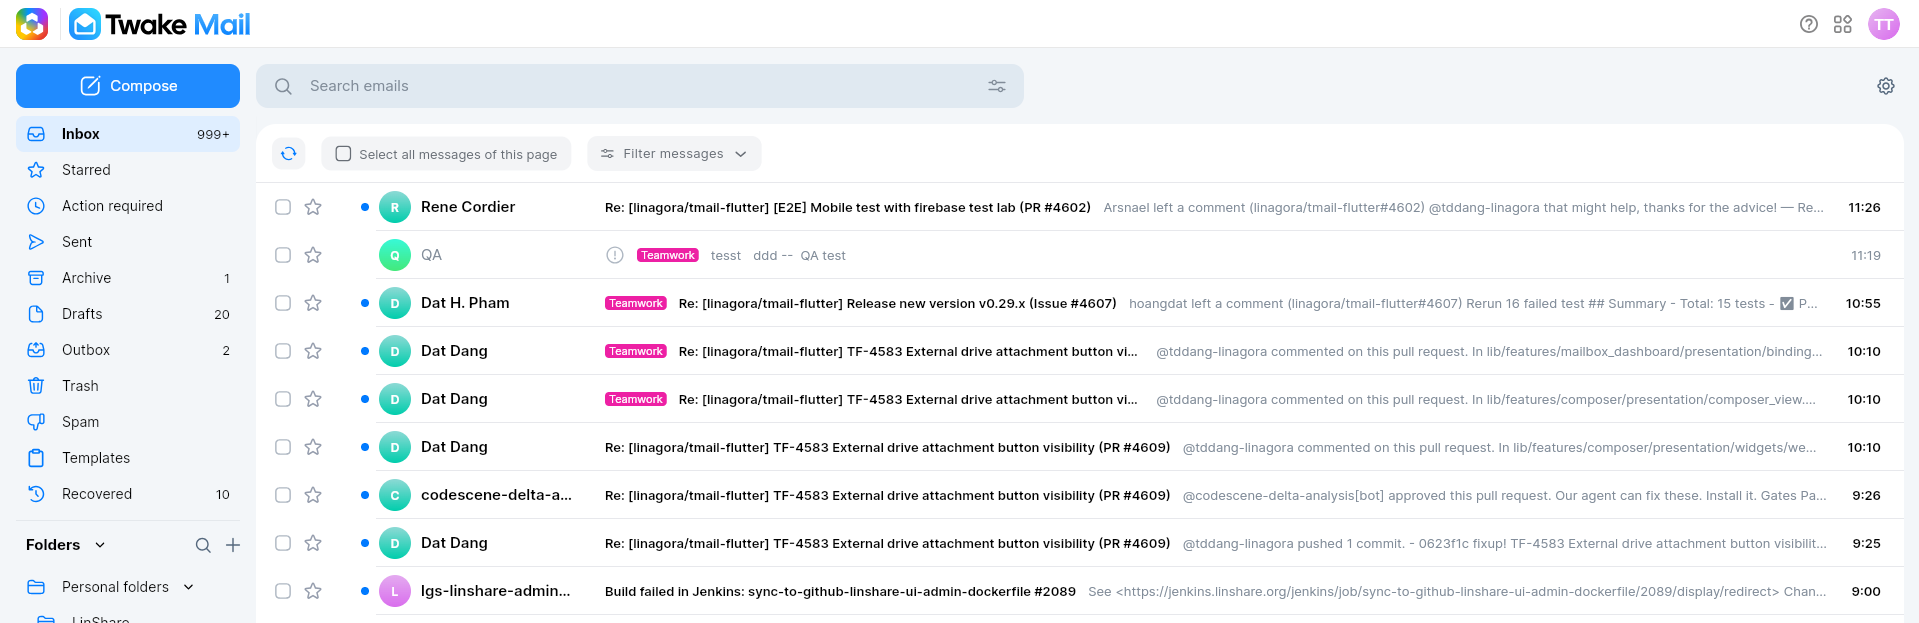
The Preferences page allows you to customize how Twake Mail behaves and how information is displayed in your mailbox.
To access Preferences:
- Click your profile avatar in the top-right corner.
- Select Manage account.
- Click Preferences from the left menu.
Changes are applied automatically when you enable or disable an option.
Email Read Receipts
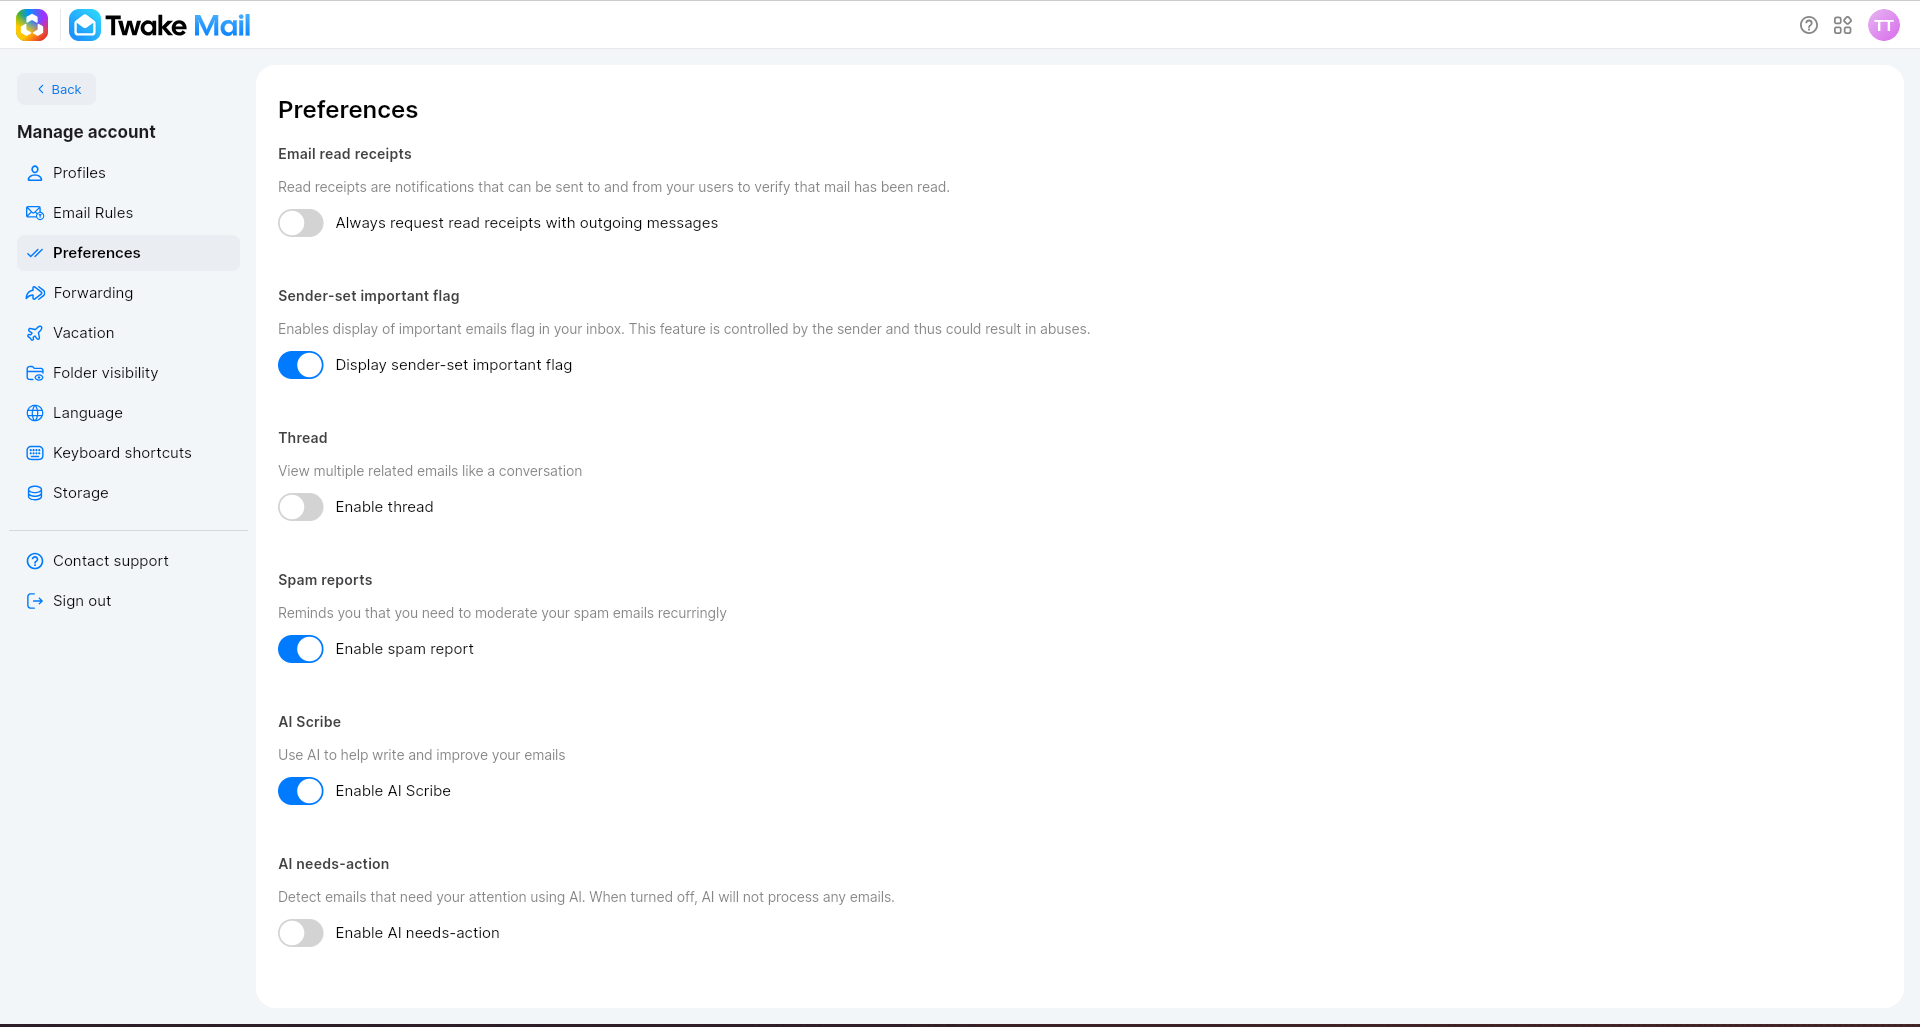
Read receipts are notifications that inform you when a recipient has opened your email. A read receipt is sent to you as an email with the time and date of when your message was opened.
Enable Automatic Read Receipts
- Go to Preferences.
- Enable Always request read receipts with outgoing messages.
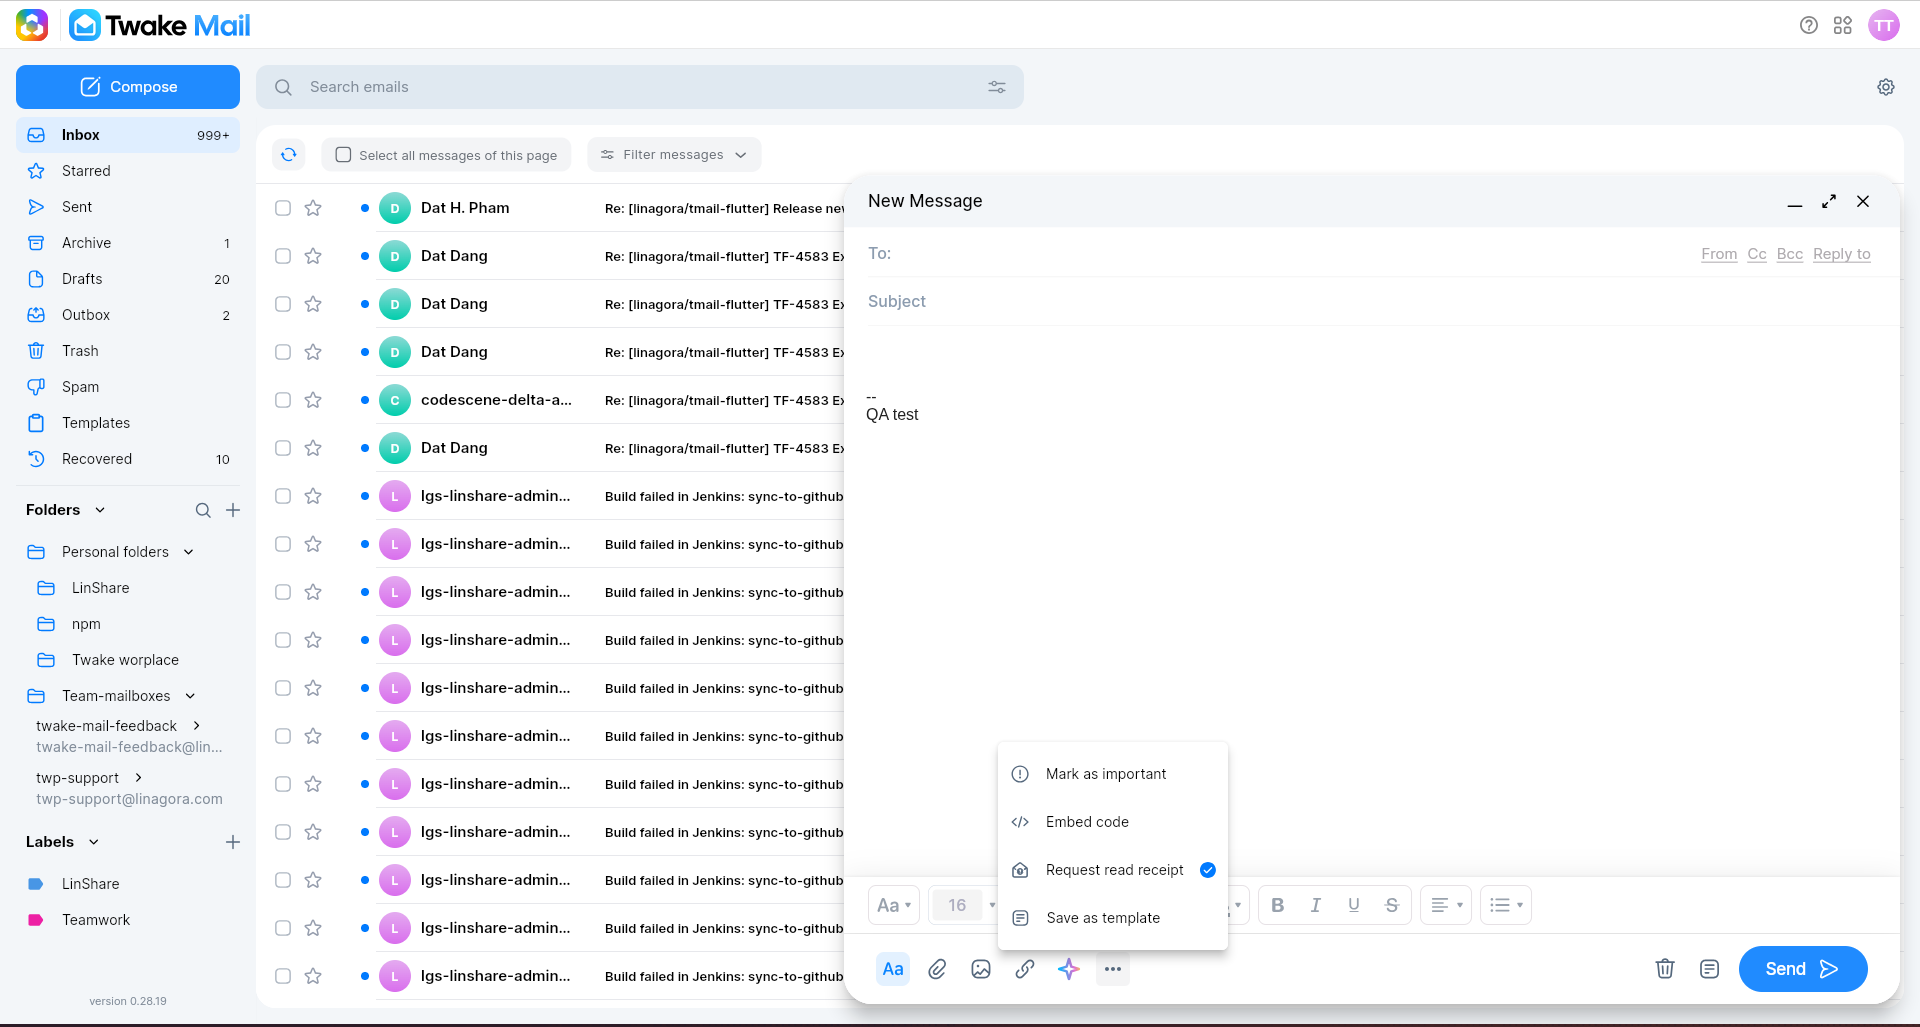
When enabled, every new email you send will automatically include a read receipt request:
Note
Recipients may choose not to send a read receipt, depending on their email client settings.
Sender-Set Important Flag
- Go to Preferences.
- Enable Display sender-set important flag.
When enabled, emails marked as important by the sender will display an importance indicator in your mailbox.
Note
This flag is controlled by the sender and may not always reflect the actual importance of a message.
Thread View
Thread view groups related emails into a conversation, making it easier to follow discussions.
When enabled, emails with the same conversation topic are grouped together instead of appearing as separate messages.
Turn off Enable thread to display each email individually in your mailbox.
Spam Reports
Spam reports help remind you to review and moderate emails in your Spam folder.
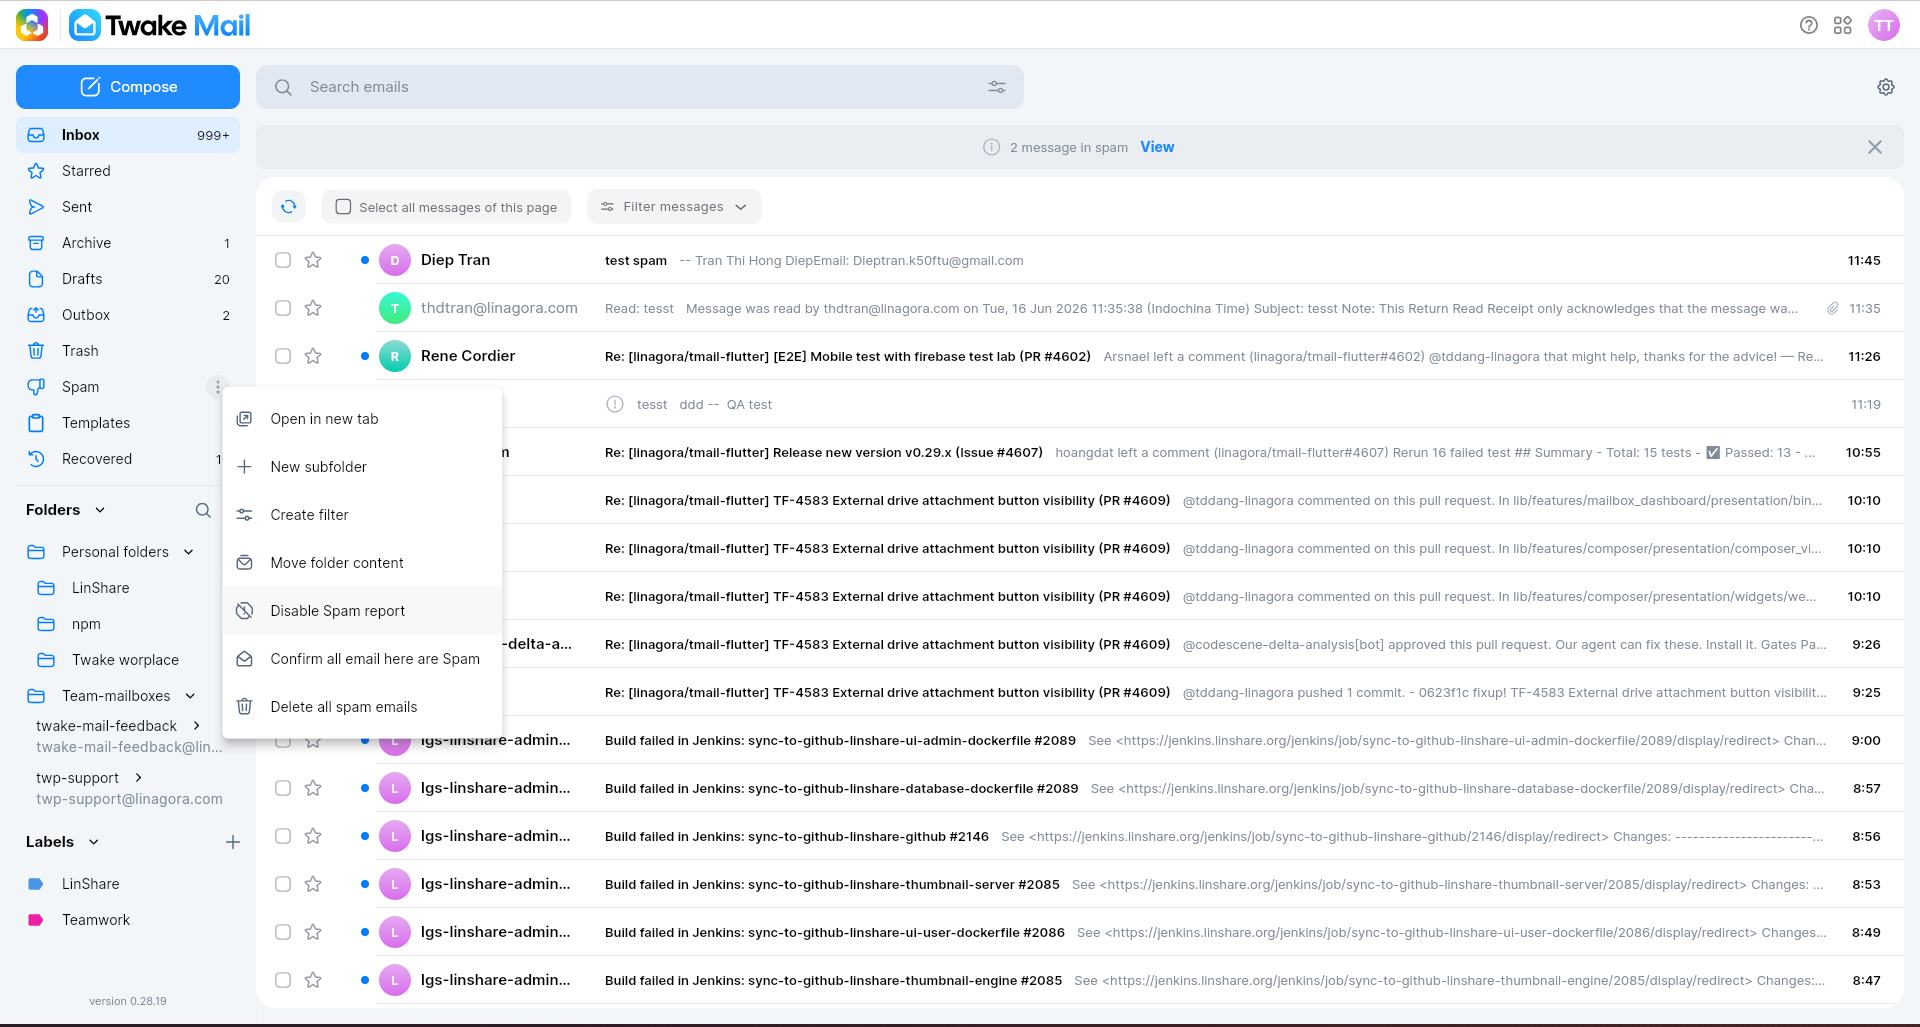
- If you enable Spam report, when you log-in to Twake Mail, you can see a banner at the top of screen that shows report of new Spam messages.
- If you disable Spam report, you will not see the spam banner
There are 2 ways to enable/disable Spam Reports:
- Go to Preferences and switch toggle Enable spam report.
- Open action menu of Spam folder, you can see option: Enable/Disable spam report
AI Scribe
AI Scribe is an AI-powered writing assistant that helps you compose, improve, and refine your emails directly within the message composer.
Enable AI Scribe
- Go to Preferences.
- Switch toggle Enable AI Scribe.
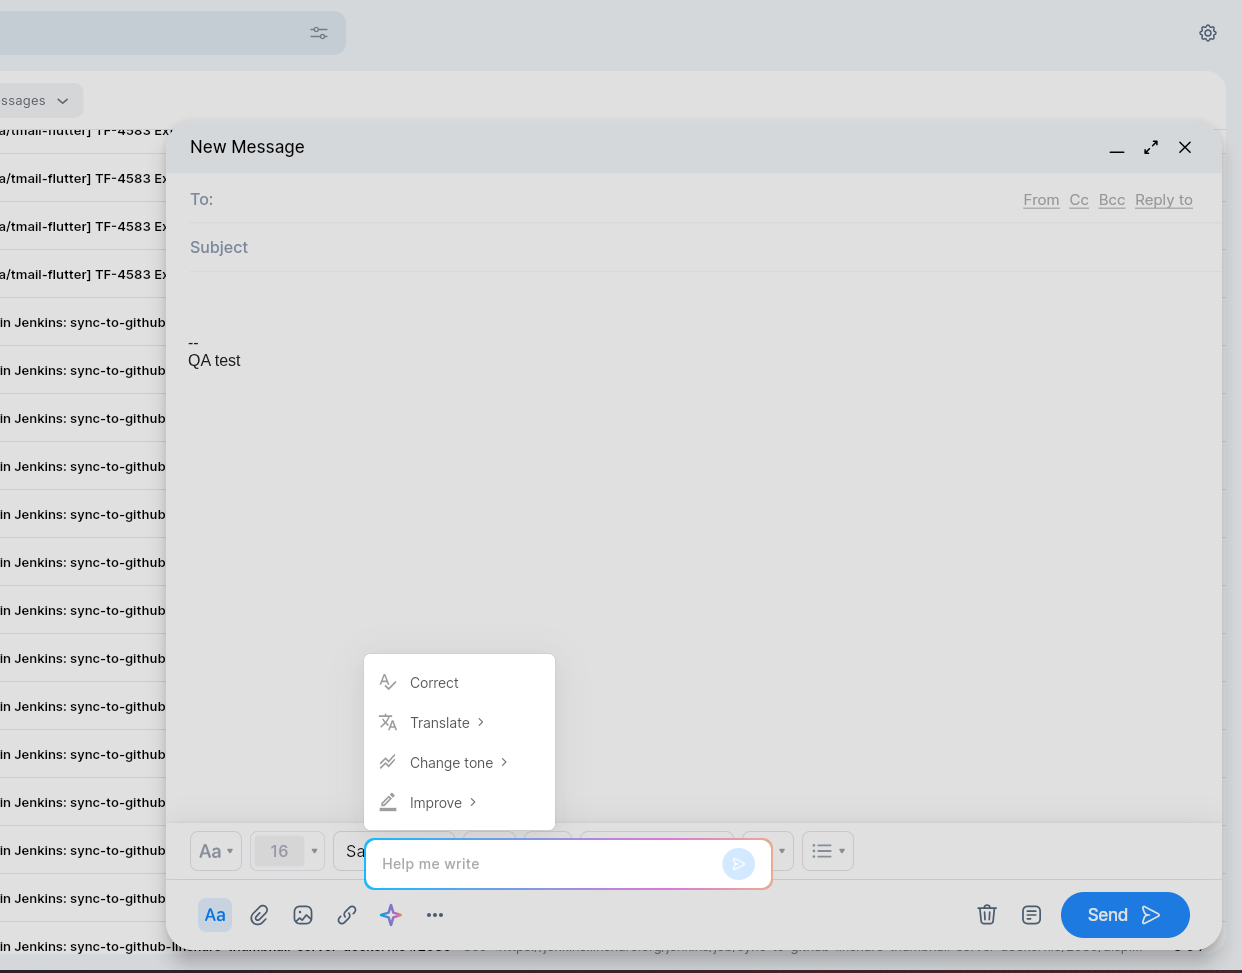
When enabled, AI-powered writing assistance becomes available while composing emails:
- Start composing a new email or open an existing draft.
- Click the AI Scribe icon (✨) in the composer toolbar.
- The AI Scribe panel will appear.
You can enter a prompt describing what you would like AI to help you write or modify.
AI Needs-Action
AI Needs-Action helps identify emails that may require your attention.
Enable AI Needs-Action
- Go to Preferences.
- Switch toggle Enable AI needs-action.
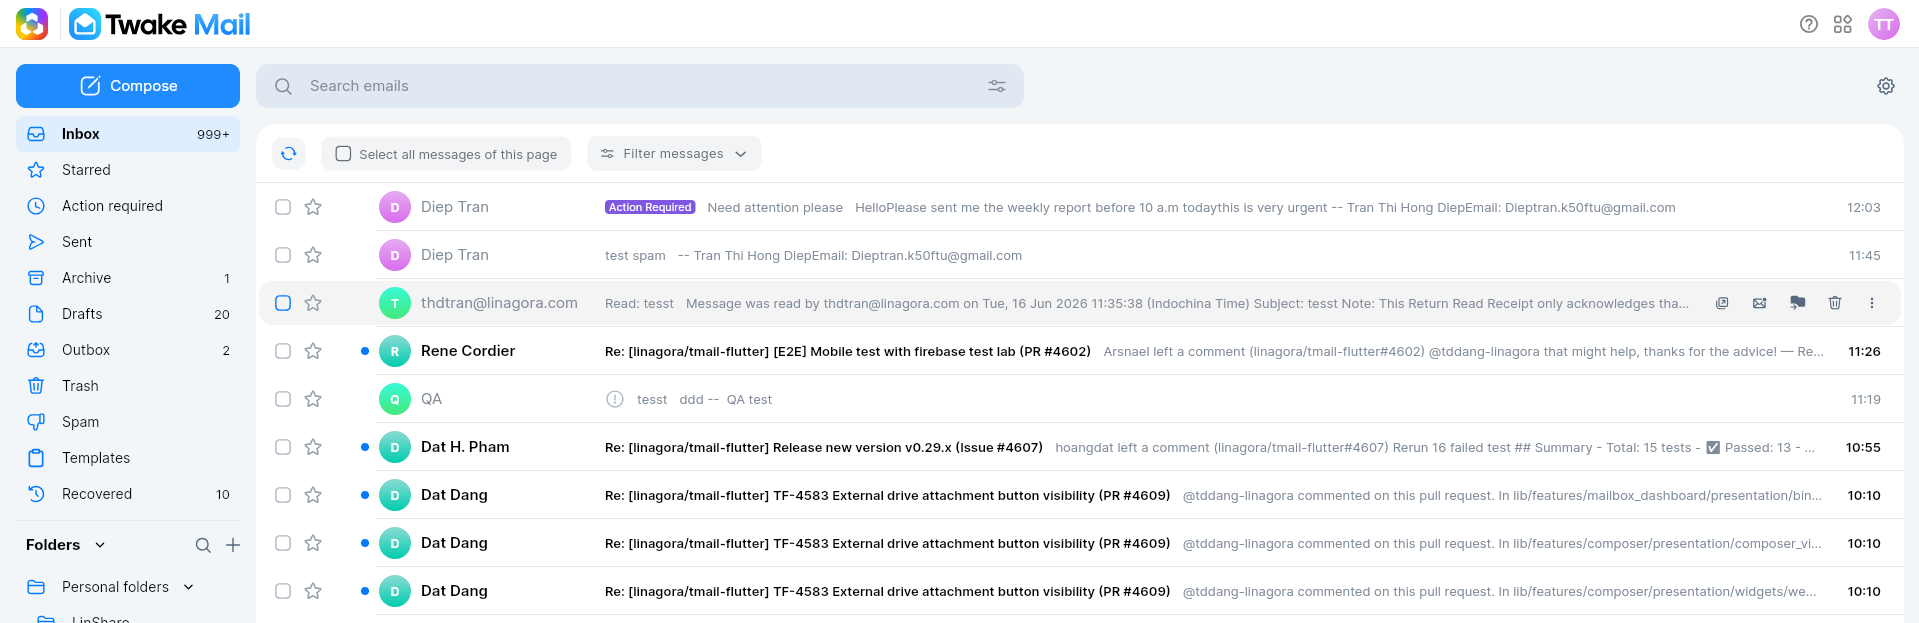
When enabled, AI analyzes incoming emails and highlights messages that may require follow-up or action with a label "Action Required"
Note
If this setting is disabled, AI will not process your emails for needs-action detection.
Label categorisation
Label categorisation helps you organise your inbox automatically. When enabled, Twake Mail analyses incoming emails and applies your labels based on the descriptions you provide.
Add a description to a label
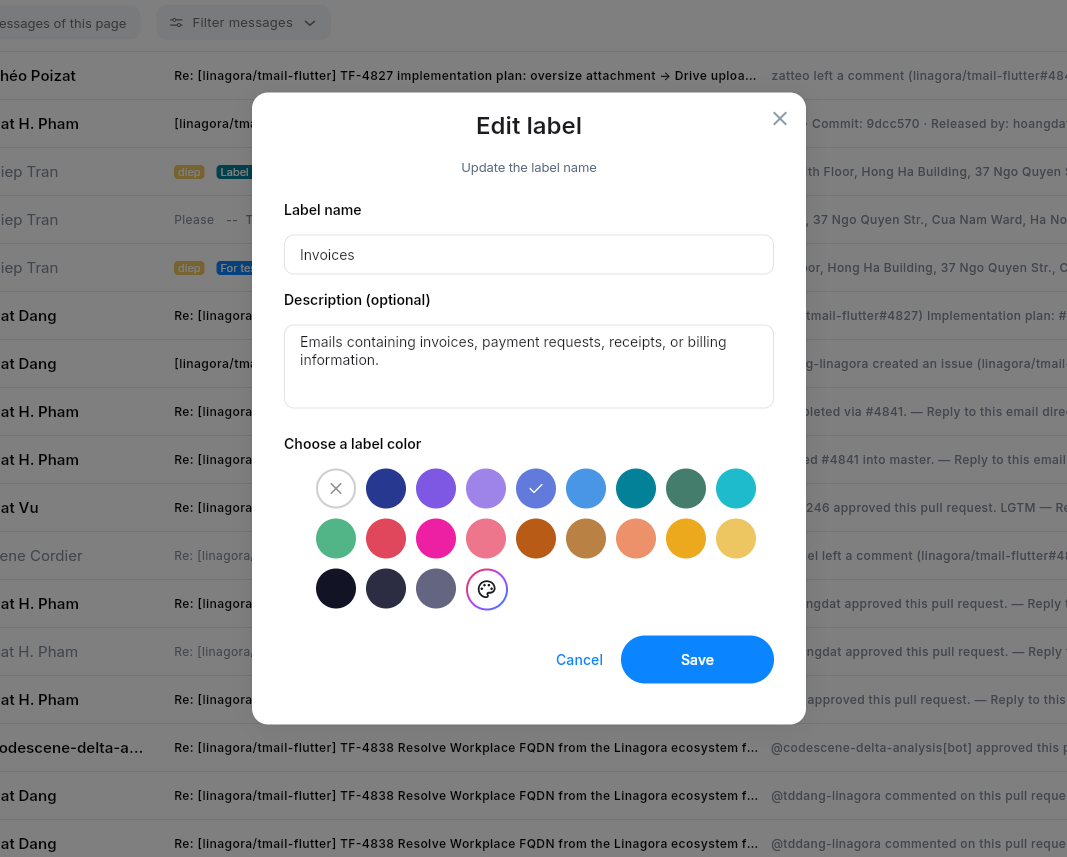
Create labels for the types of emails you want to categorise. In the Description field, explain what types of emails should receive this label.
For example:
- Label name: Invoices
- Description: Emails containing invoices, payment requests, receipts, or billing information.
Enable automatic label categorisation
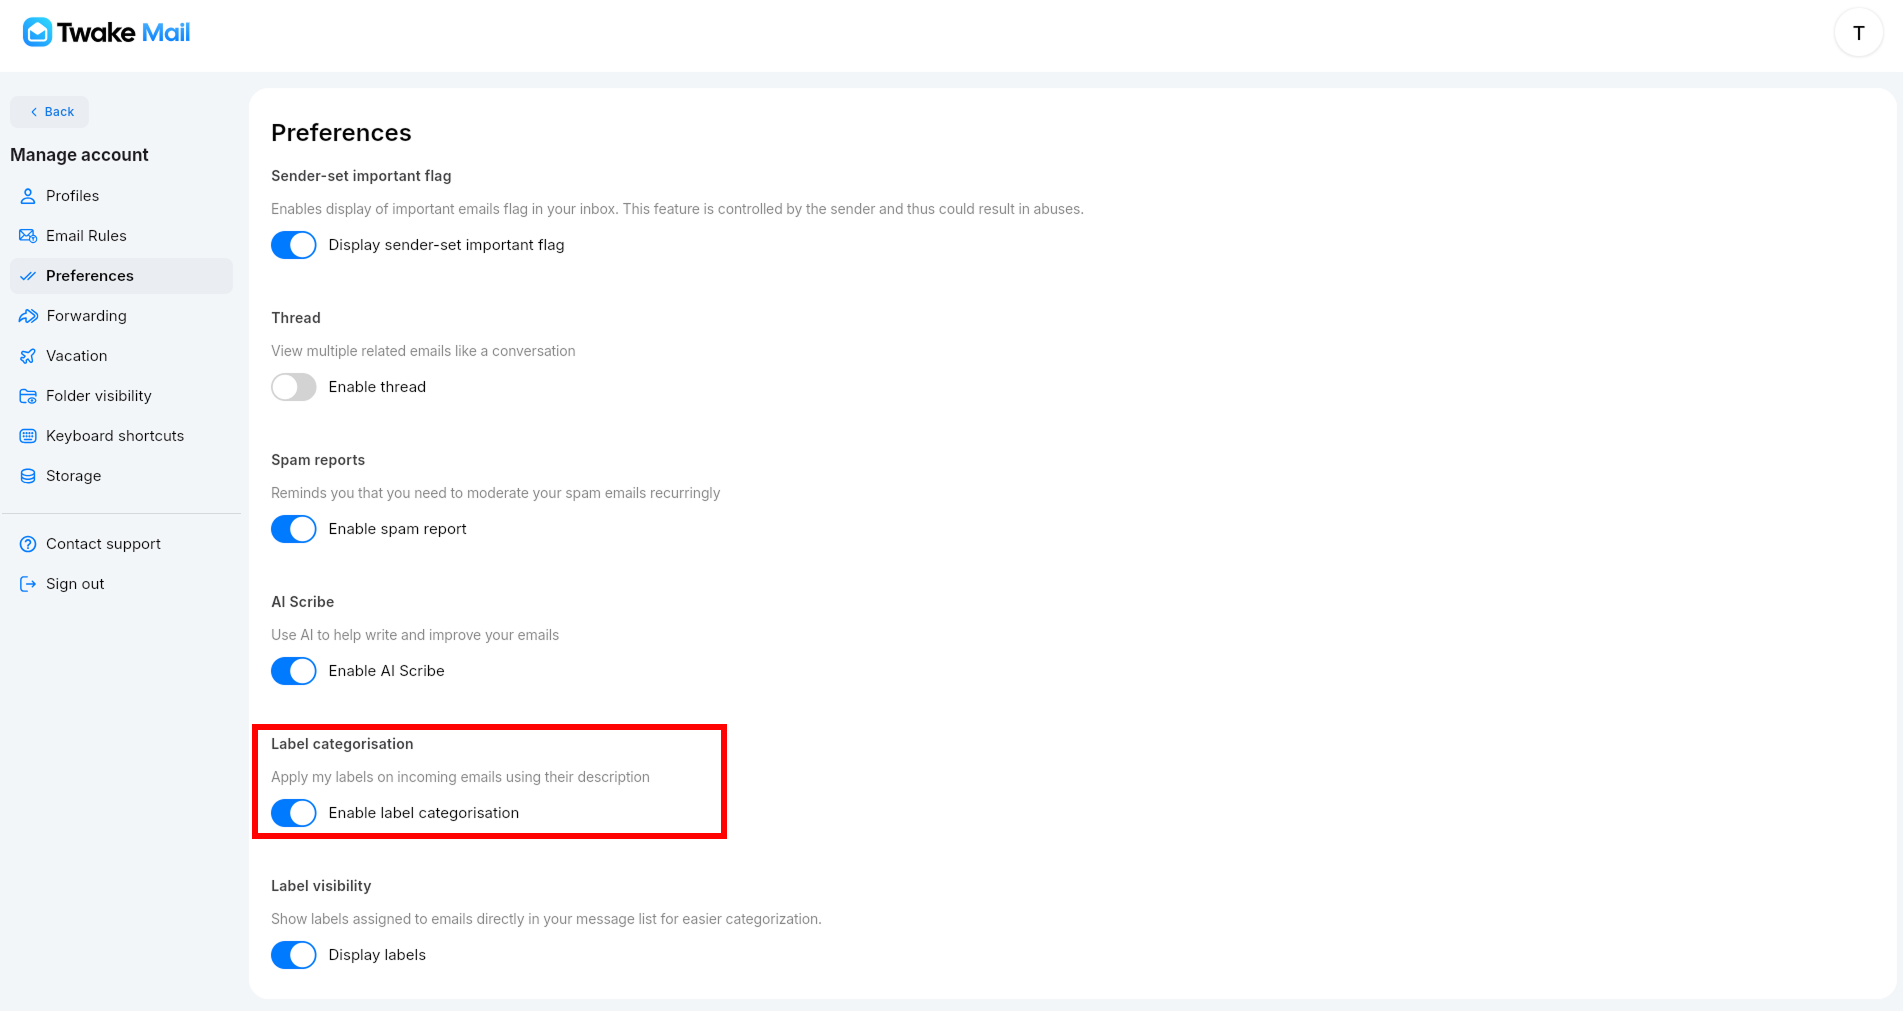
- Click your profile picture in the upper-right corner.
- Open Manage account.
- Select Preferences.
- Find and turn on Enable label categorisation.
Twake Mail will use your label descriptions to automatically apply suitable labels to incoming emails.
Label Visibility
Label visibility controls whether labels are displayed directly in your message list.
Display Labels
- Go to Preferences.
- Enable Display labels.
When enabled, labels assigned to emails are displayed in the message list, making it easier to identify and categorize emails at a glance: