
Use Application Accounts to Sync Mail, Contacts and Calendars
Overview
An Application Account lets you connect your Twake account to third-party applications and keep your emails, contacts and calendars in sync, for example:
- Mozilla Thunderbird
- Microsoft Outlook
- Apple Mail, Contacts and Calendar (iPhone, iPad, Mac)
- Android mail, contacts and calendar apps
Whatever you want to sync, the principle is the same: first create an Application Account in Twake settings, then use its credentials to sign in from your application. Never use your regular Twake password in a third-party application.
Each application gets its own dedicated password. If a device is lost or no longer trusted, you revoke that one application without changing your main password. For example, you could create separate Application Accounts for:
- Outlook on your work laptop
- Thunderbird on your desktop computer
- Your iPhone (mail, contacts and calendar)
Server settings at a glance
What you sync | Protocol | Server | Port | Security |
|---|---|---|---|---|
Incoming email | IMAP | imap.twake.app | 993 | SSL/TLS |
Outgoing email | SMTP | imap.twake.app | 465 | SSL/TLS |
Contacts | CardDAV | https://dav.twake.app | 443 | SSL/TLS |
Calendars | CalDAV | https://dav.twake.app | 443 | SSL/TLS |
For all services, the username is your full Twake email address and the password is the Application Password.
Step 1: Manage your application acount
Create an Application Account
This step is required before setting up any application, whether for email, contacts or calendars.
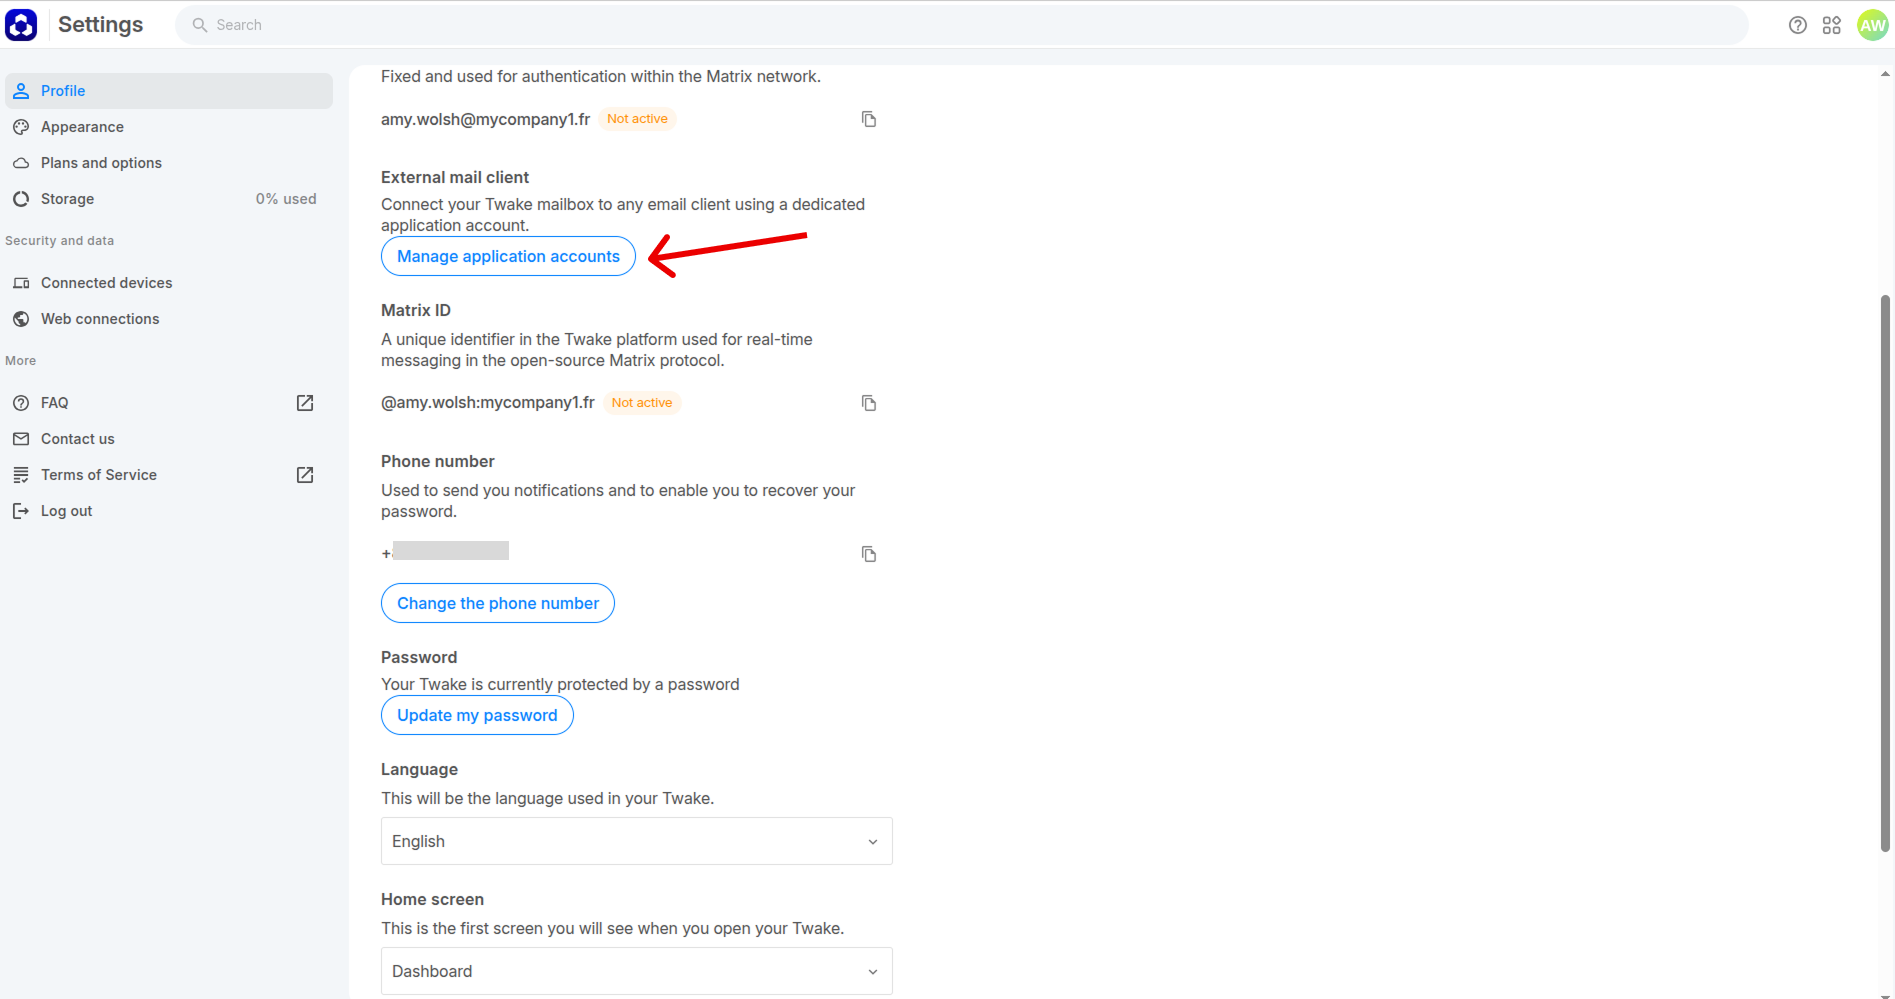
- Open Settings.
- Scroll to External mail client.
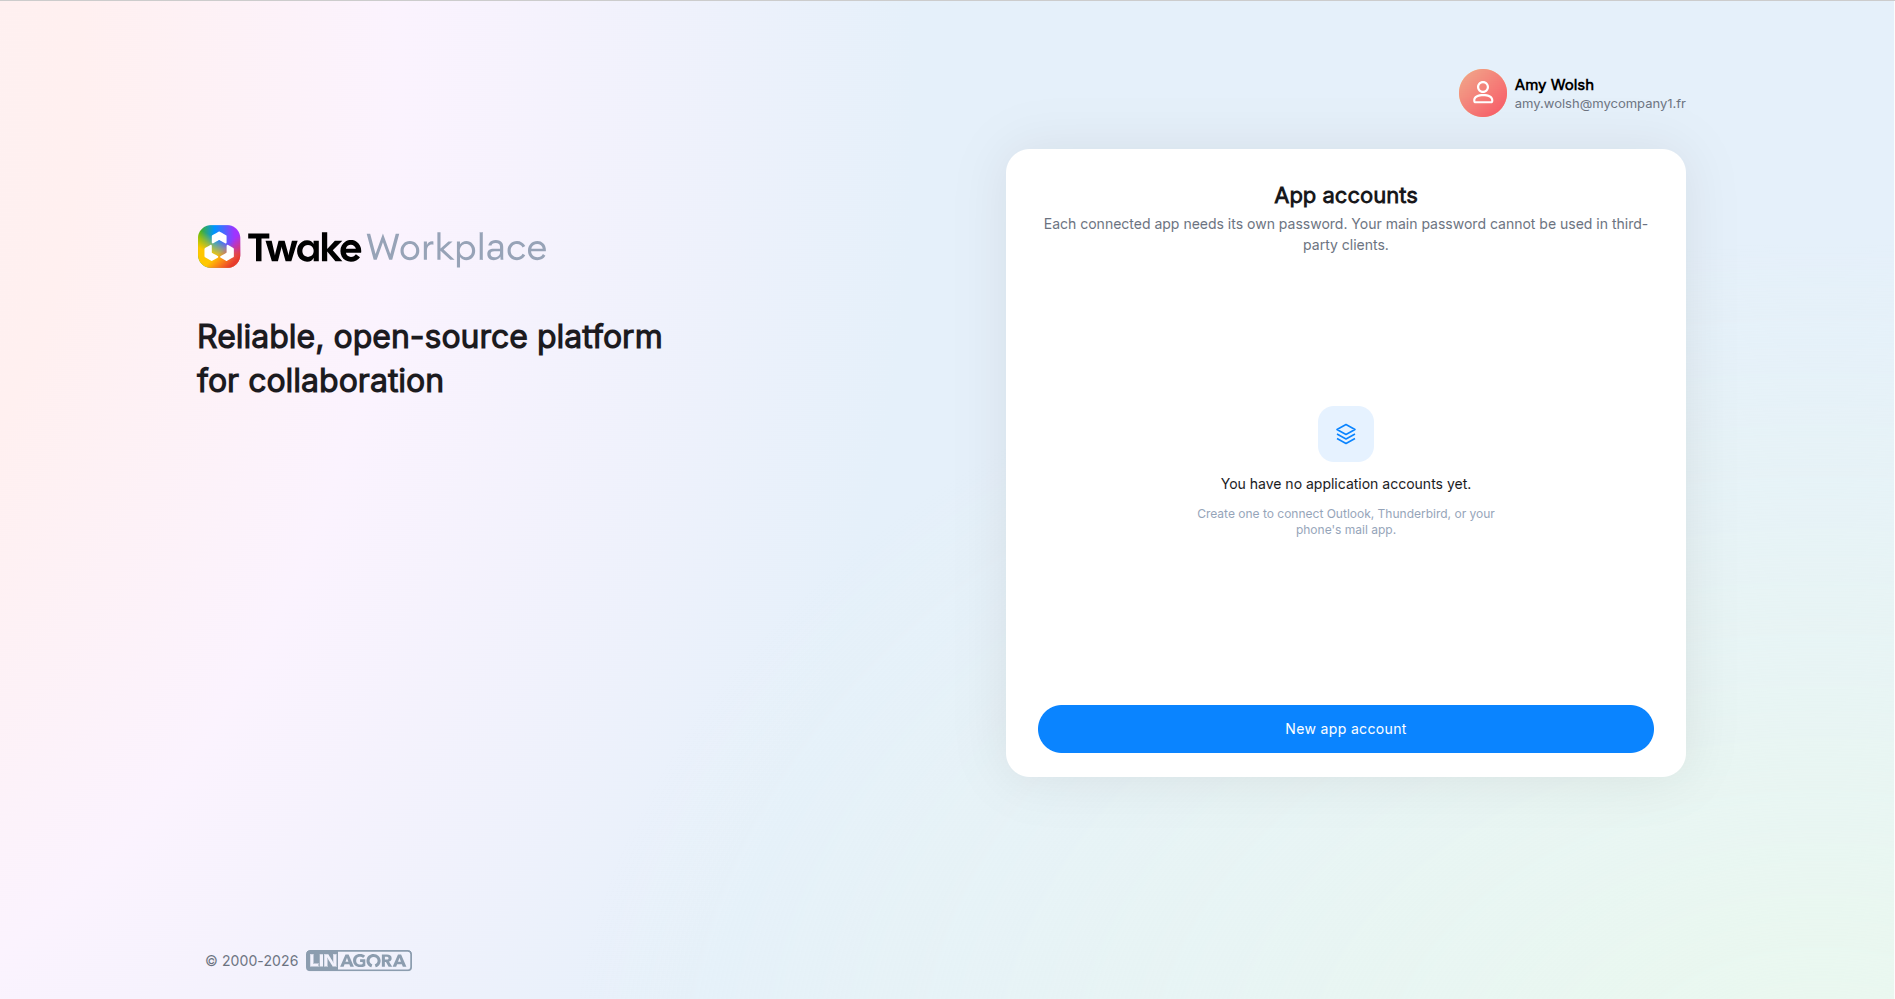
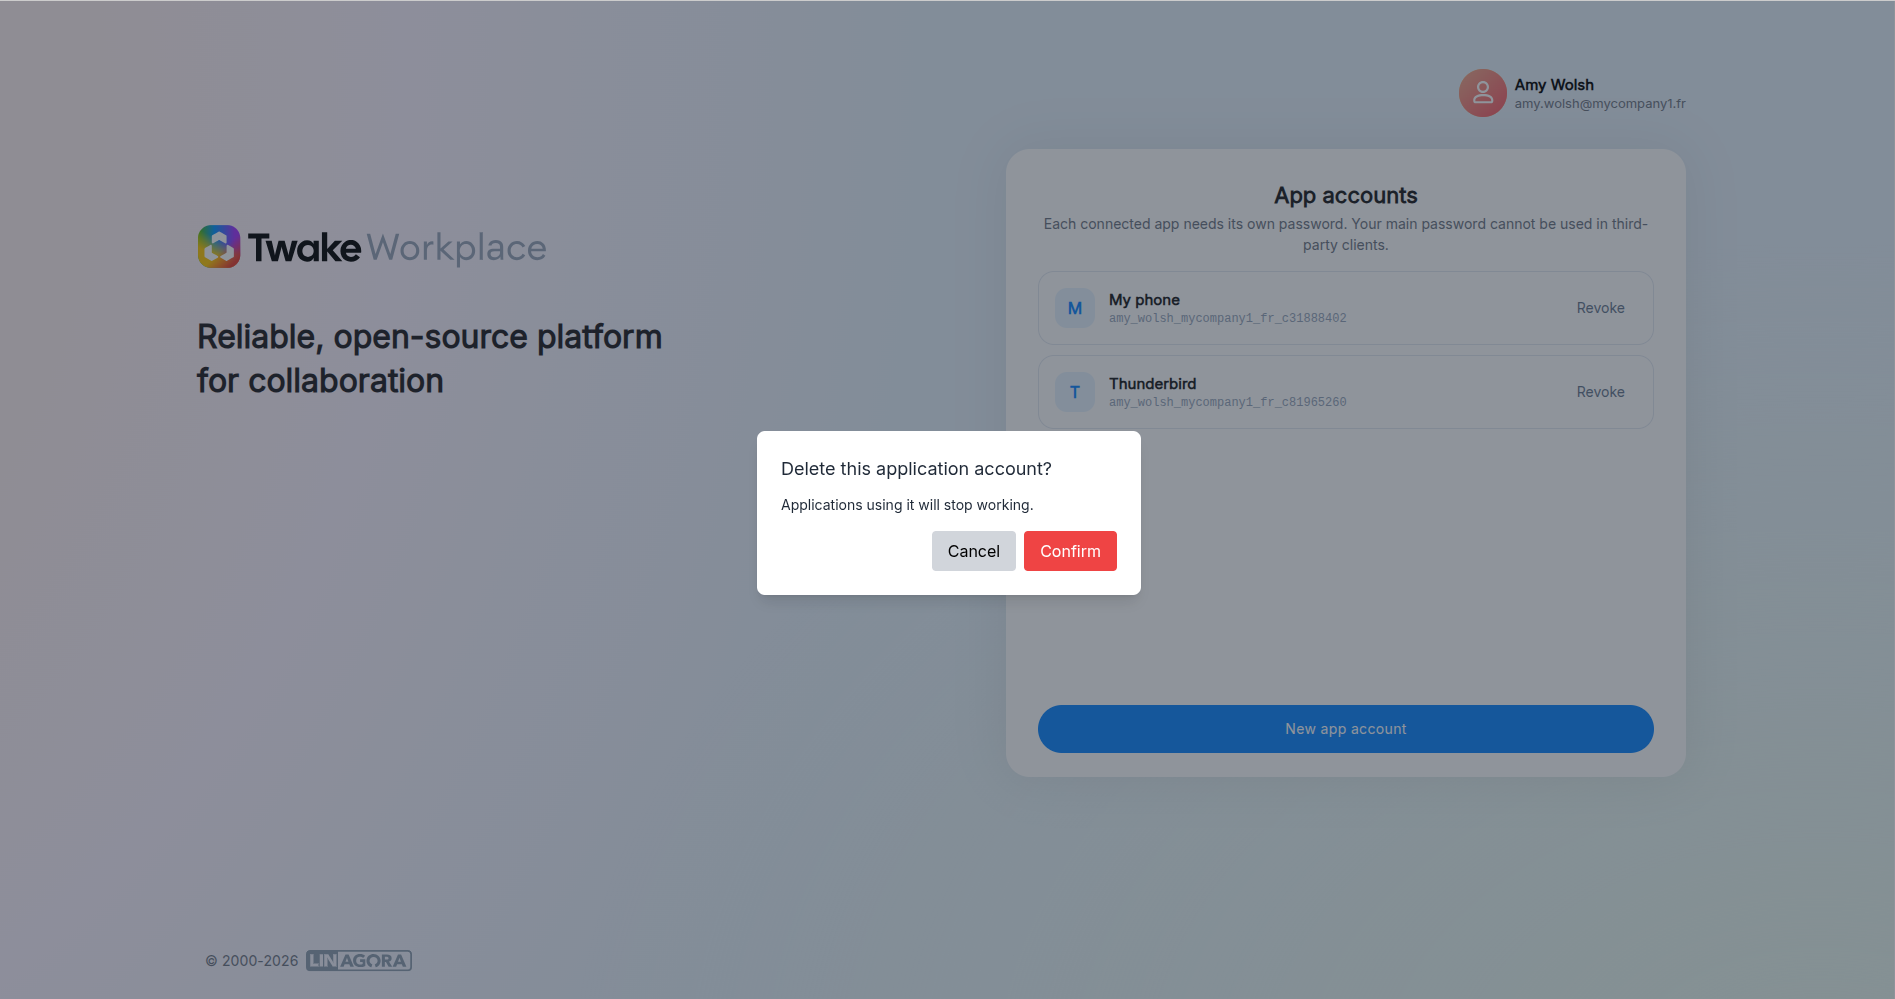
- Click Manage application accounts. The App accounts page opens. If no Application Accounts exist yet, the list is empty.
- Click New app account.
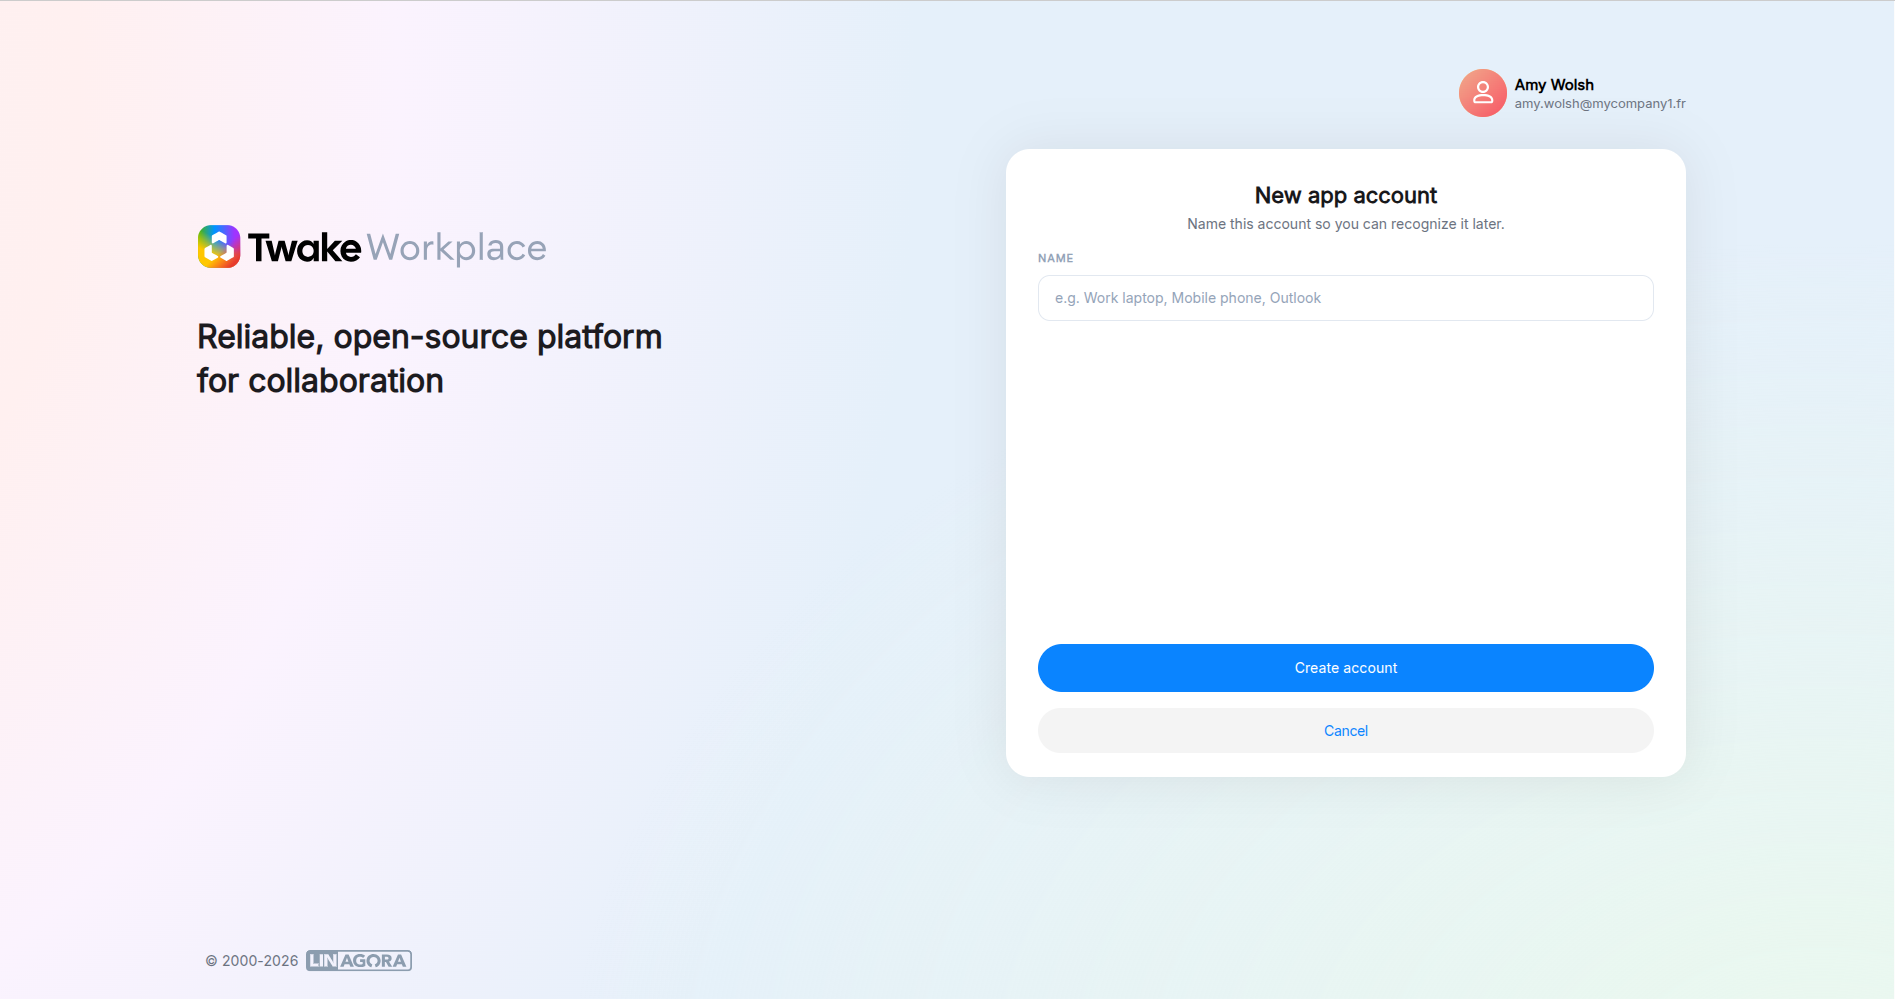
- Enter a name that helps you recognize the application later, for example: Outlook, Thunderbird, iPhone, Work laptop.
- Click Create account.
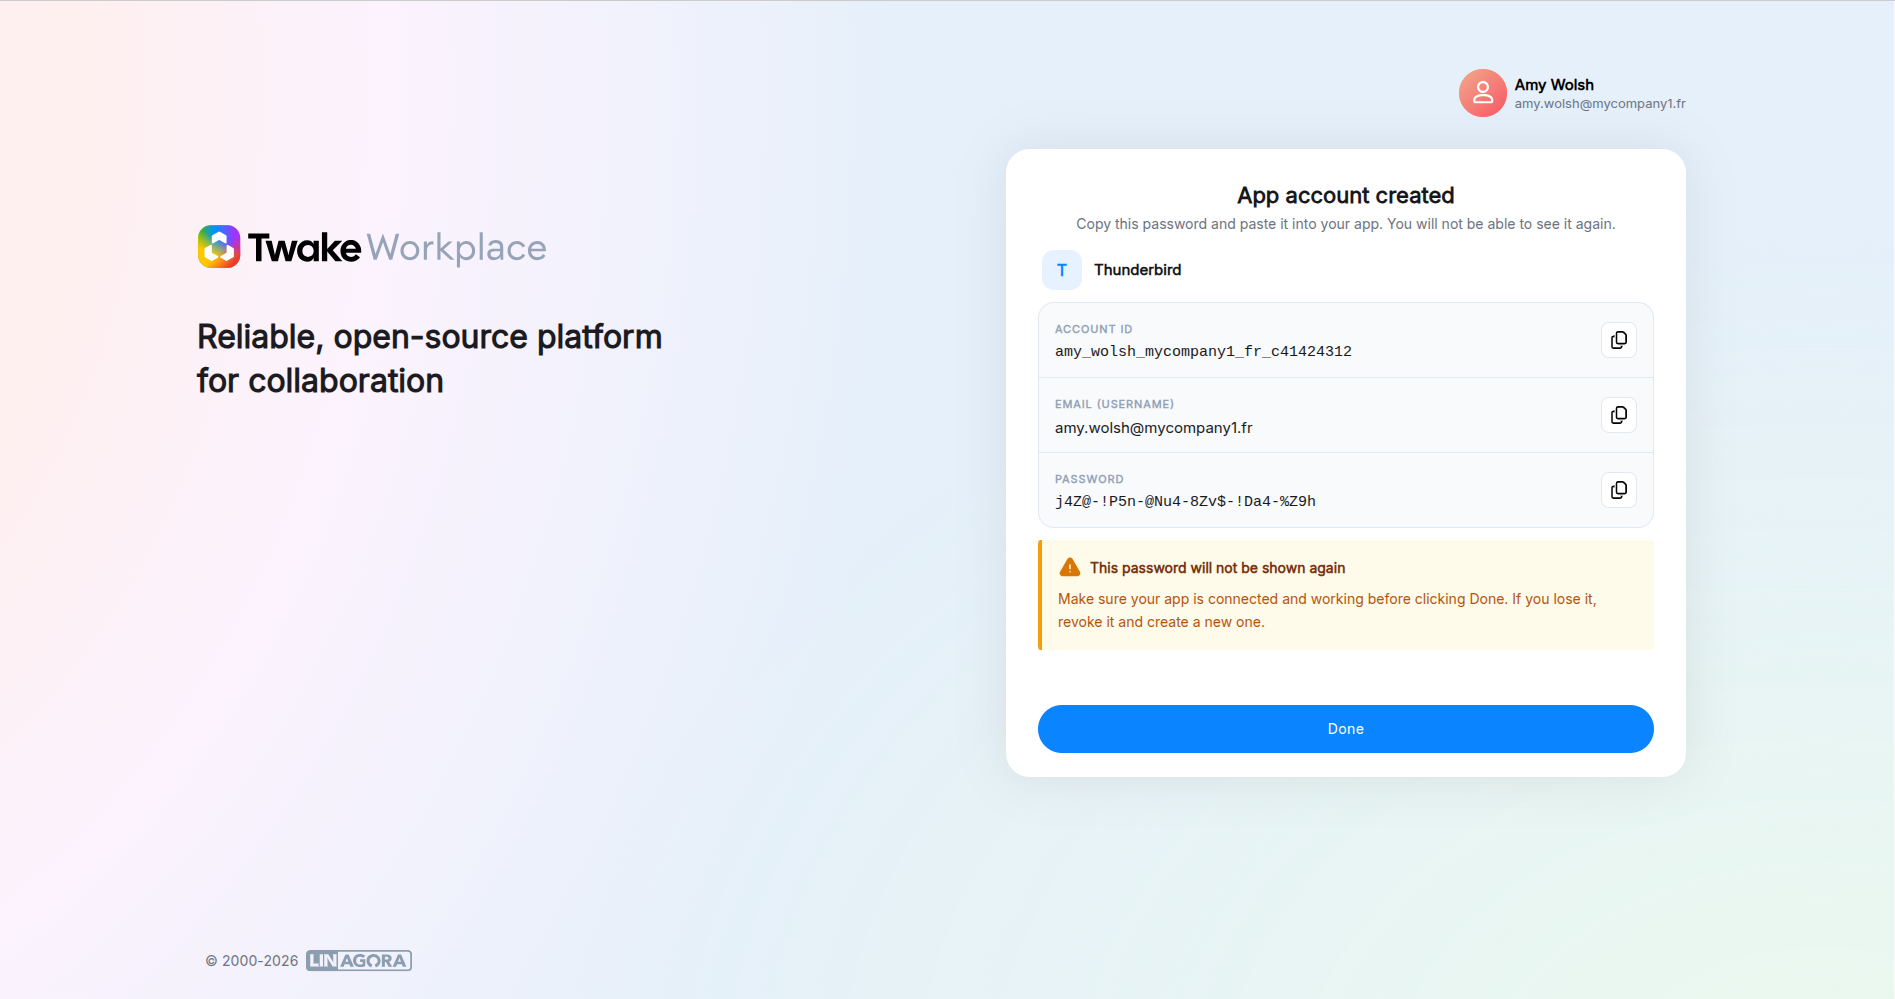
Twake generates:
- An Account ID
- A Username (your email address)
- An Application Password
Use these credentials in every service you configure on that device: email, contacts and calendars.
Tip: On a phone, you can use the same Application Account for mail, contacts and calendar. Revoking it then disconnects all three at once.
Revoke an Application Account
If you no longer use an application or believe its credentials have been compromised, revoke the Application Account.
- Open Manage application accounts.
- Locate the account you want to remove.
- Click Revoke.
- Click Confirm.
After revoking, the Application Password becomes invalid immediately. The application can no longer access your mailbox, contacts or calendars.
Step 2a: Sync your email
Configure Twake Mail in Mozilla Thunderbird
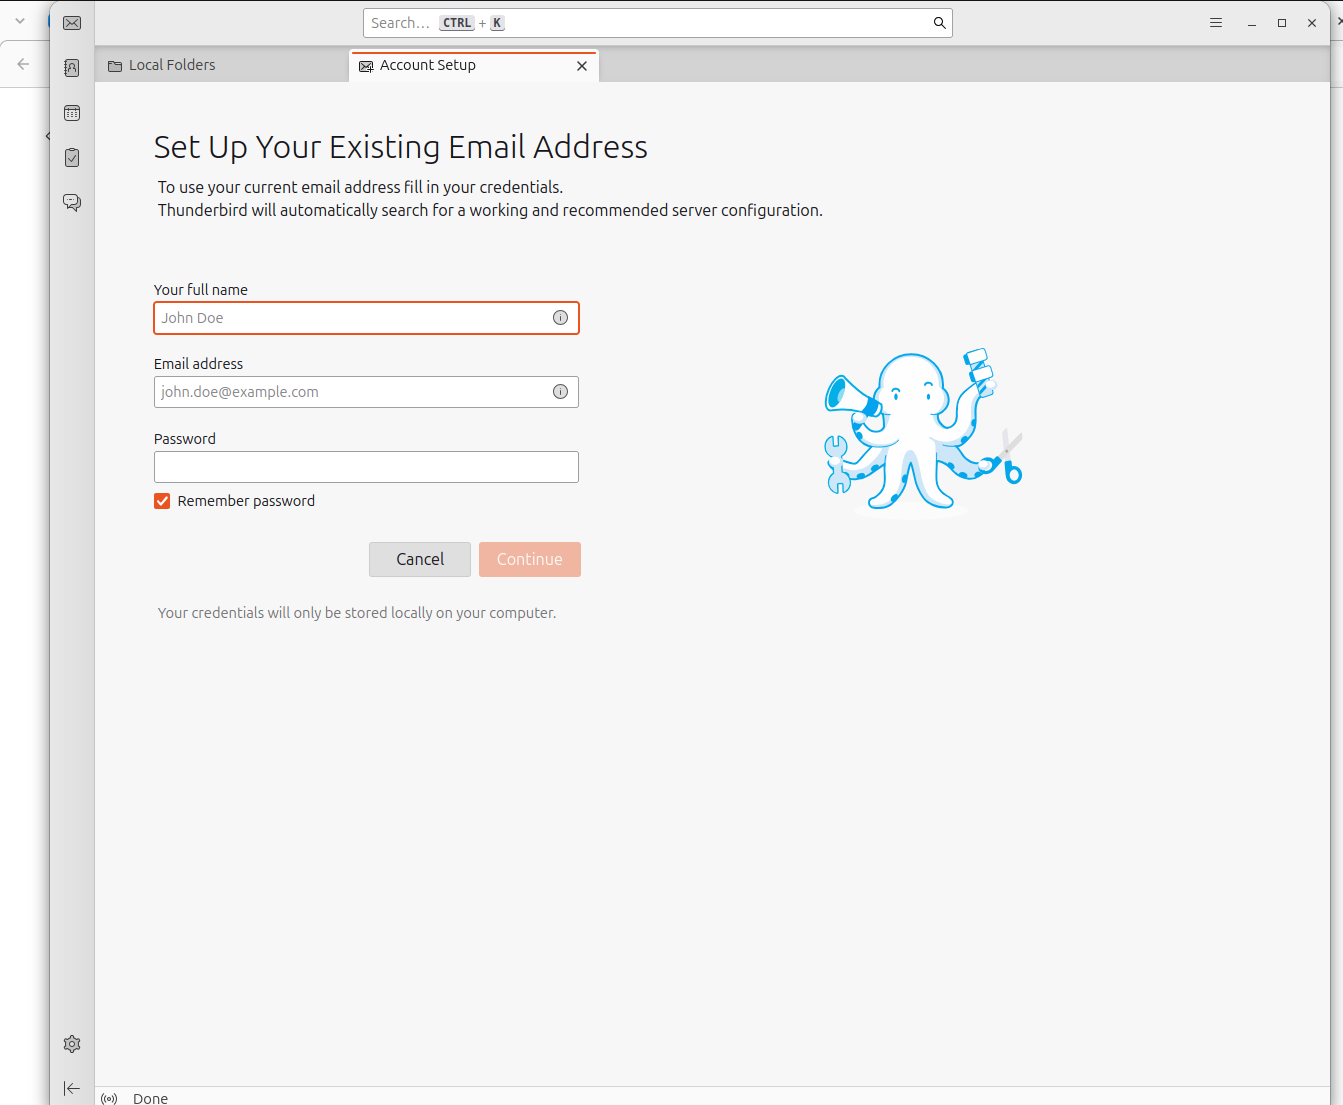
Add your account
- Open Mozilla Thunderbird.
- Select Email to add a new account.
- Enter:
- Your full name
- Your Twake email address
- The Application Password generated in Twake. Do not use your regular Twake Mail password.
- Click Continue.
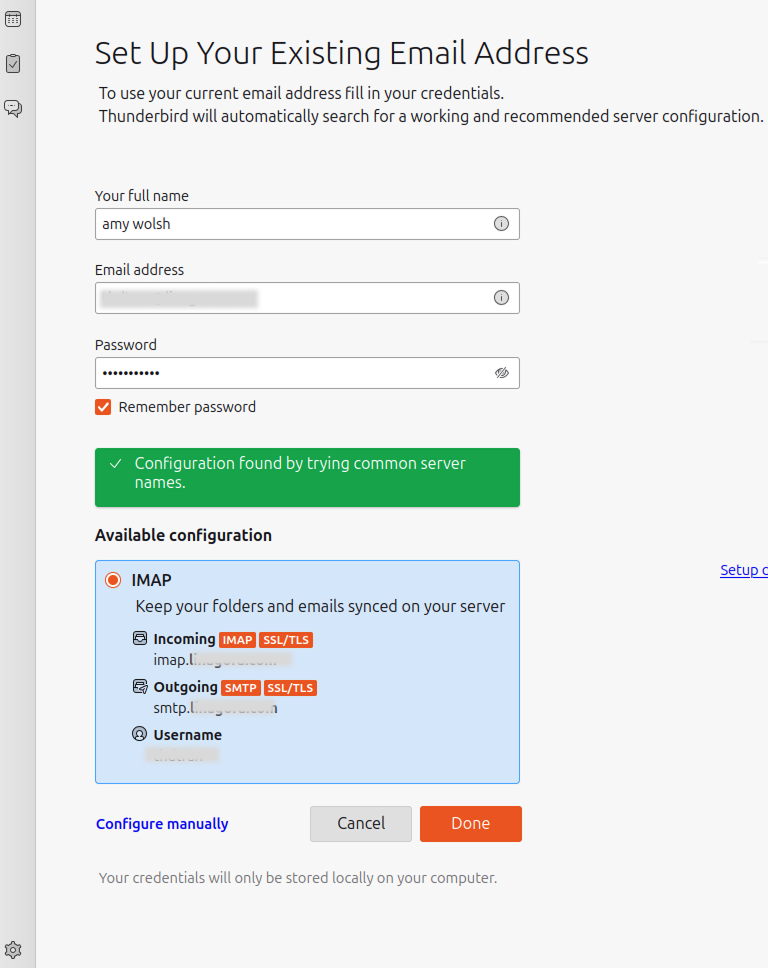
The setting should be detected automatically. If everything looks fine, click Done and you can start using Thunderbird to send and receive emails.
If Thunderbird doesn't detect the settings automatically, You need to Configure manually: Input configuration as below:
Incoming server:
- Protocol: IMAP
- Hostname: imap.twake.app
- Port: 993
- Connection security: SSL/TLS
- Authentication method: Normal password
- Username: Your Twake email address
Outgoing server:
- Hostname: imap.twake.app
- Port: 465
- Connection security: SSL/TLS
- Authentication method: Normal password
- Username: Your Twake email address
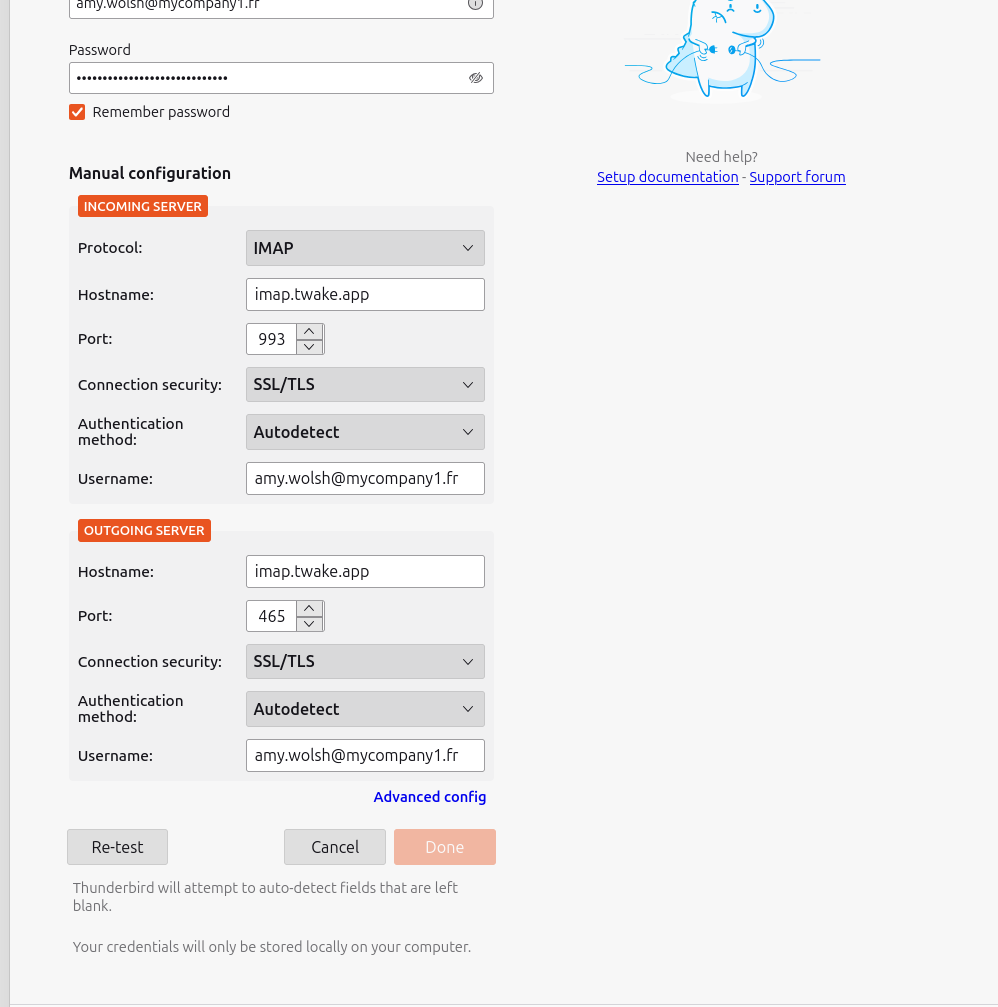
Then click Retest button.
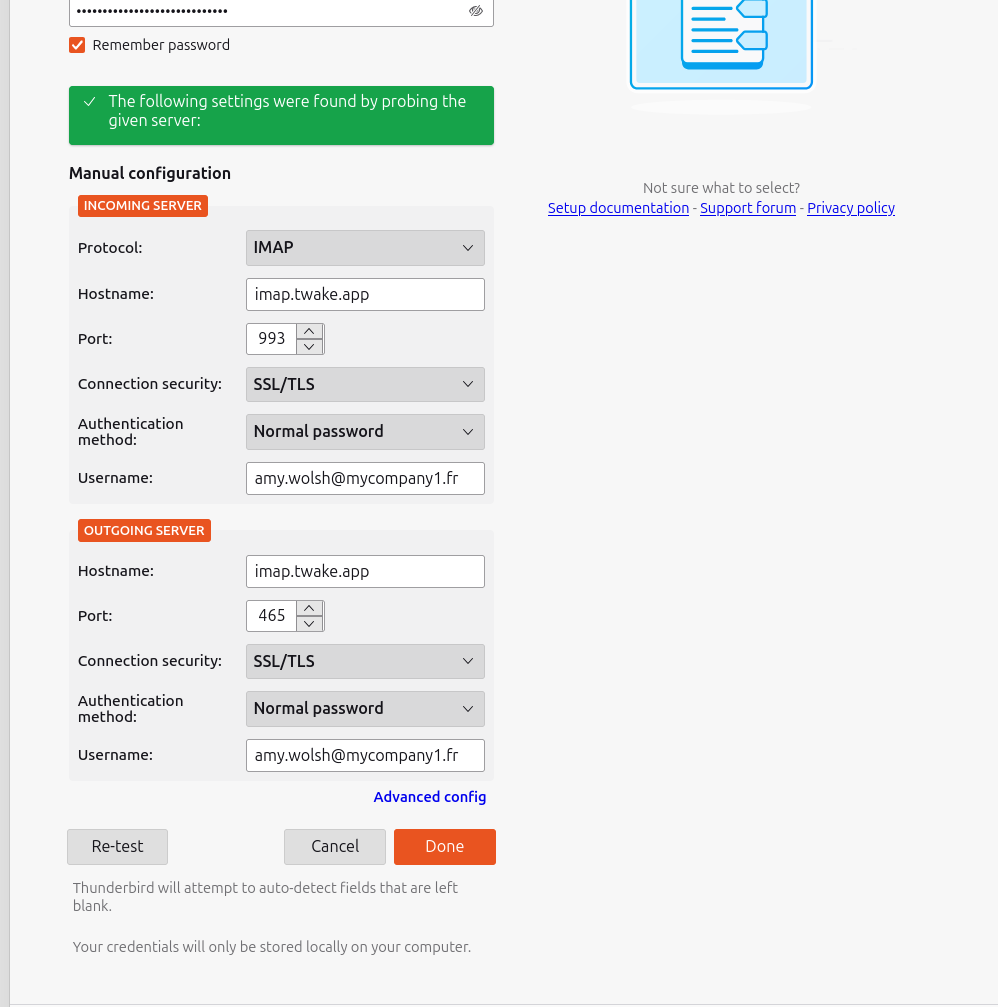
When Thunderbird confirms the configuration, click Done to complete the setup.
Configure Twake Mail in Outlook software
1. Open Outlook and select File
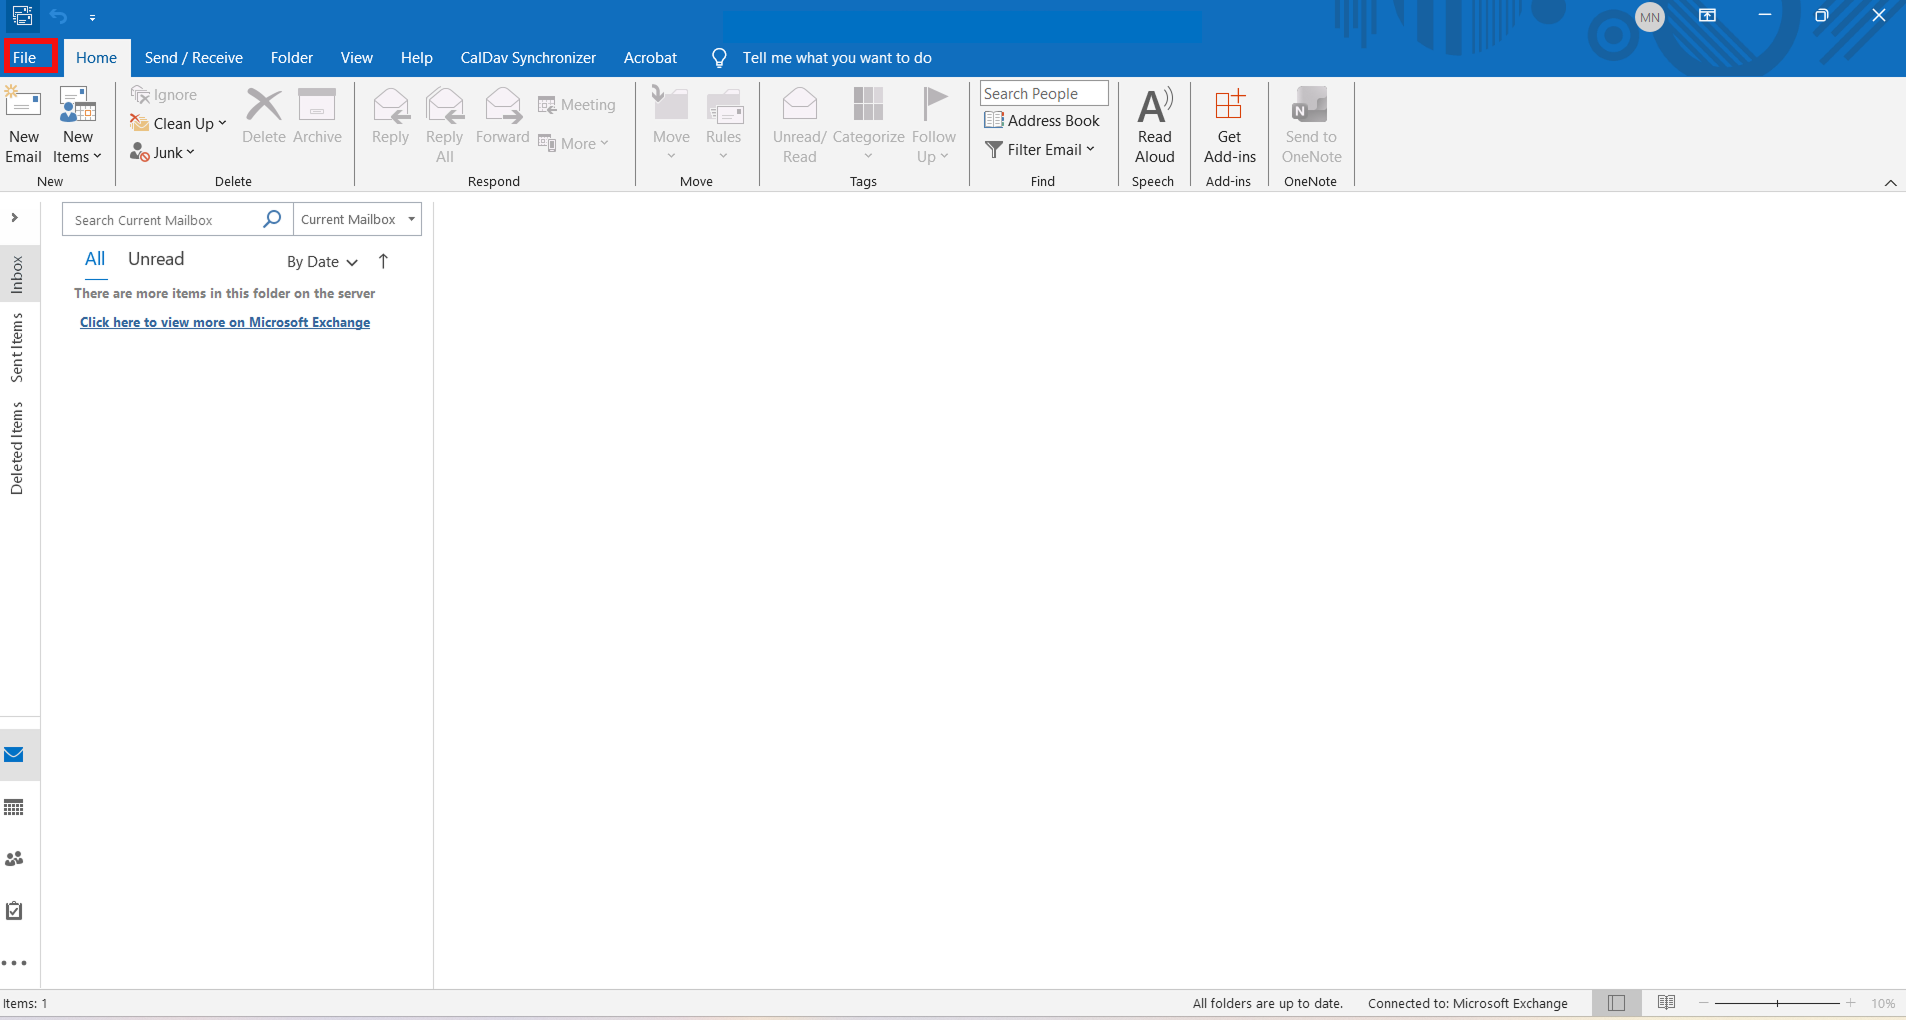
- Click Add Account
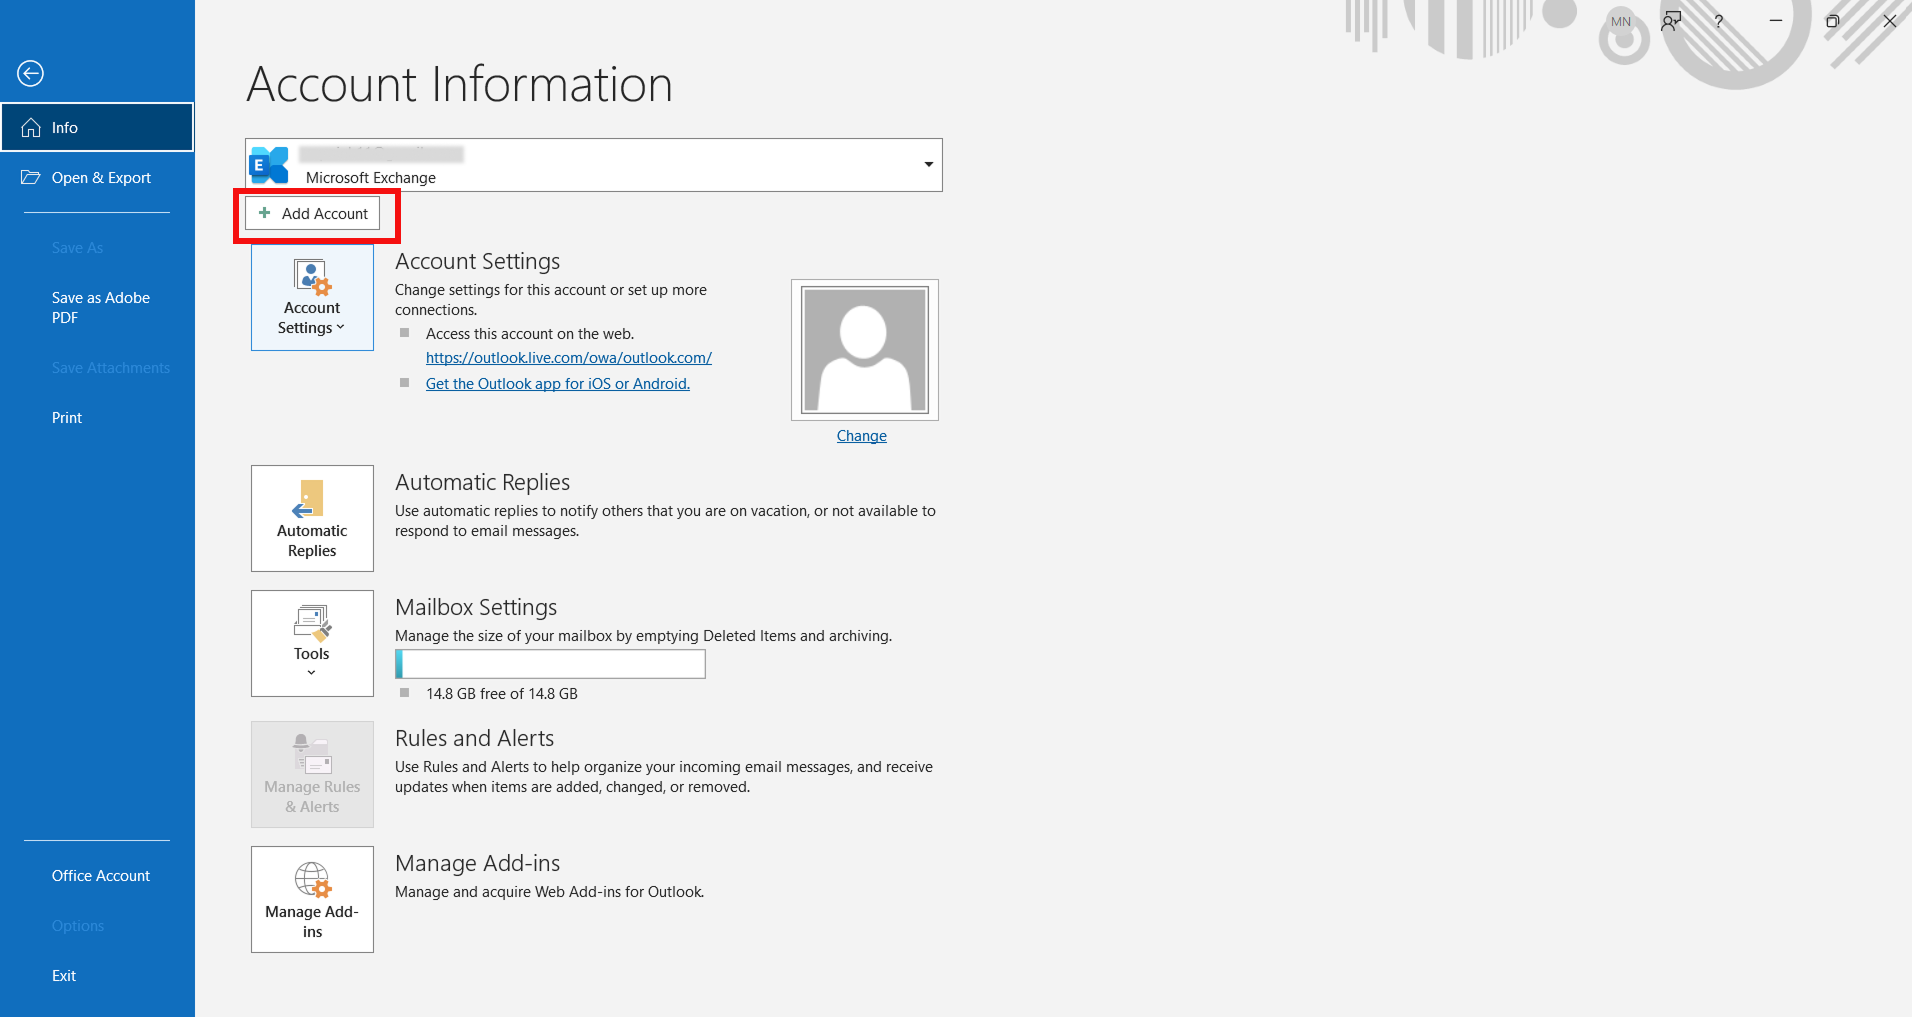
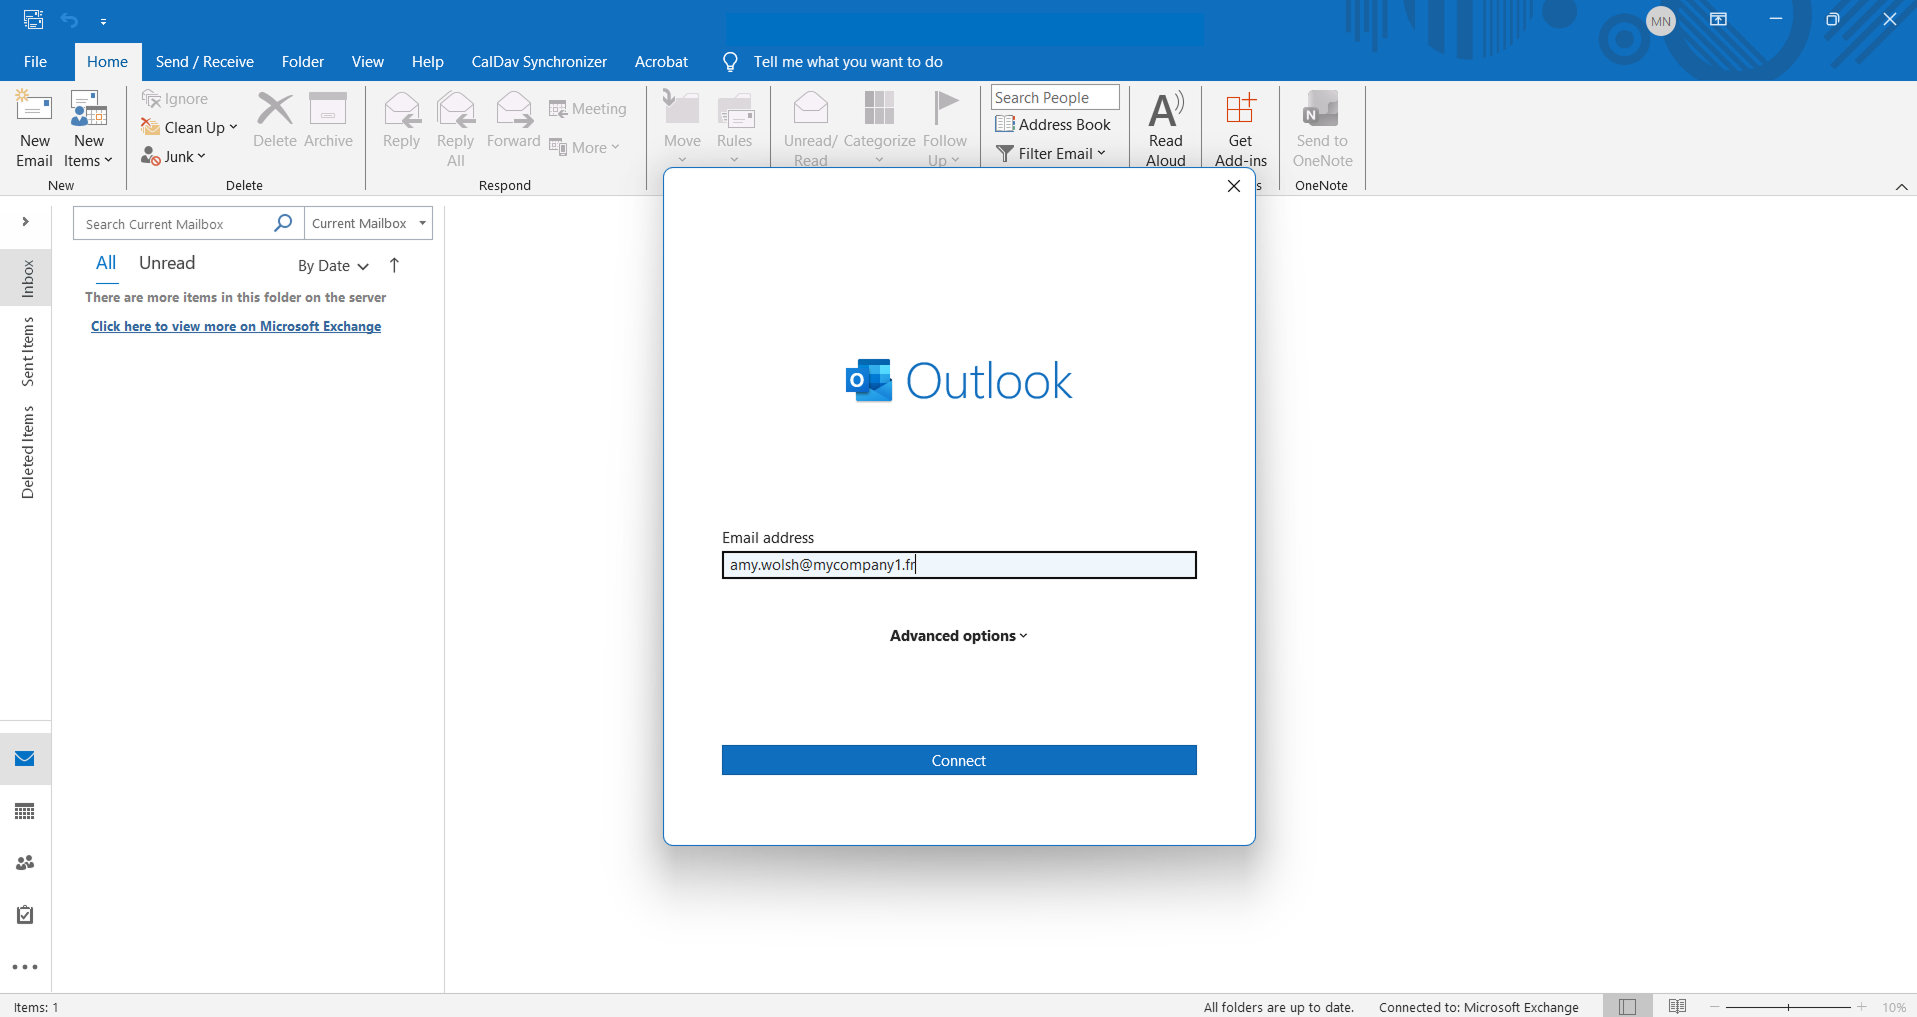
- Enter your email address and then click on "Connect"
- Select "IMAP"
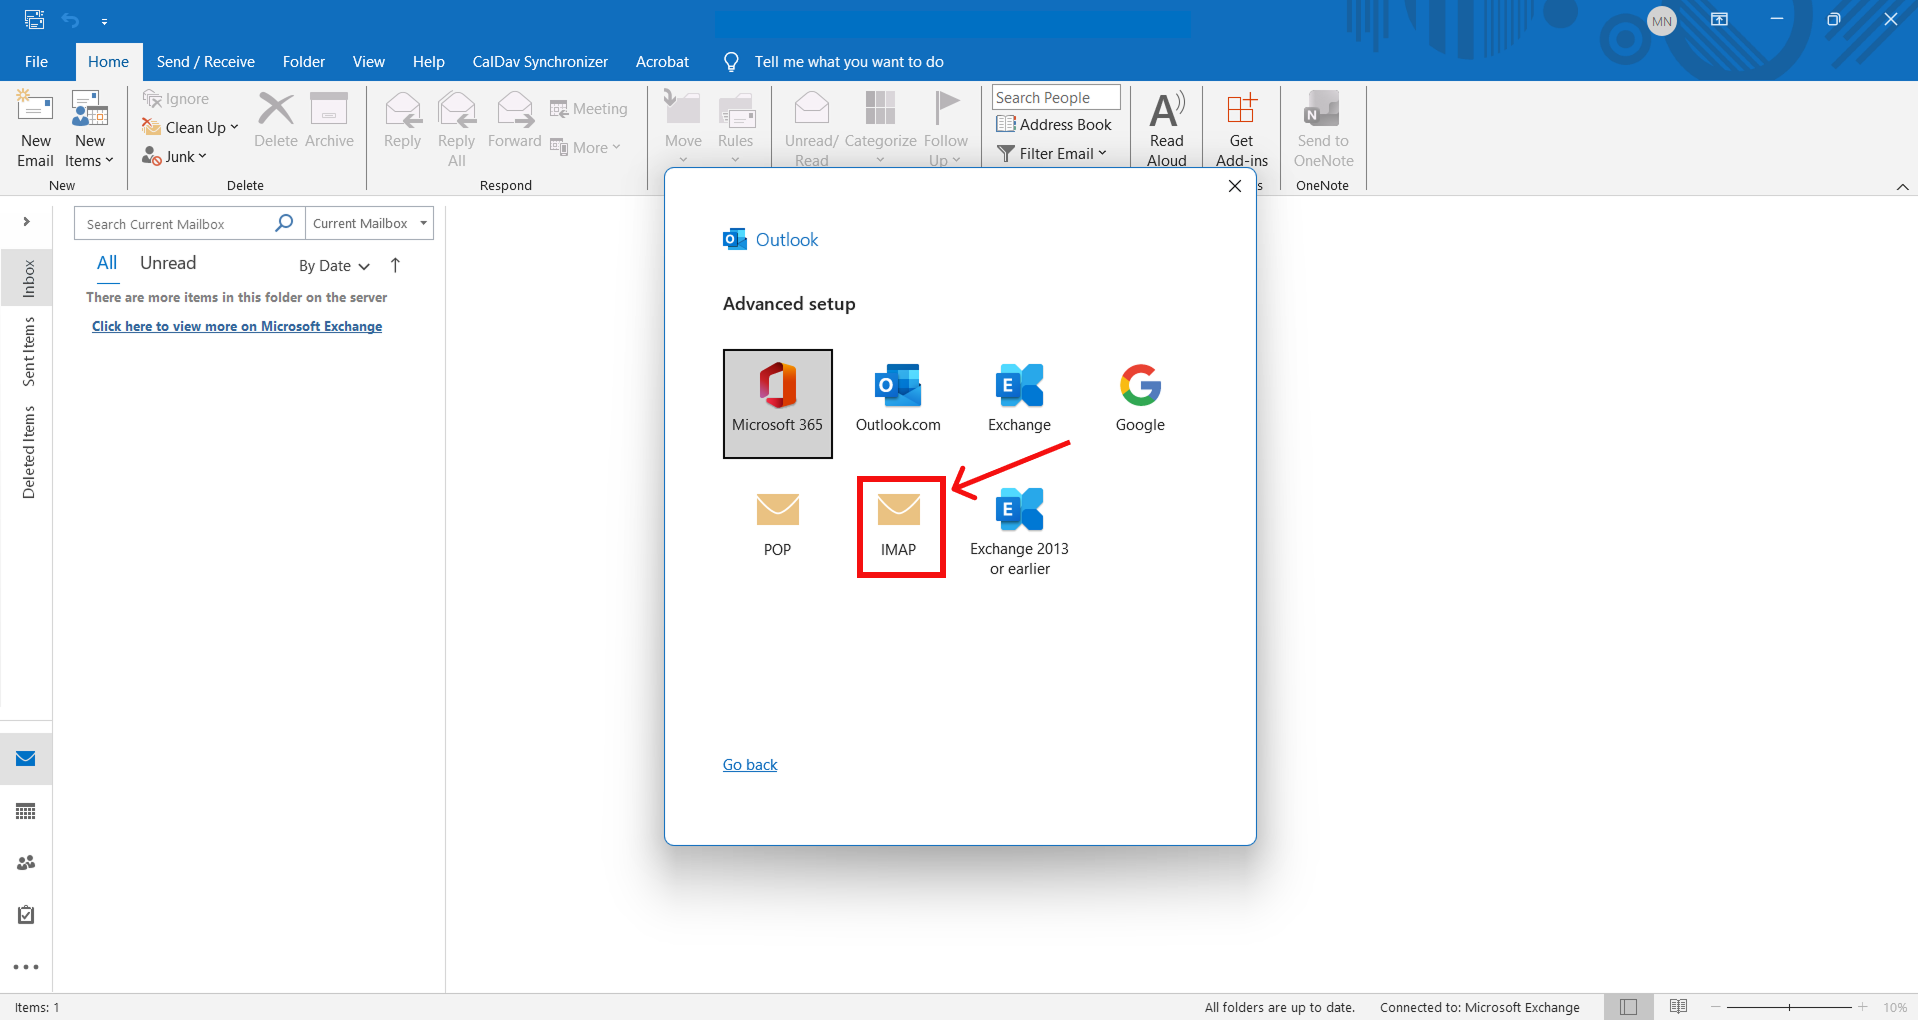
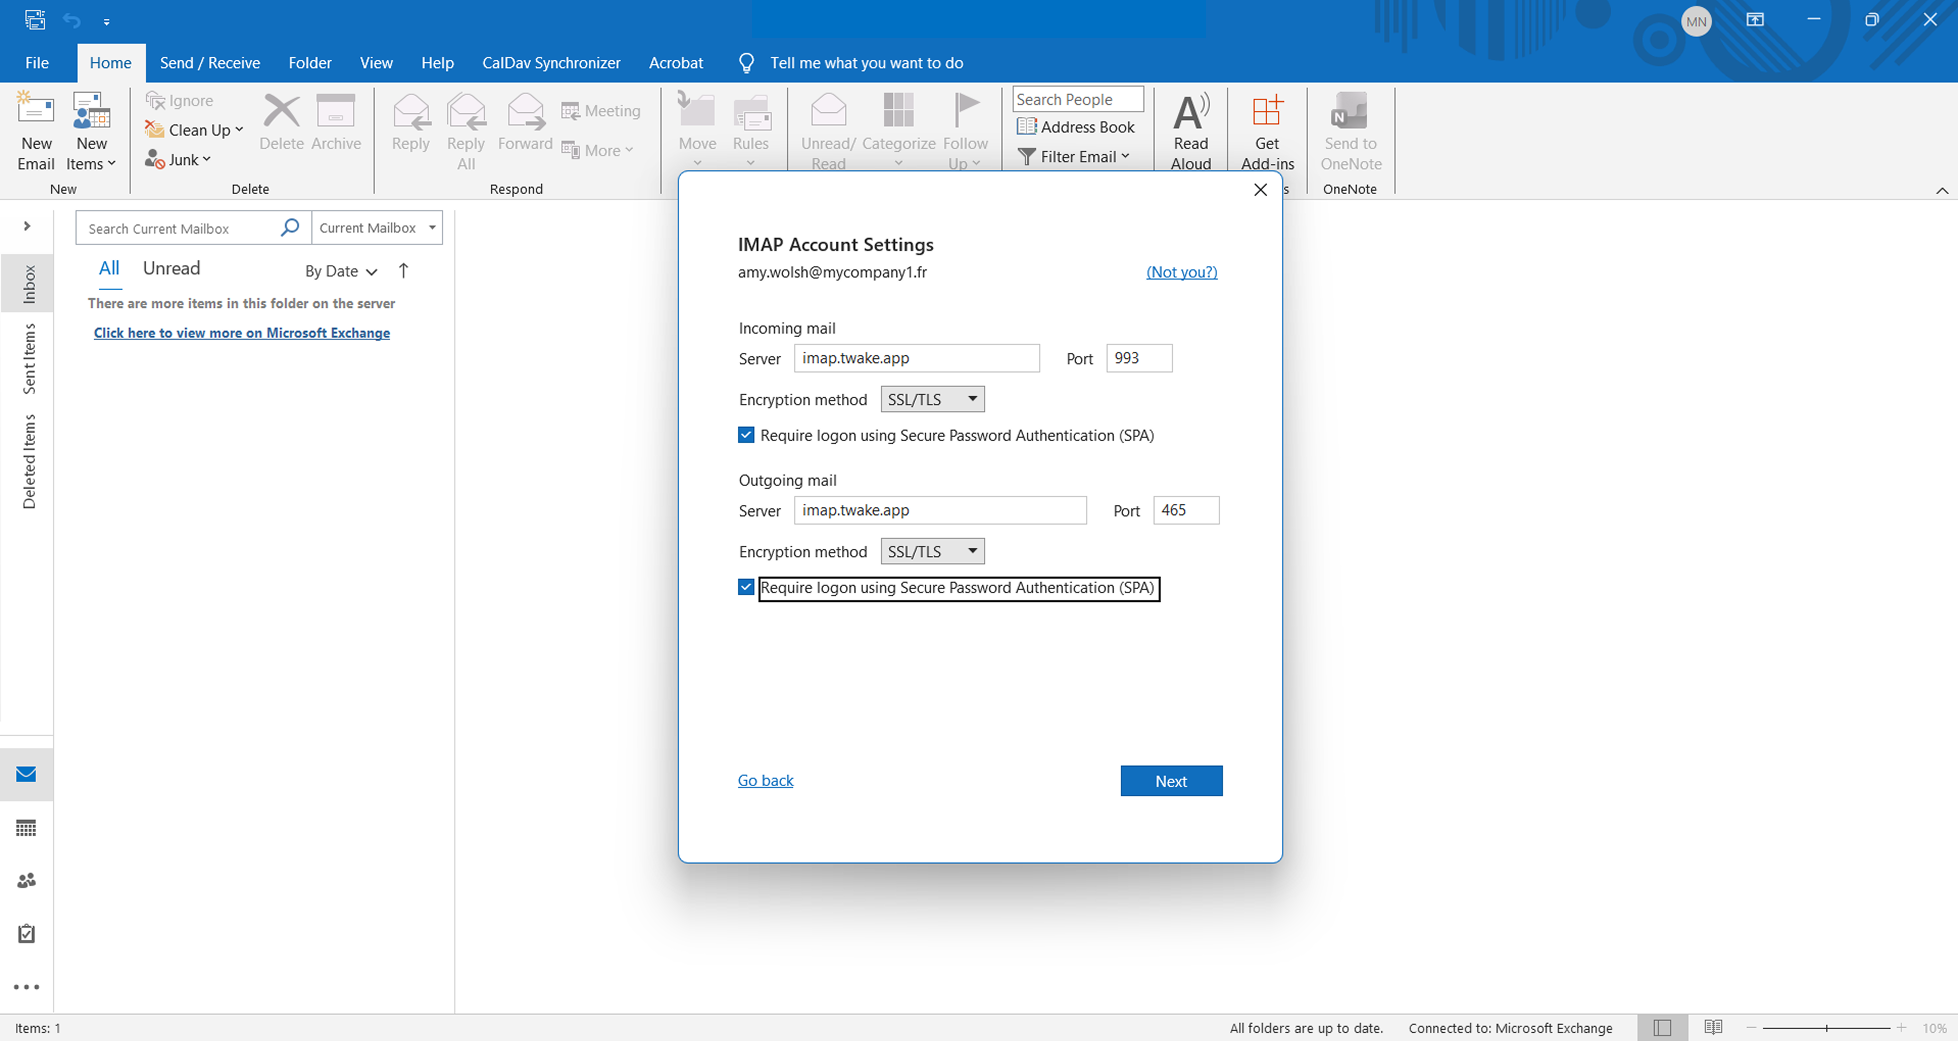
- Technical connection data
Manually enter the technical connection data as shown below. Fill in all fields and click "Next".
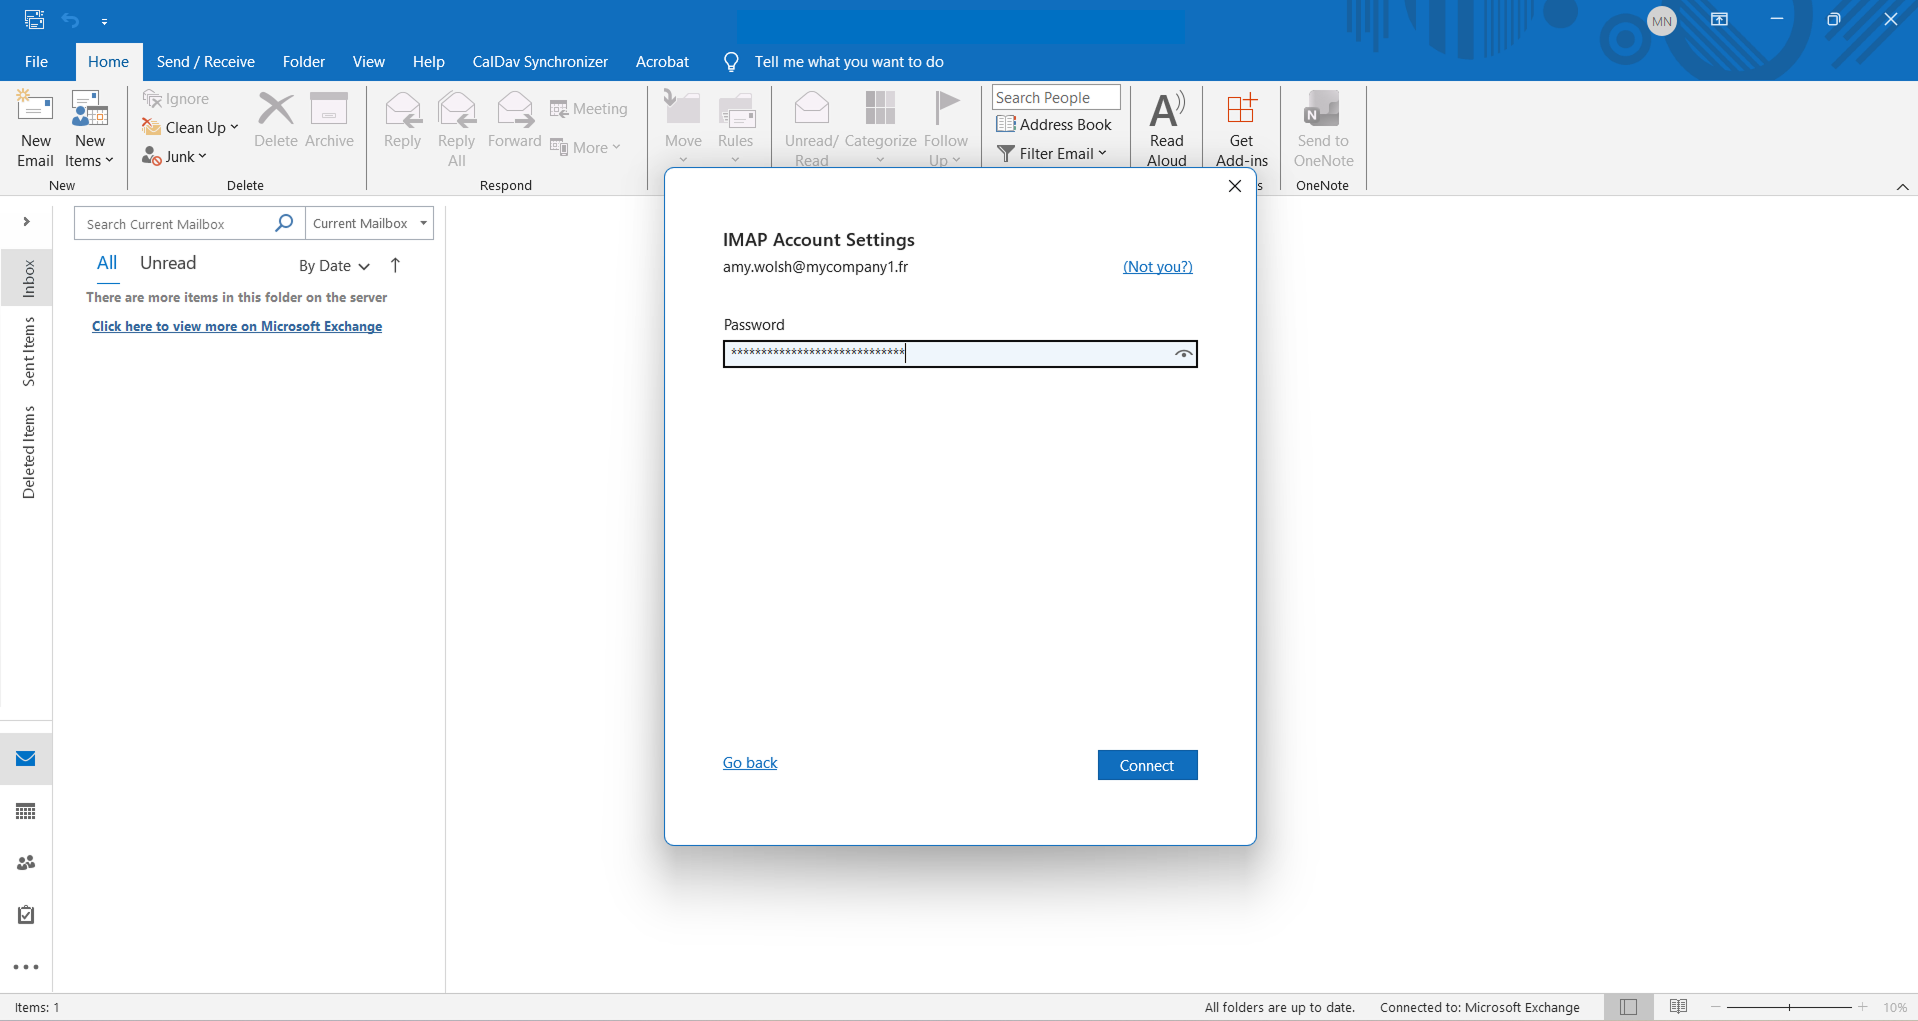
- Enter the application password (previously obtained when creating the application account). Then click "Connect".
- Un-check the 2 boxes "Let me set up my account manually" and "Set up Outlook Mobile on my phone, too", then click "Done".
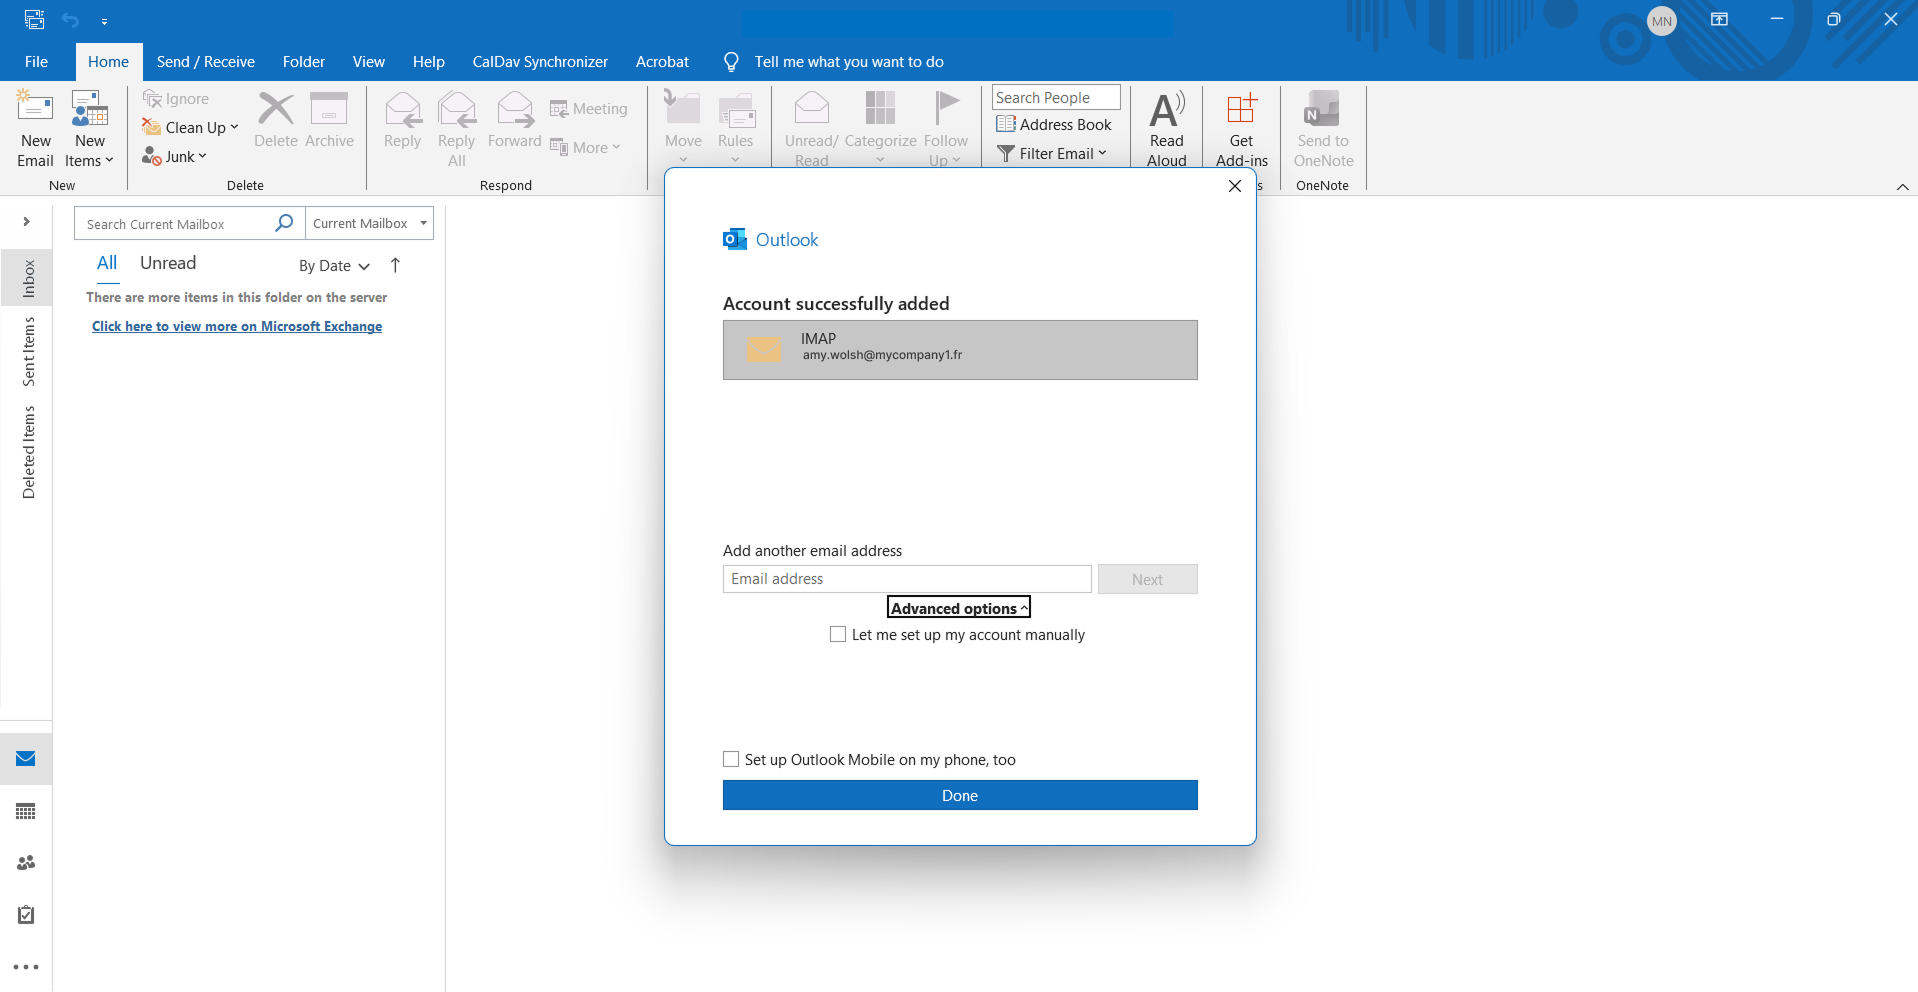
The mailbox has been successfully added to Outlook.
Step 2b: Sync your contacts and calendars
Twake shares contacts over CardDAV and calendars over CalDAV. Both use the same server address: https://dav.twake.app, with your Twake email address as username and the Application Password.
iPhone and iPad
Calendars
- Open Settings > Apps > Calendar > Calendar Accounts > Add Account. On iOS 17 and earlier: Settings > Calendar > Accounts > Add Account.
- Tap Other > Add CalDAV Account.
- Enter:
- Server: dav.twake.app
- User Name: your Twake email address
- Password: the Application Password
- Description: Twake (optional)
- Tap Next, check that Calendars is enabled, then tap Save.
Contacts
- Open Settings > Apps > Contacts > Contacts Accounts > Add Account. On iOS 17 and earlier: Settings > Contacts > Accounts > Add Account.
- Tap Other > Add CardDAV Account.
- Enter the same server, user name and password as above.
- Tap Next, then Save.
Your Twake calendars appear in the Calendar app, and your contacts in the Contacts app and in Phone.
Mac (Calendar and Contacts apps)
- Open Calendar, then Calendar > Add Account > Other CalDAV Account.
- Set Account Type to Manual, enter your Twake email address, the Application Password and dav.twake.app as server address, then click Sign In.
- Open Contacts, then Contacts > Add Account > Other Contacts Account > CardDAV, and enter the same information.
Mozilla Thunderbird
Thunderbird supports calendars and contacts natively.
Calendars
- Open the Calendar tab, then click New Calendar.
- Select On the Network, then click Next.
- Enter your Twake email address as username and https://dav.twake.app as location, then click Find Calendars.
- Enter the Application Password when prompted, select the calendars to sync, then click Subscribe.
Contacts
- Open Address Book, then click the arrow next to New Address Book > Add CardDAV Address Book.
- Enter your Twake email address as username and https://dav.twake.app as location, then click Continue.
- Enter the Application Password when prompted, select the address books to sync, then click Continue.
Microsoft Outlook
Outlook doesn't support CalDAV and CardDAV natively, so your Twake contacts and calendars won't appear after you add your mailbox.
- Outlook classic for Windows: install the free, open-source add-in CalDav Synchronizer. In its settings, create a profile for each calendar and address book, using https://dav.twake.app as DAV URL, your Twake email address and the Application Password. Then click Discover resources and assign to Outlook folders.
- New Outlook for Windows, Outlook for Mac and Outlook mobile: CalDAV and CardDAV sync isn't available. Use the Twake web app, or the native Calendar and Contacts apps on your device.