
Create an event
In this article, we explain how to create new events in Twake Calendar to organize meetings, appointments, reminders, or personal activities
How to create events in our web app
- Open Twake Calendar.
- Click + Create, or click an empty slot in the calendar:
- In Month view, clicking a day creates an all-day event for that date.
- In Day or Week view, clicking a time slot creates an event starting at the selected time (in half-hour increments)
- Enter the event title.
- Set the date and time: Choose the start and end date and time.
- (Optional) Add:
- Guests
- Visio conference
- Description
- Location
- Click Save.
The event is added to your selected calendar.
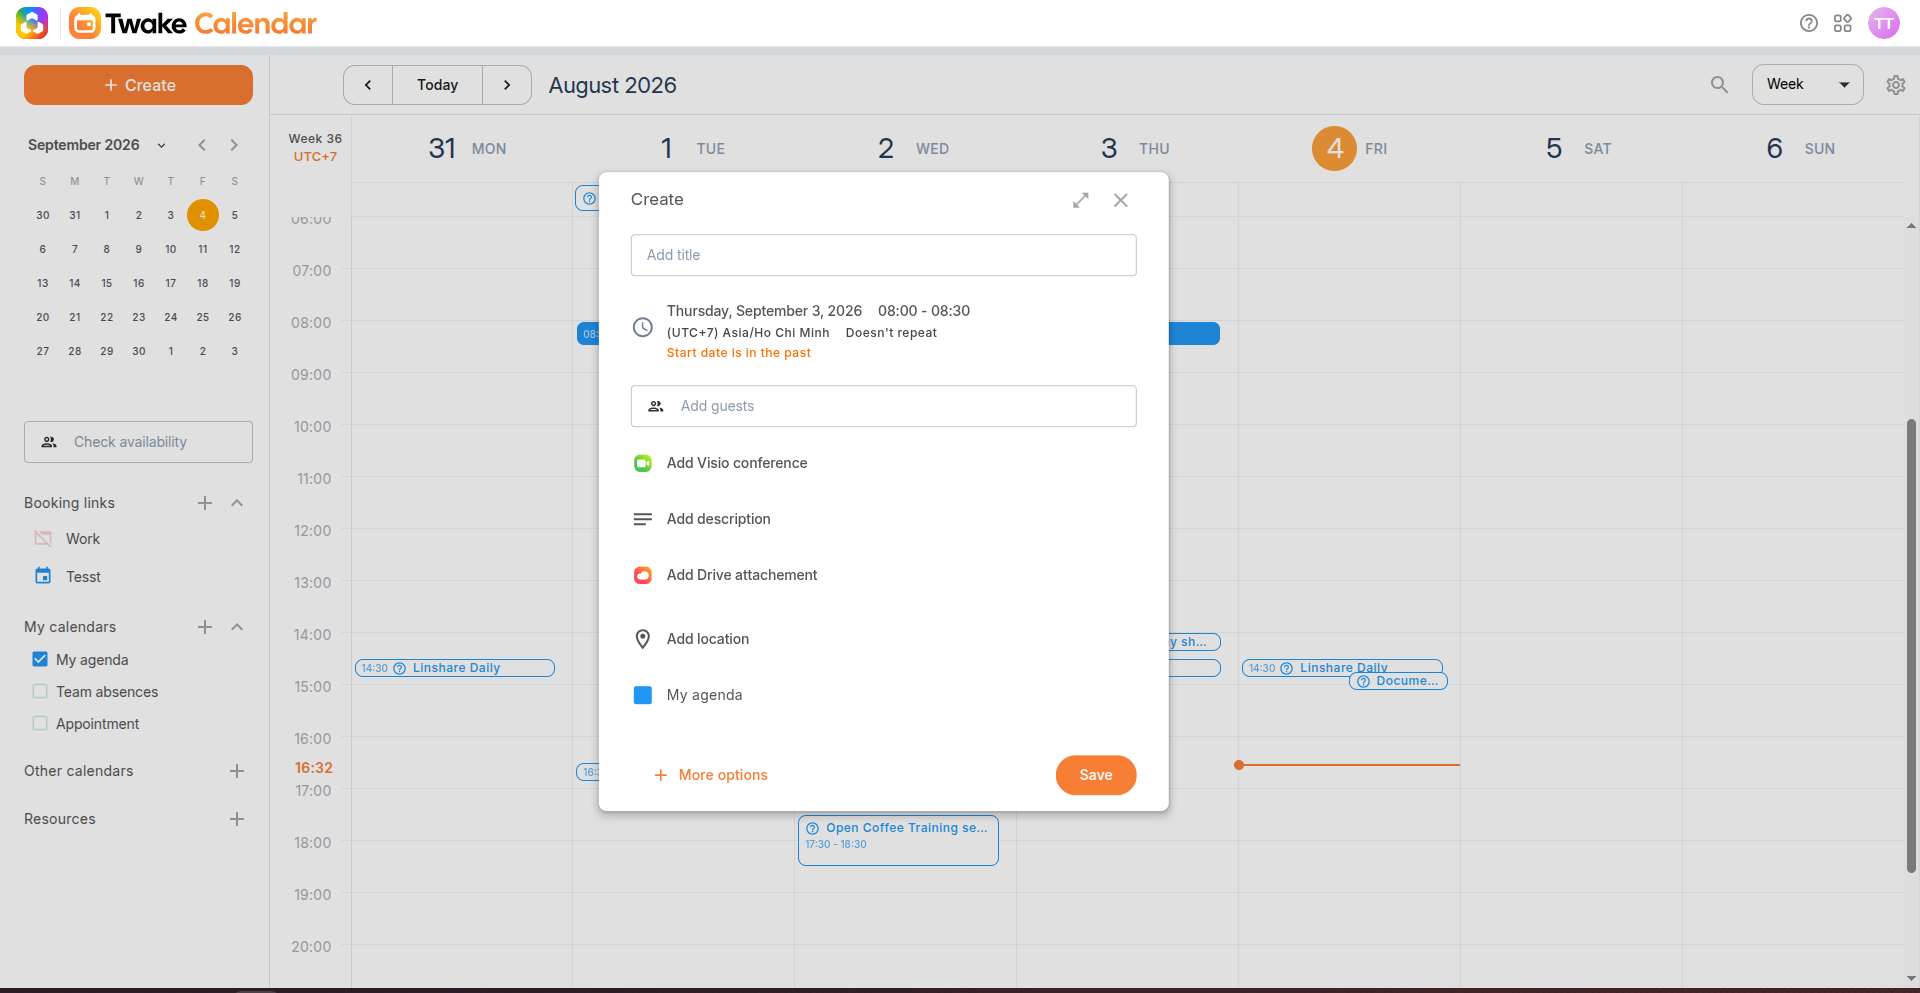
Create an event with more options
Use the full event editor when you need to configure more details, such as notifications, visibility, or calendar selection.
- Start creating an event, then click More options:
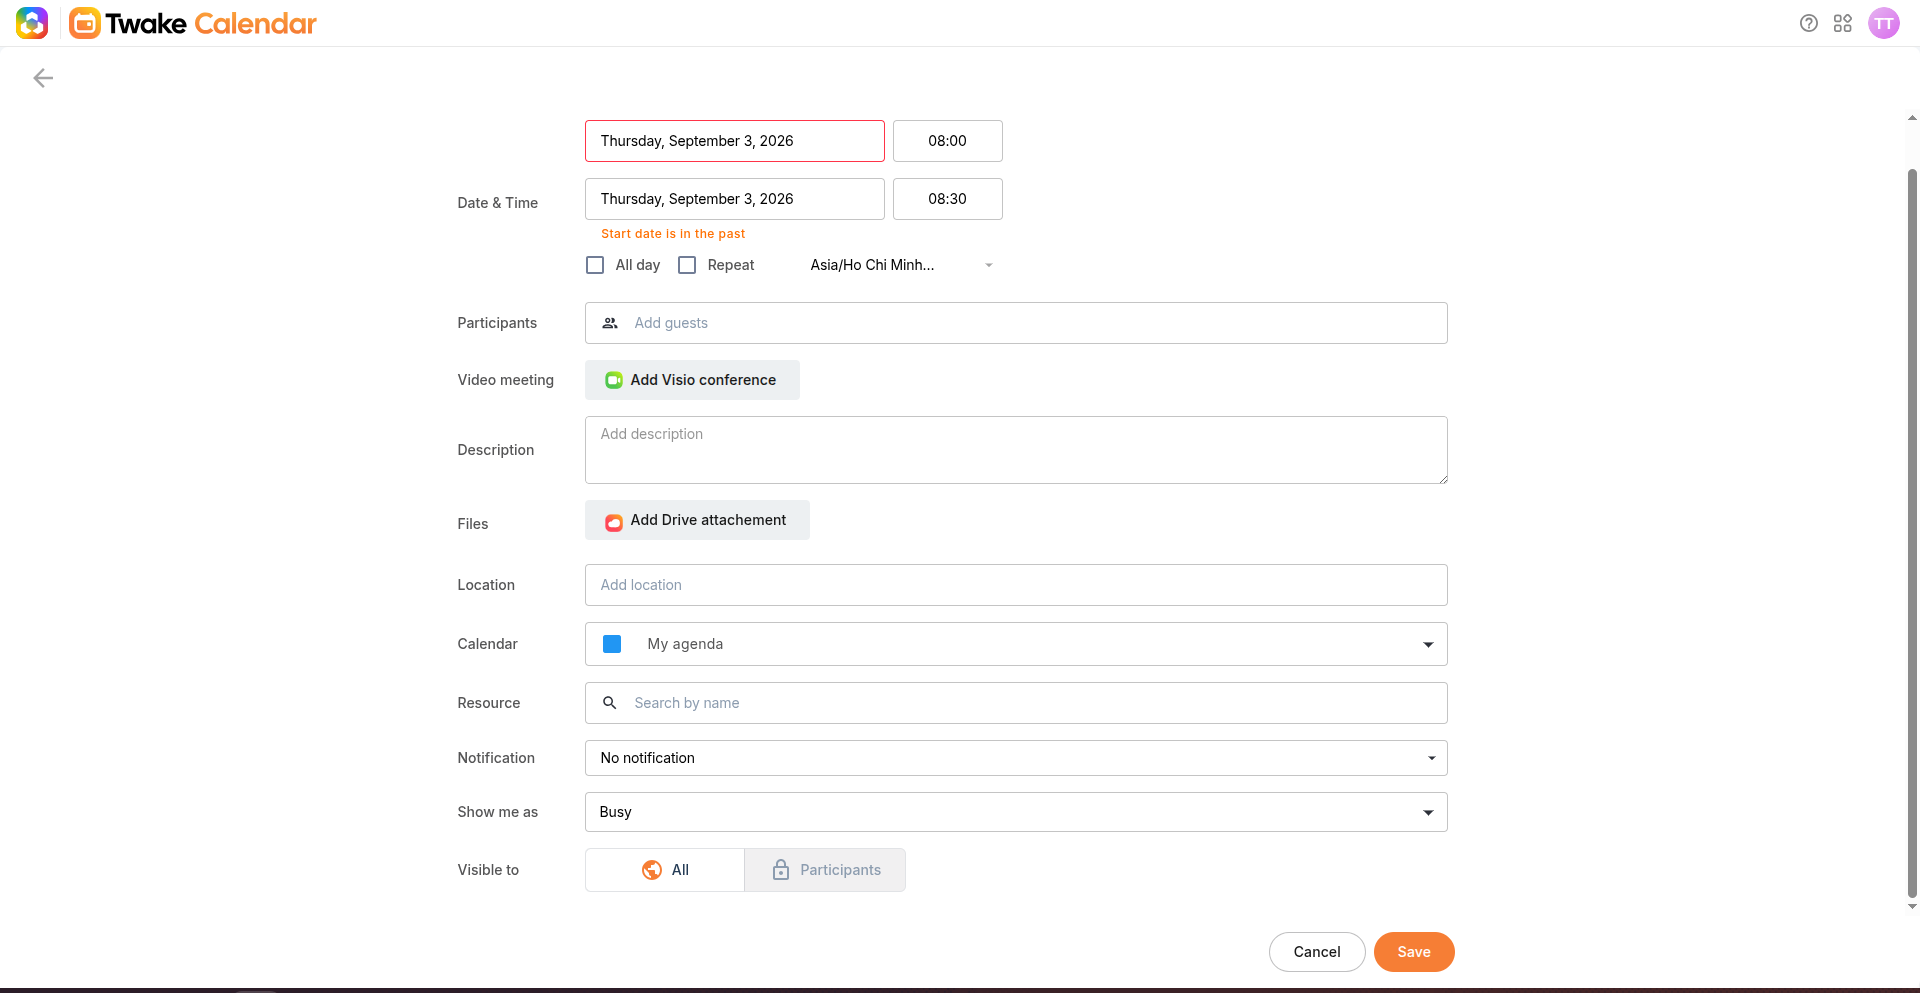
All day event
- Select the checkbox to Create an all-day event without a specific time:

Repeat
- By default, events do not repeat. If you have meetings or activities that occur regularly, you can make an event recur daily, weekly, monthly, yearly, or create a custom recurrence pattern to fit your schedule.
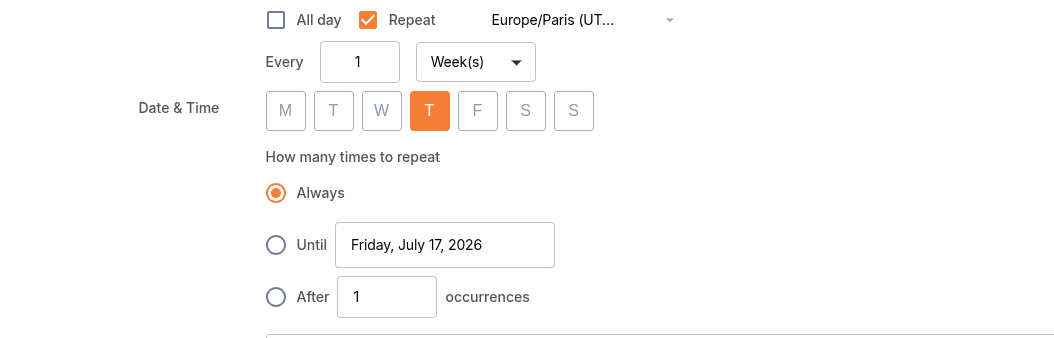
Learn more: How to Create a Recurring Event
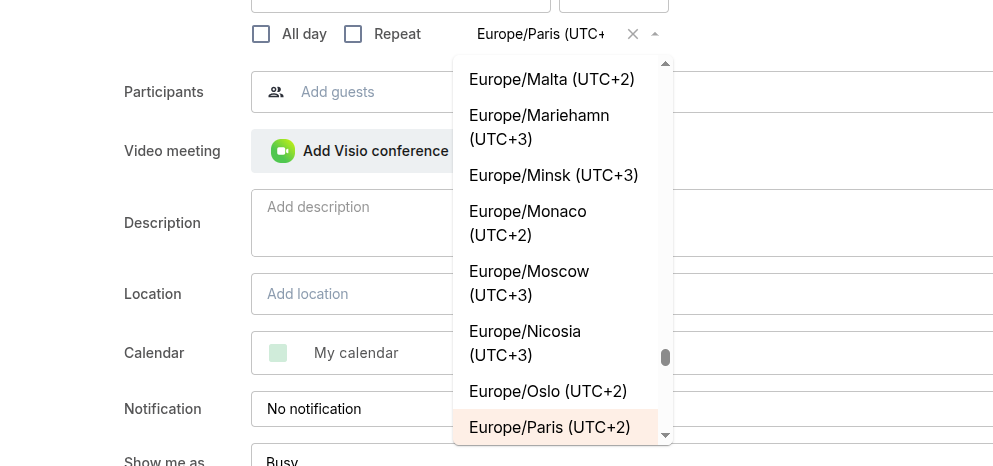
Time zone
- To change the time zone the event occurs in, click on the field and select appropriate timezone:
Participants
- Invite attendees by entering their email addresses.

Video meeting
- Add a Visio conference: A secure, end-to-end encrypted meeting link will be generated and attached to your invitation automatically and is displayed on the field "Description" below, you can also copy the link and send to related people.

Description
- Add notes, an agenda, or additional information.
Add files from Twake Drive
You can attach one or more files from Twake Drive to your event. The files are added as links, allowing participants to access the latest version directly from Drive.
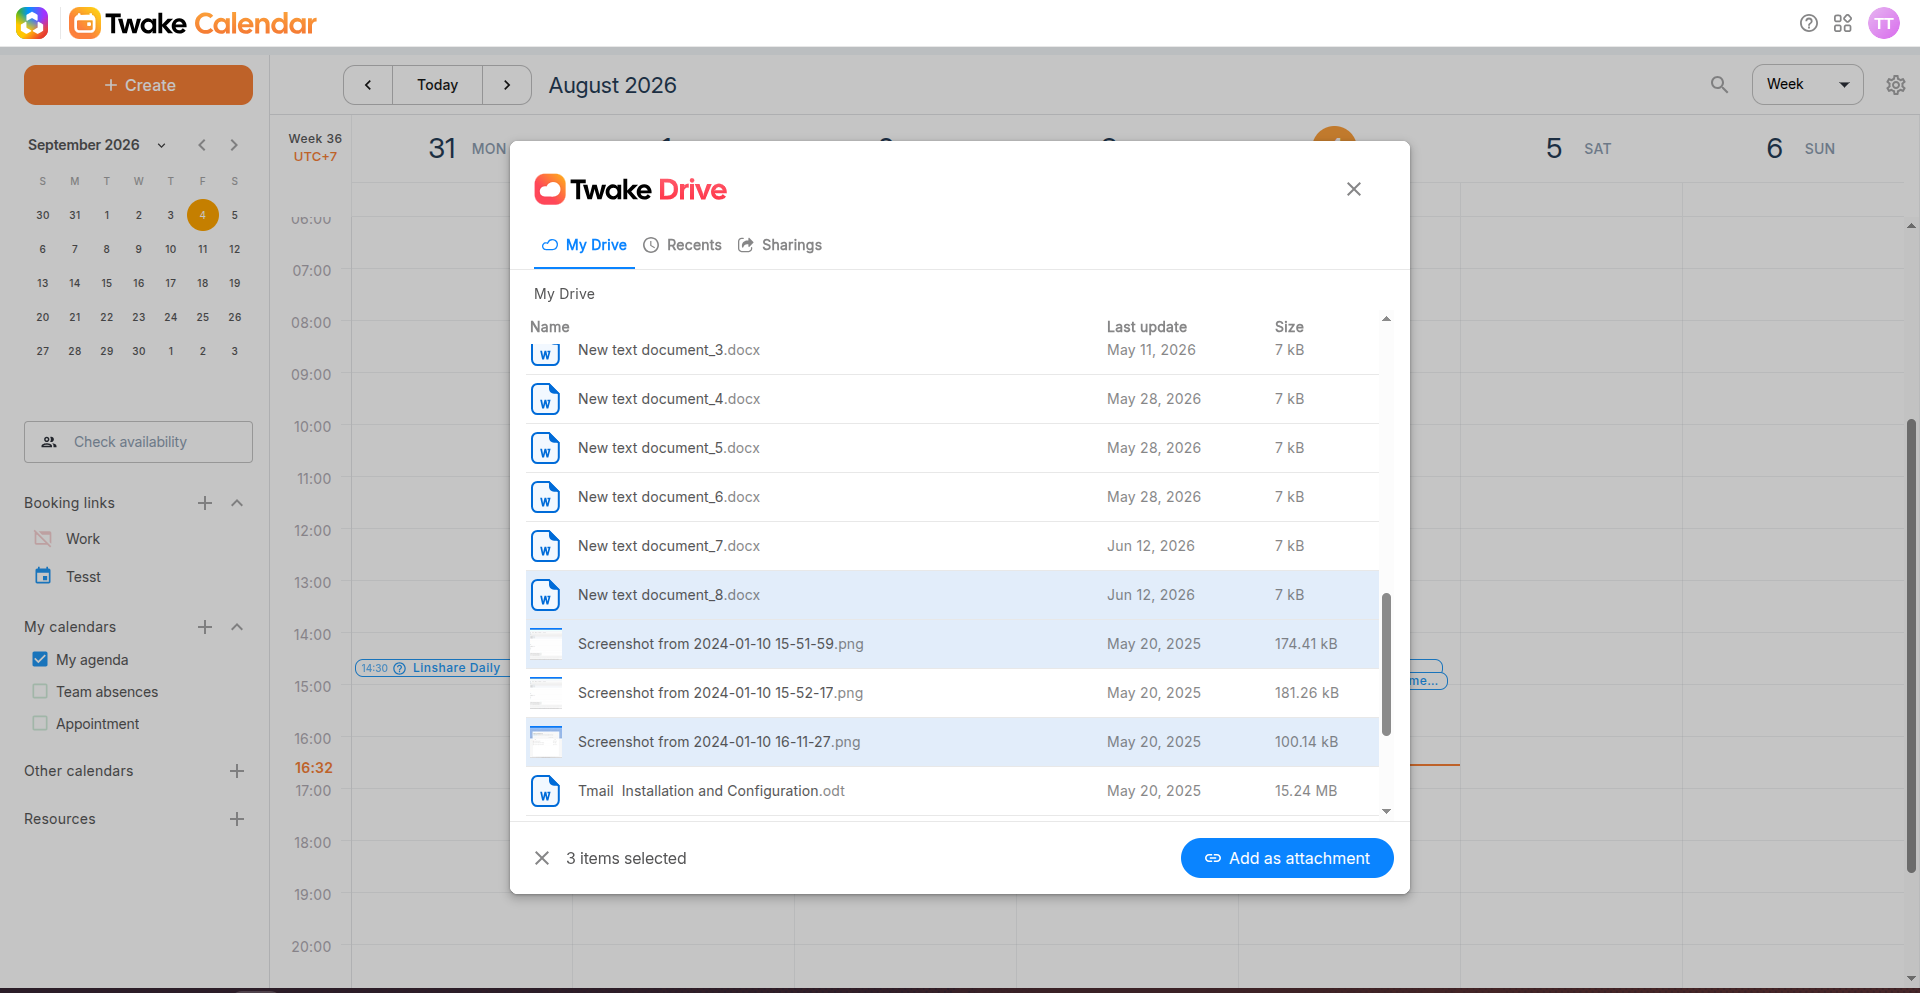
- Click Add Drive attachment.
- Find your files using one of these tabs:
- My Drive: Browse files stored in your Drive.
- Recents: View files you recently accessed.
- Sharings: View files shared with you.
- Select one or more files.
- Click Add as attachment.
4 . Configure how participants can access the files:
- Select Viewer to allow participants to view them.
- Select Editor to allow participants to modify them.
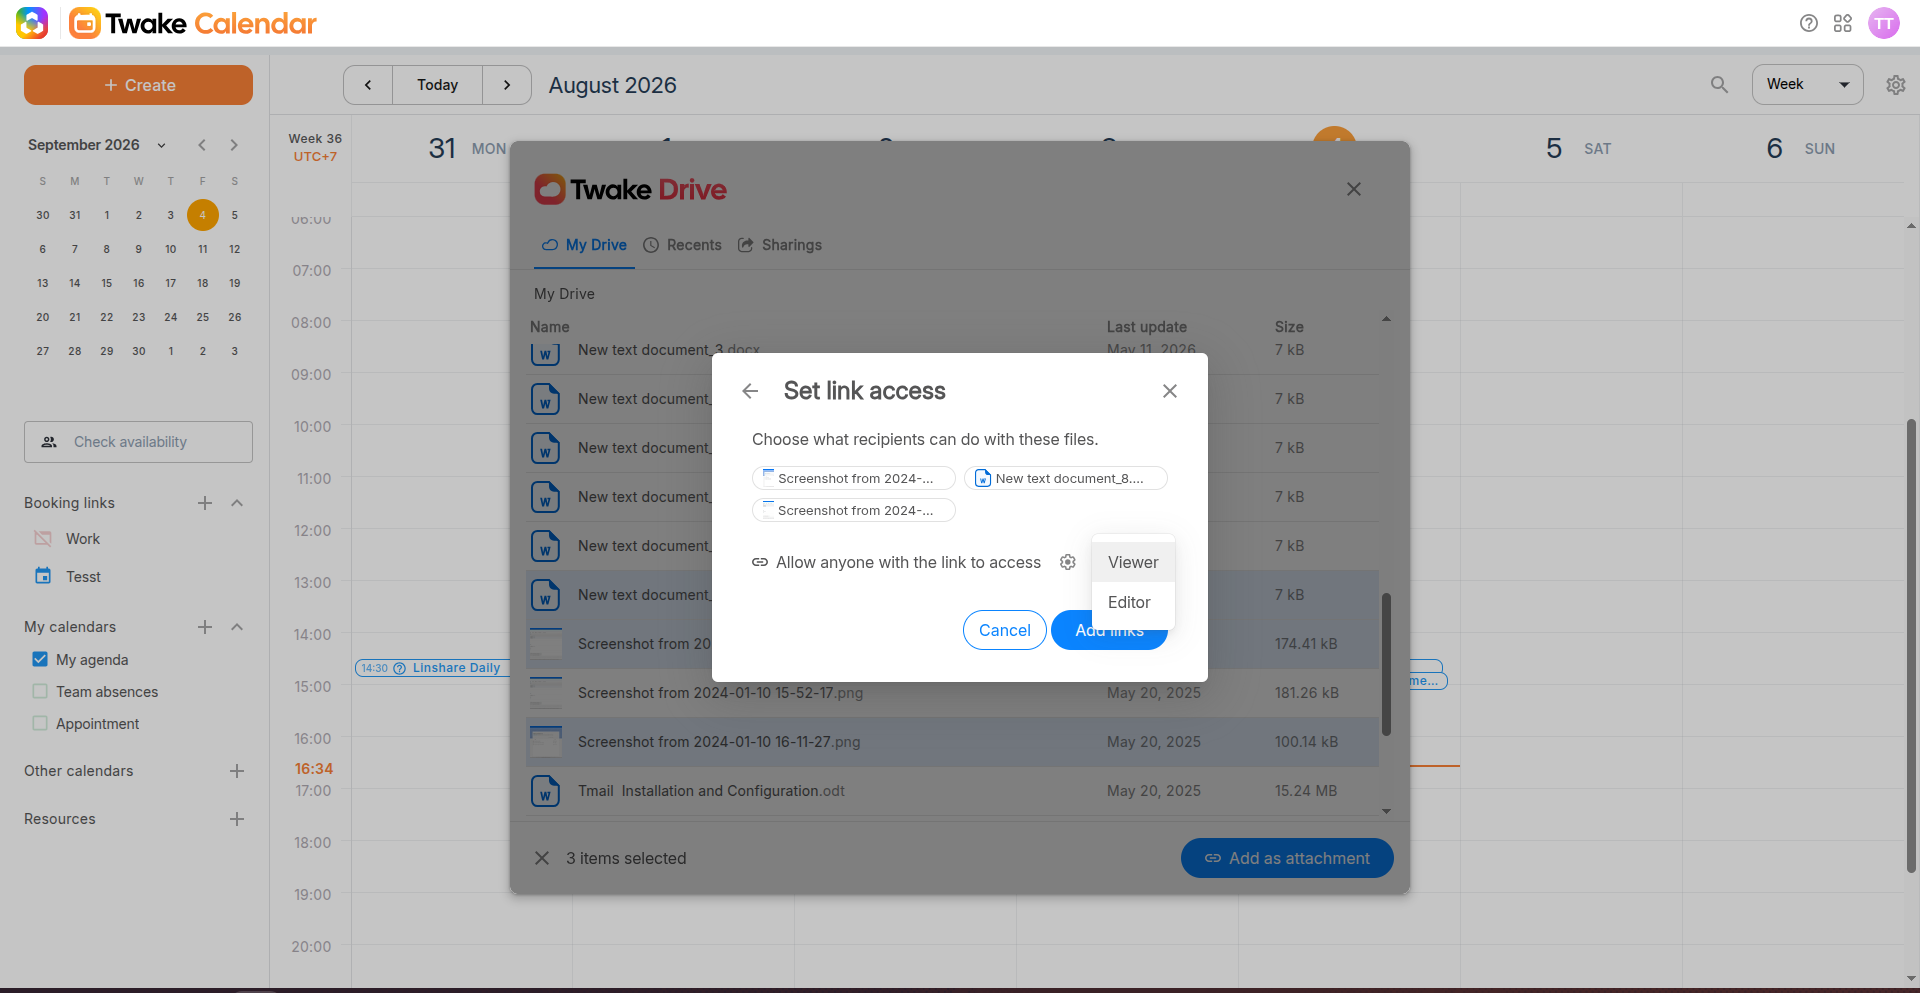
5 . Optional: Click the Settings icon to:
- Remove access after a specified deadline.
- Protect access with a password.
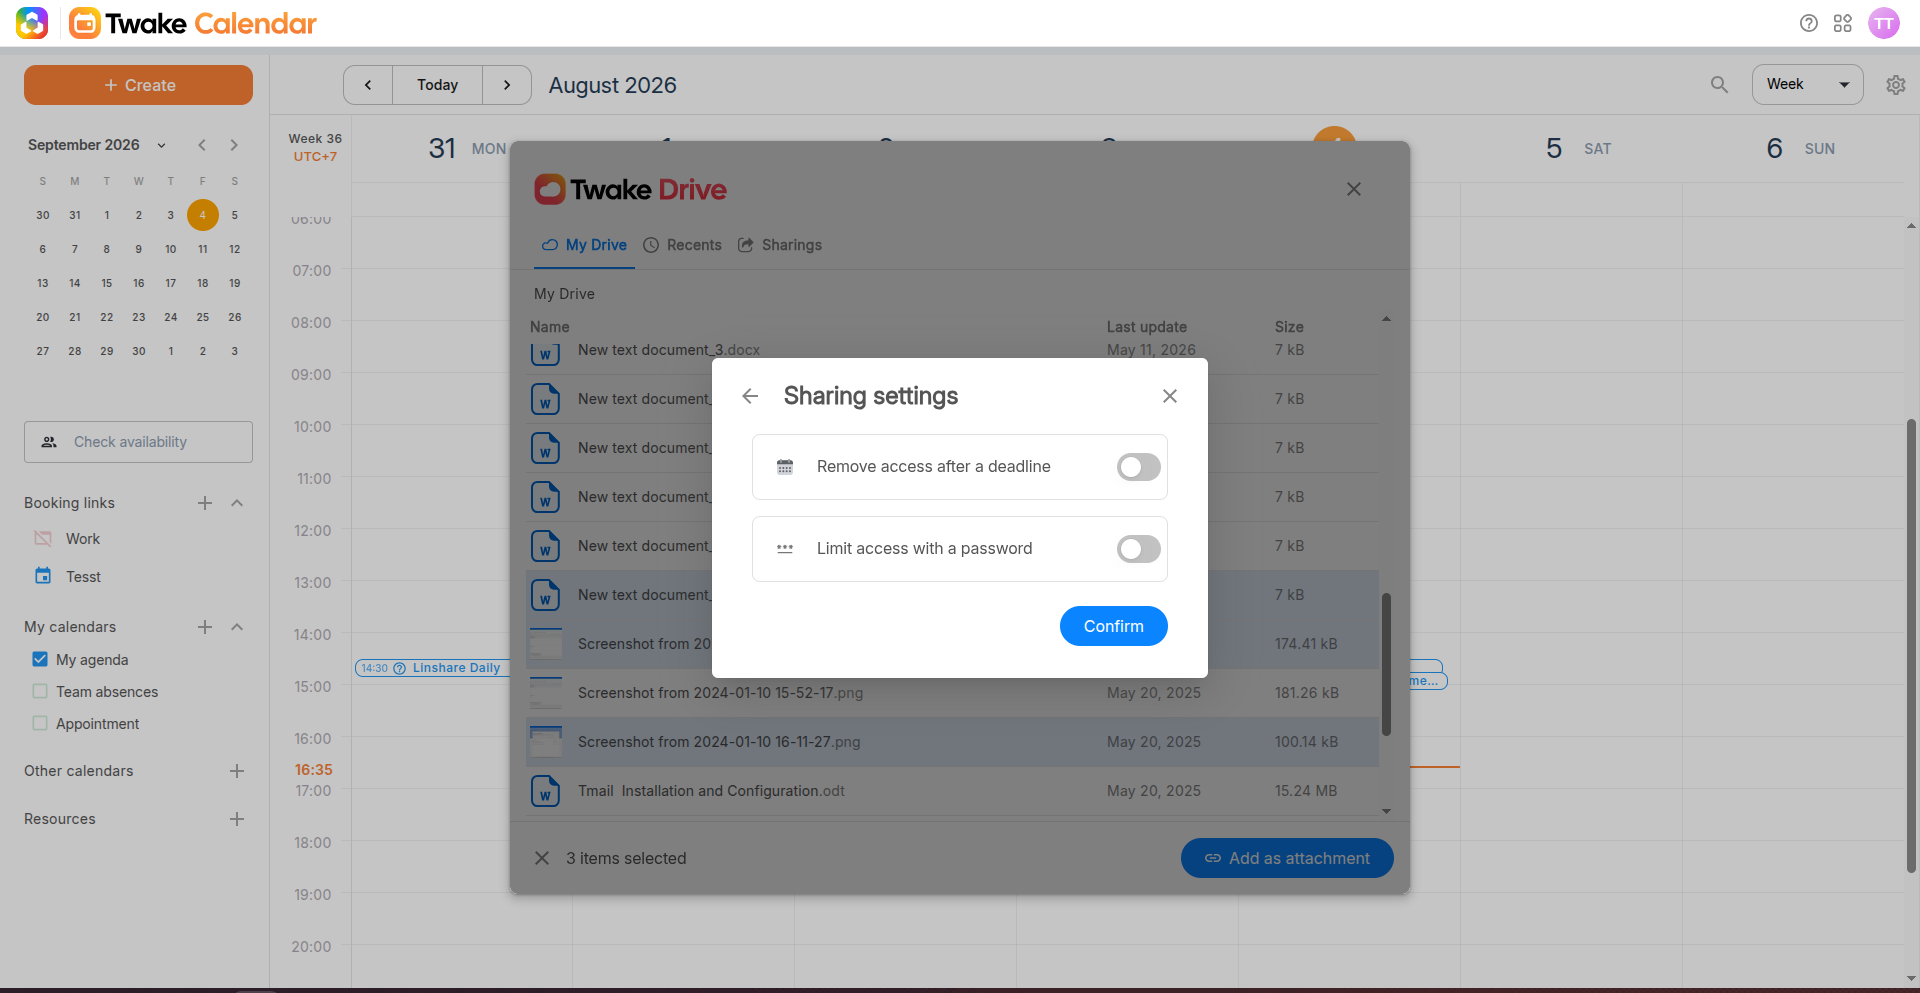
6 . Click Add links.
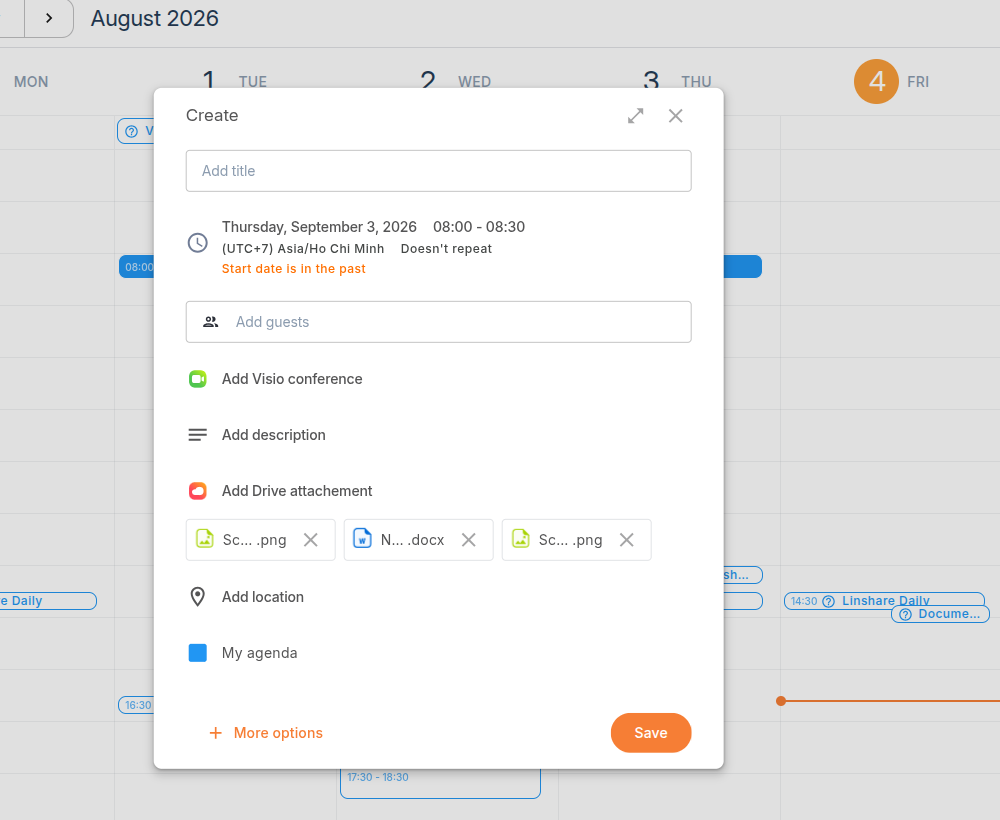
The selected files appear in the event. To remove a file before saving, click the X next to its name.
Complete the other event details, then click Save. Participants can open the attached files from the event details.
Location
- Specify where the event takes place.

Calendar
- Choose which calendar the event belongs to.

Resources
- You can books resources (Rooms, equipment...) for your meeting. Learn more
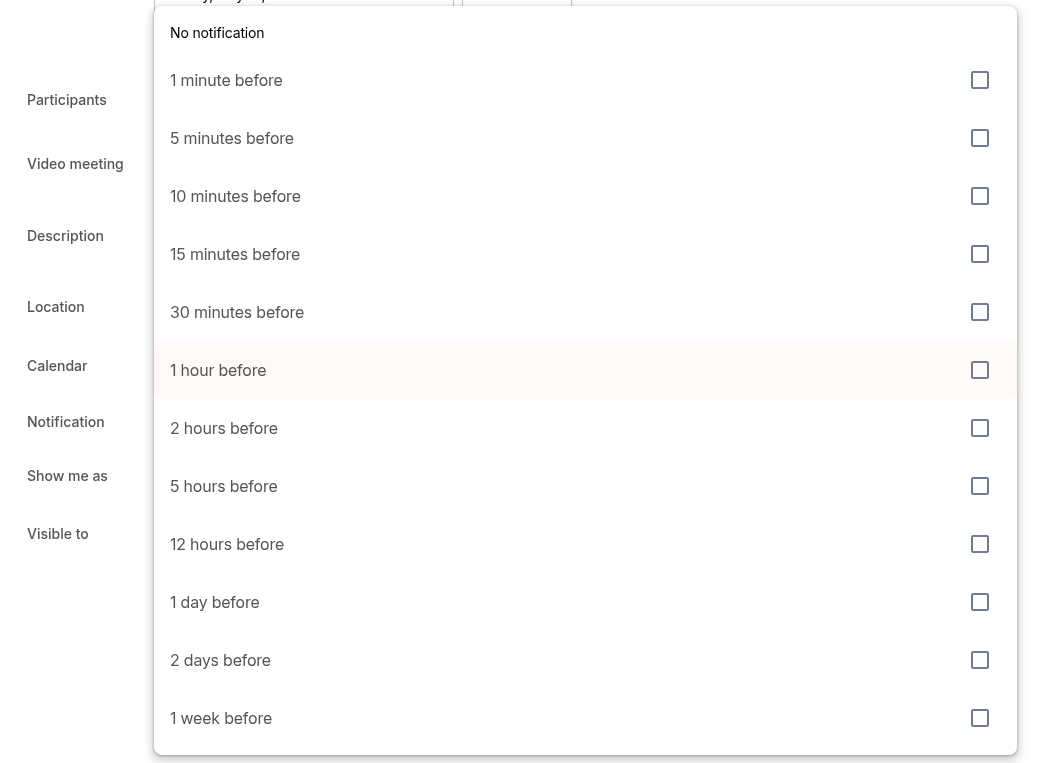
Notification
- You can add notifications to alert you about upcoming events. You must enable browser notifications to receive notifications on desktop systems.
Show me as
- Display your availability as Busy or Free.

Visible to
- Control who can view the event details.
