
Discover Twake Mail in 8 steps
Your step-by-step onboarding guide
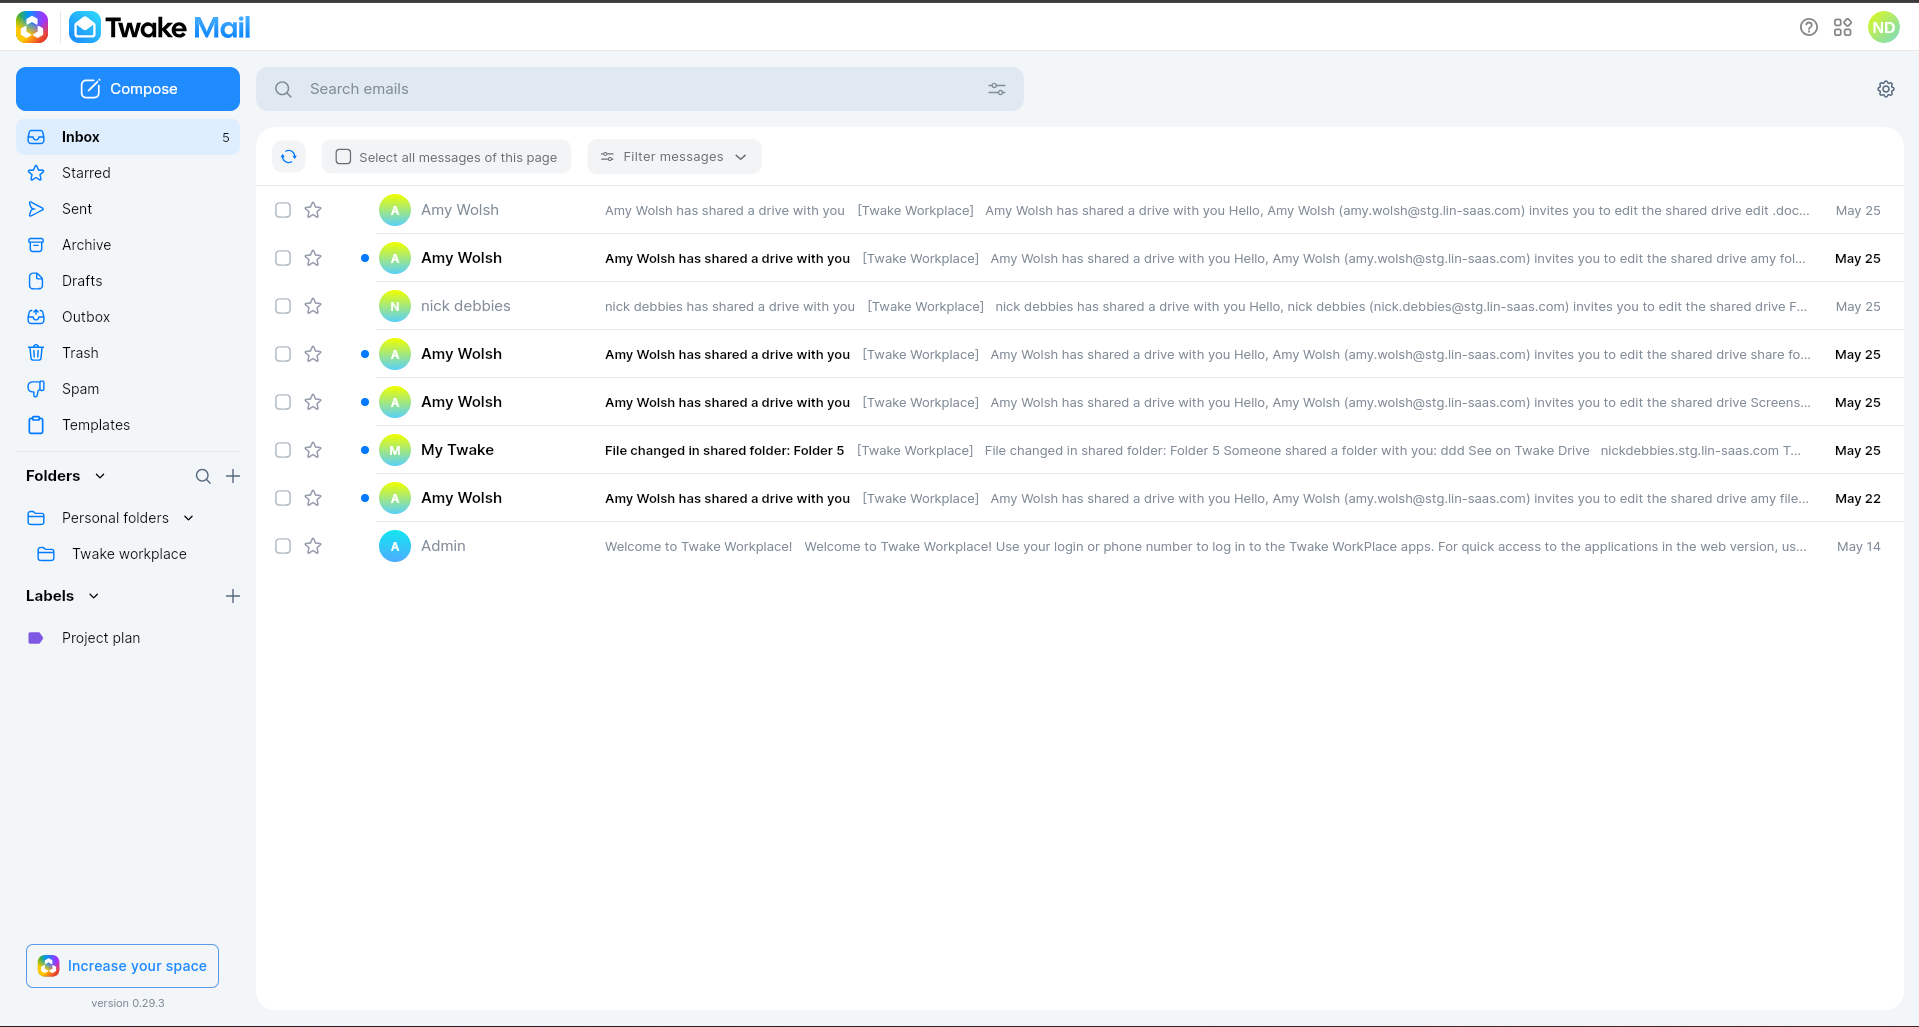
Step 1 — Find your way around the interface
When you first open Twake Mail, you land on your inbox. Here are the key landmarks:
- Inbox — your incoming emails
- Sent — emails you have sent
- Drafts — emails saved for later
- Outbox — emails currently being sent
- Trash — deleted emails, recoverable before permanent removal
Navigation happens through the left-hand panel. You can also create custom folders to organize your messages.
Step 2 — Compose and send your first email
To write a new email:
- Select Compose
- Check the From field and select your identity if you have more than one
- Add one or more recipients in the To field
- Enter a subject
- Write your message
- Select Send
After the email is sent, it appears in the Sent folder.
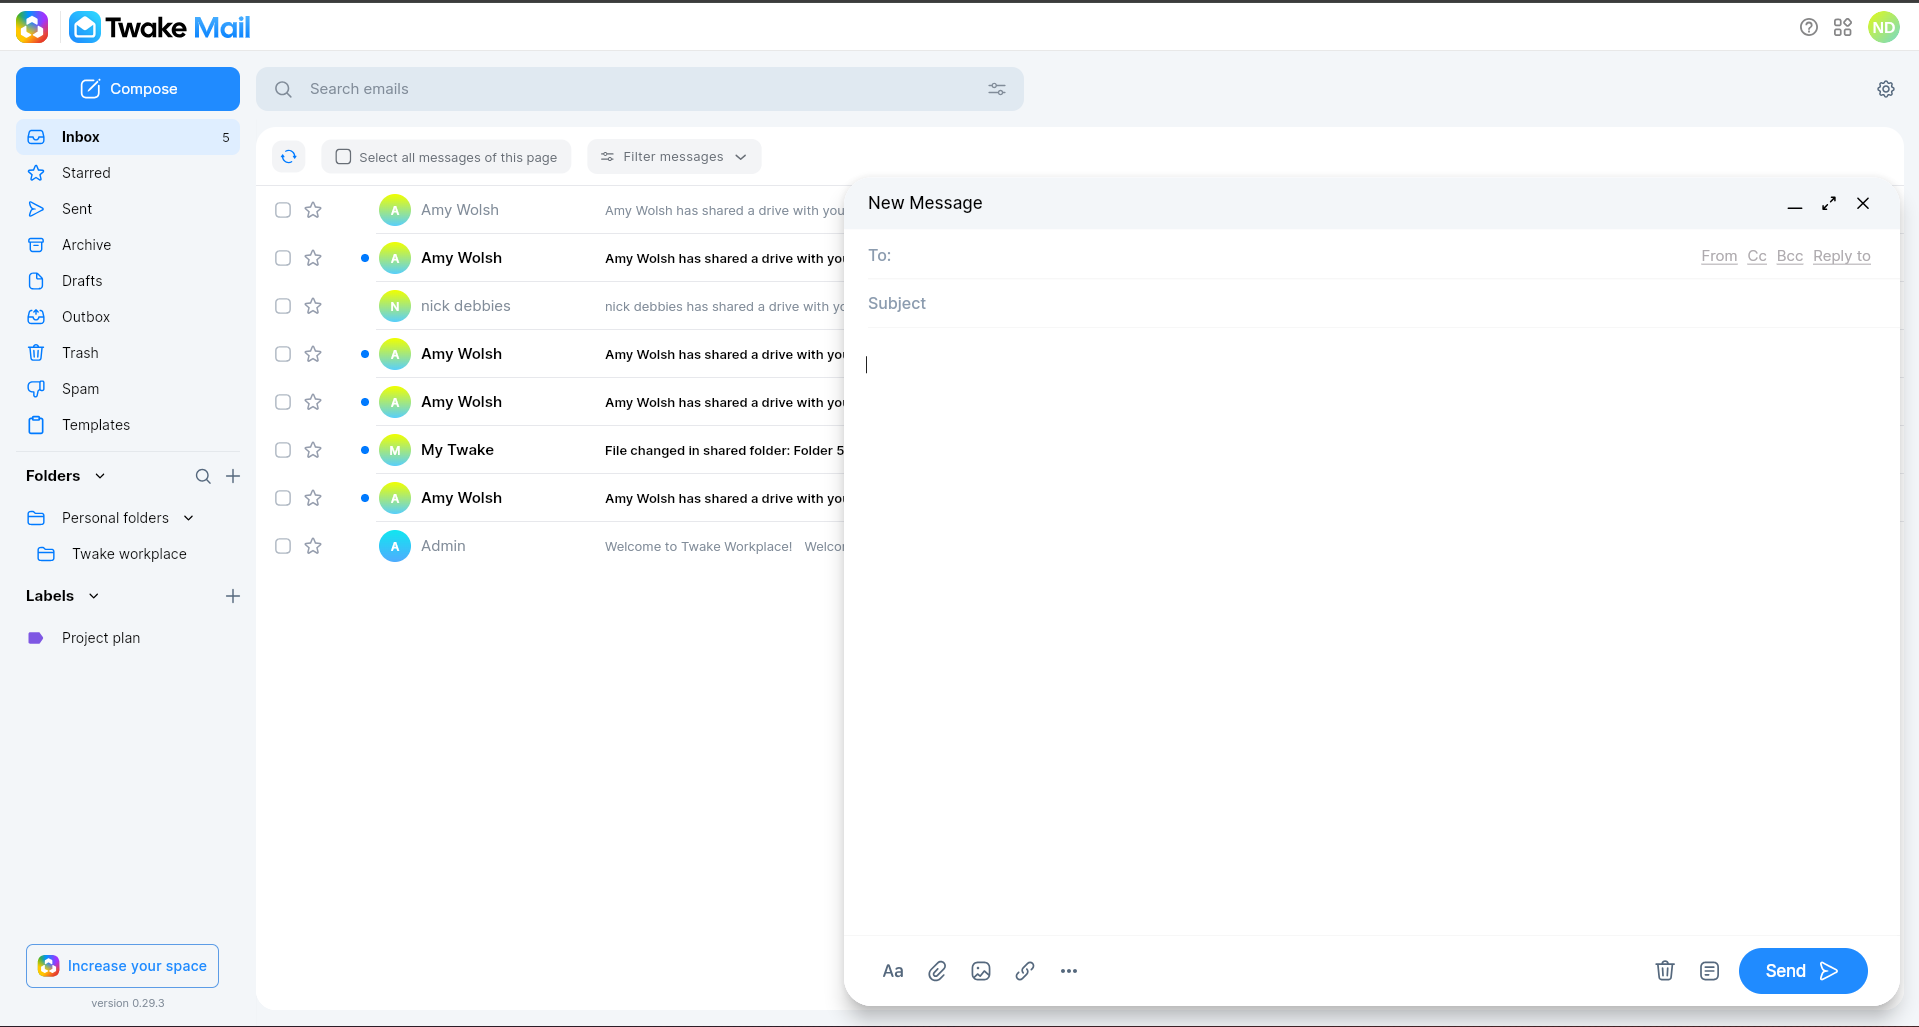
💡 You can open multiple composer windows at the same time — useful when writing several emails without losing your work.
👉 Want to go deeper? Read the full guide
Step 3 — Manage recipients (To, Cc, Bcc, Reply-to)
Use the recipient fields to control who receives your email:
| Field | Use it for |
|---|---|
| To | Main recipients |
| Cc | People who should receive a visible copy |
| Bcc | People who should receive a hidden copy |
| Reply-to | The address that receives replies |
Recipients in To and Cc can see each other. Recipients in Bcc are hidden from all other recipients.
Step 4 — Format your emails
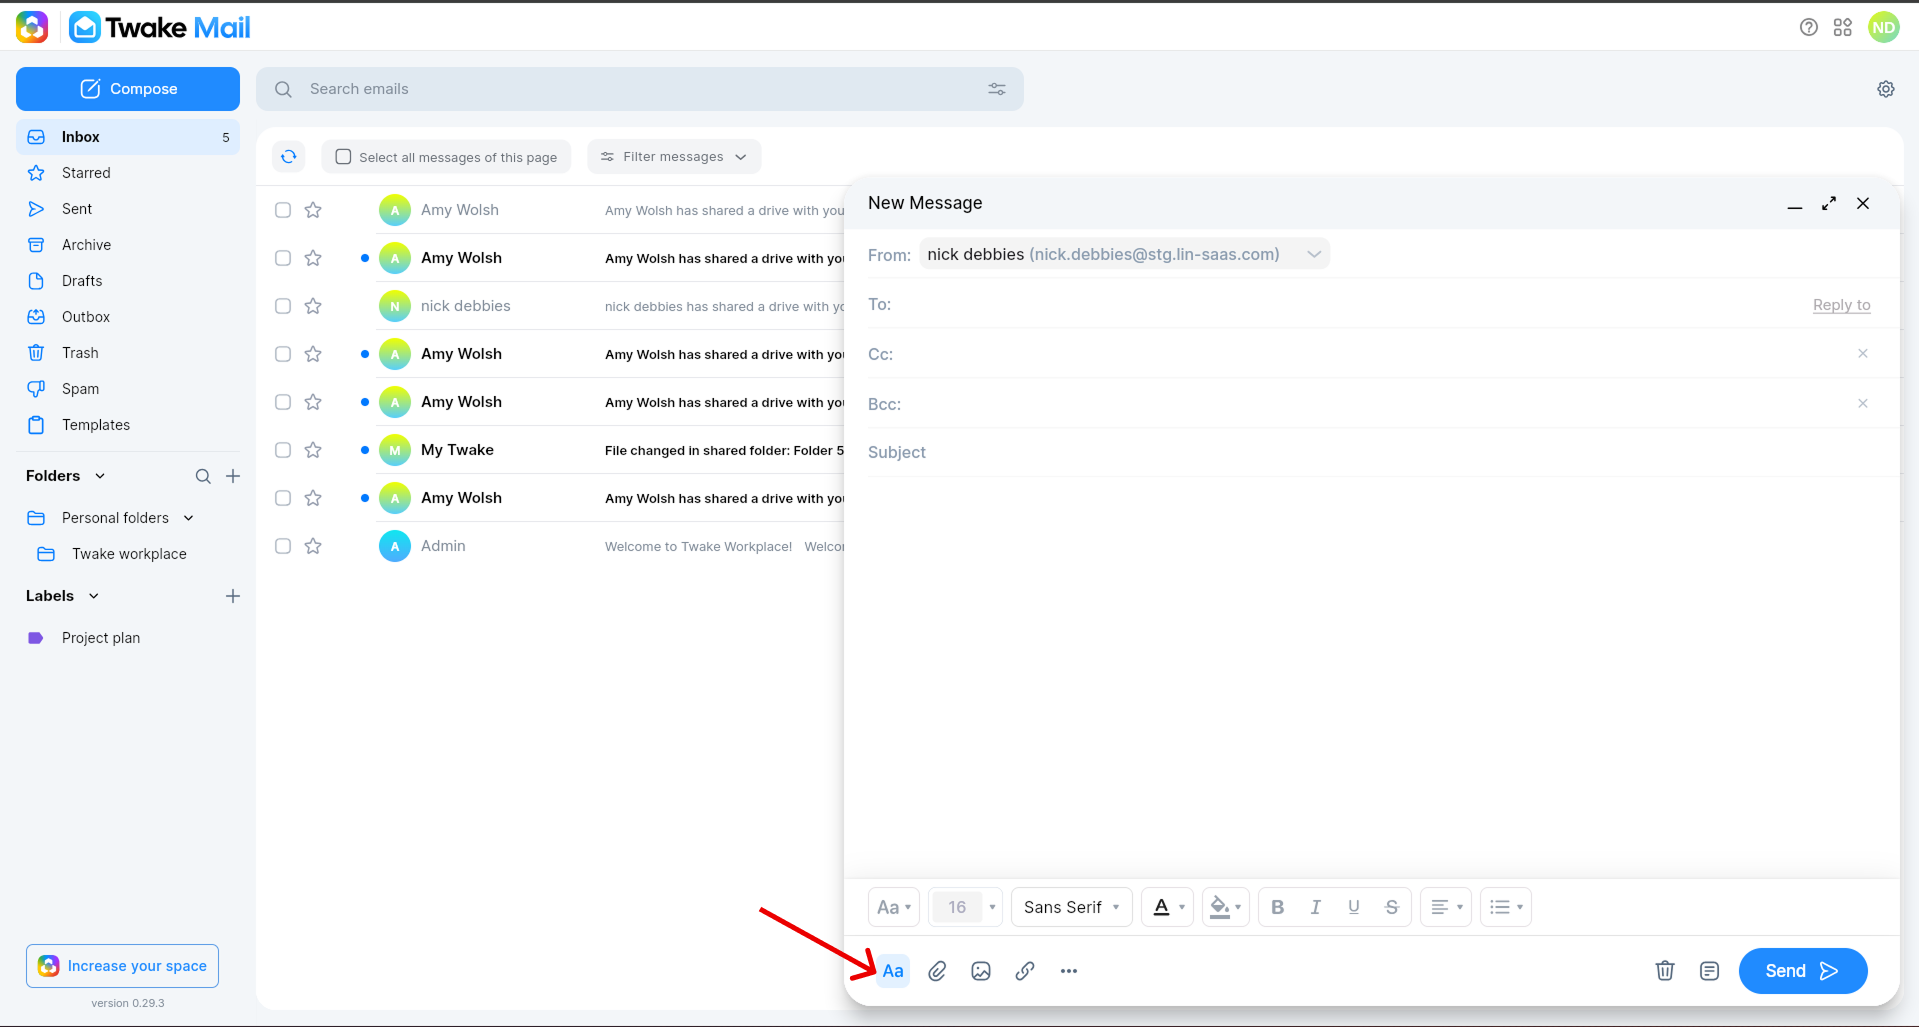
Use the formatting toolbar to make your messages easier to read:
- Bold, Italic, Underline, Strikethrough
- Text size, font family, text colour
- Ordered and unordered lists
- Inline images and clickable links
Select the text you want to change, then choose the formatting option from the toolbar.
👉 Want to go deeper? Read the full guide
Step 5 — Organie with folders and labels
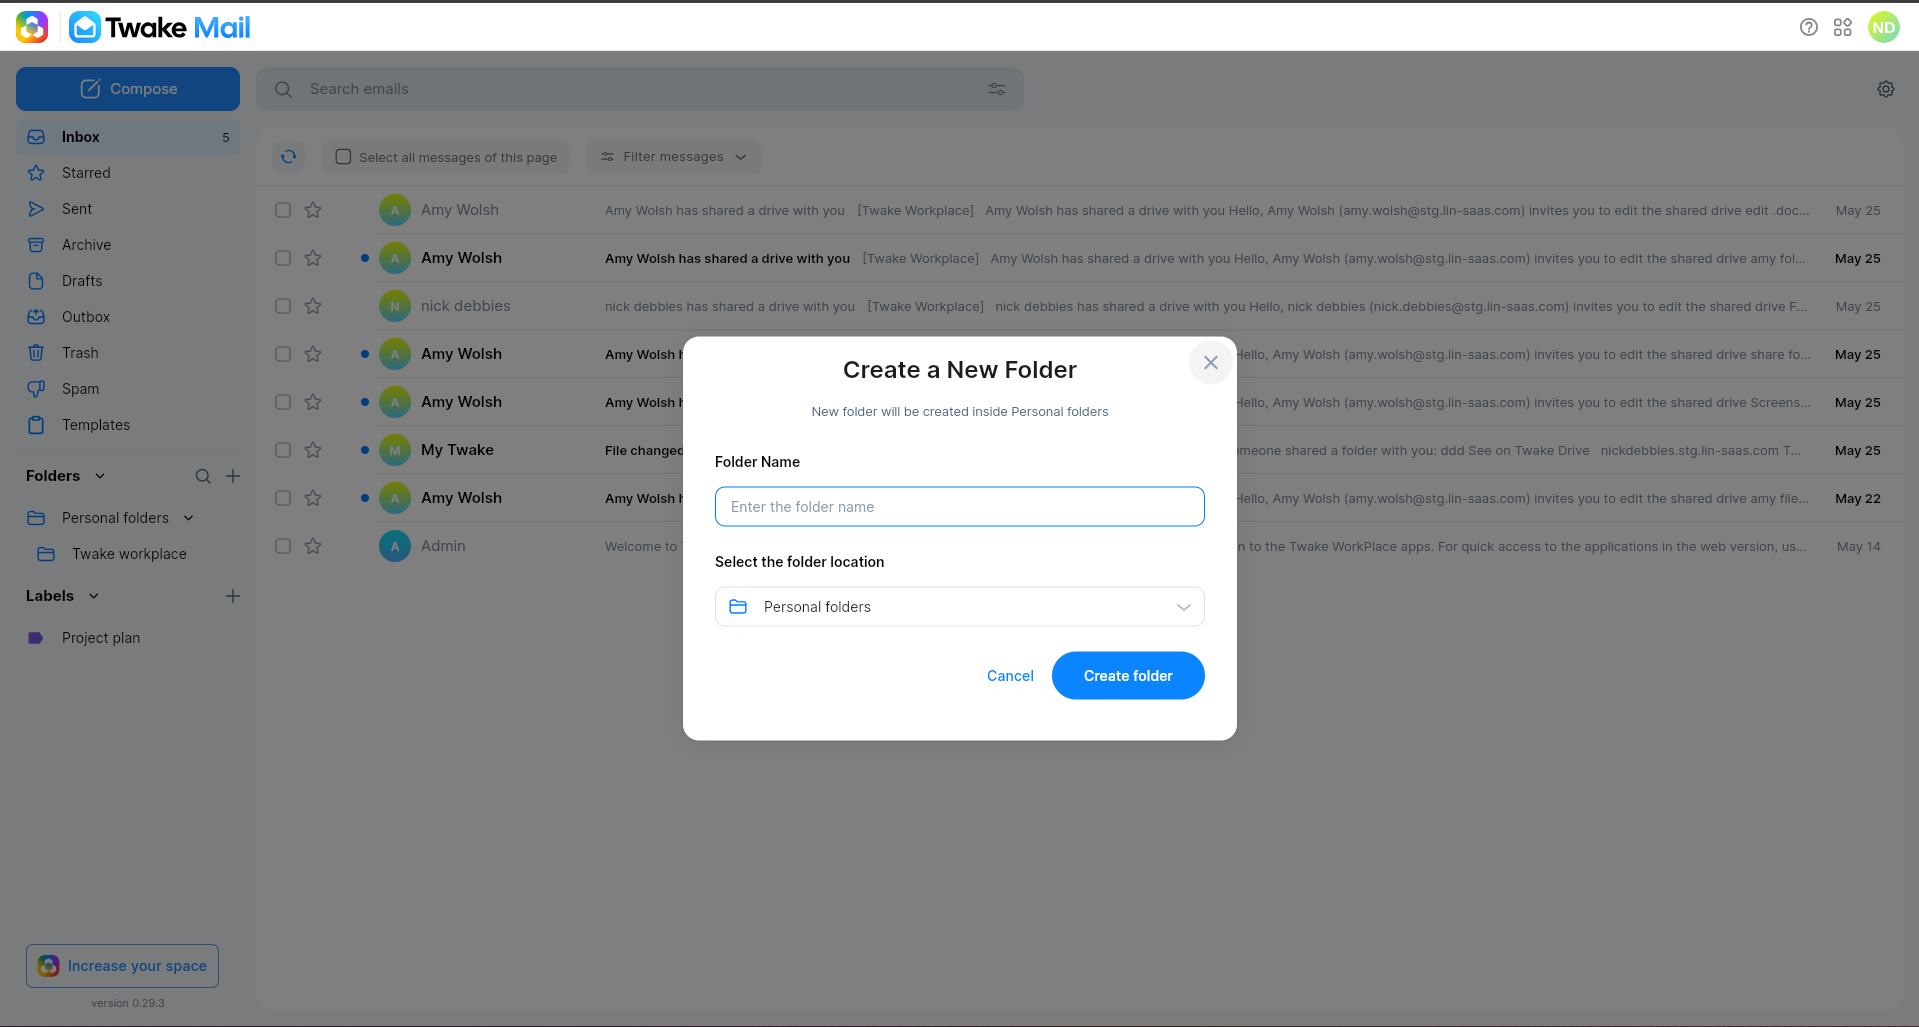
Folders let you sort your emails into dedicated spaces. System folders (Inbox, Sent, Drafts, Spam…) are created automatically. You can also create your own:
- In the left panel, select + New folder
- Name your folder
- Move emails into it by drag and drop or right-click → Move
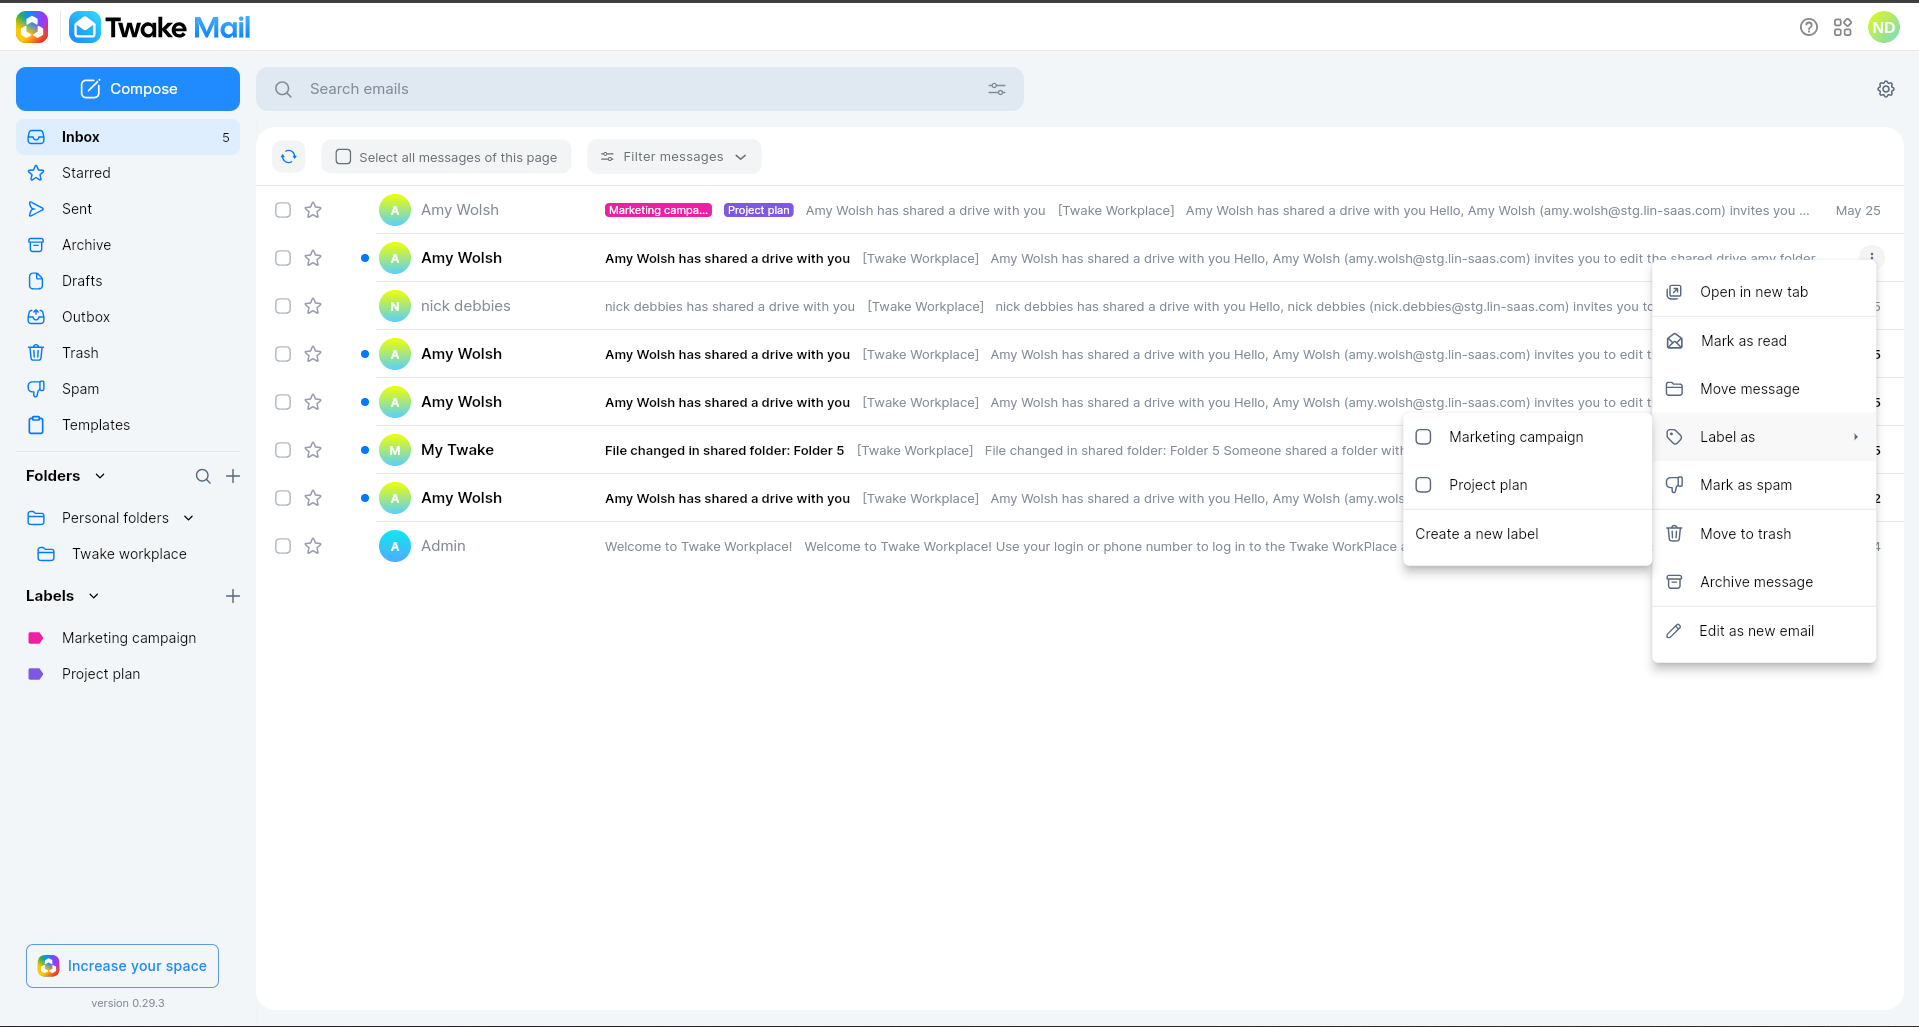
Labels let you tag emails without moving them, so the same email can carry multiple labels at once. To apply a label:
- Select the email
- Right-click → Label as
- Choose an existing label or create a new one
💡 Combine folders and labels for a powerful organisation system — folders for broad categories, labels for cross-cutting themes.
👉 Want to go deeper? Read the full guide
Step 6 — Search your emails
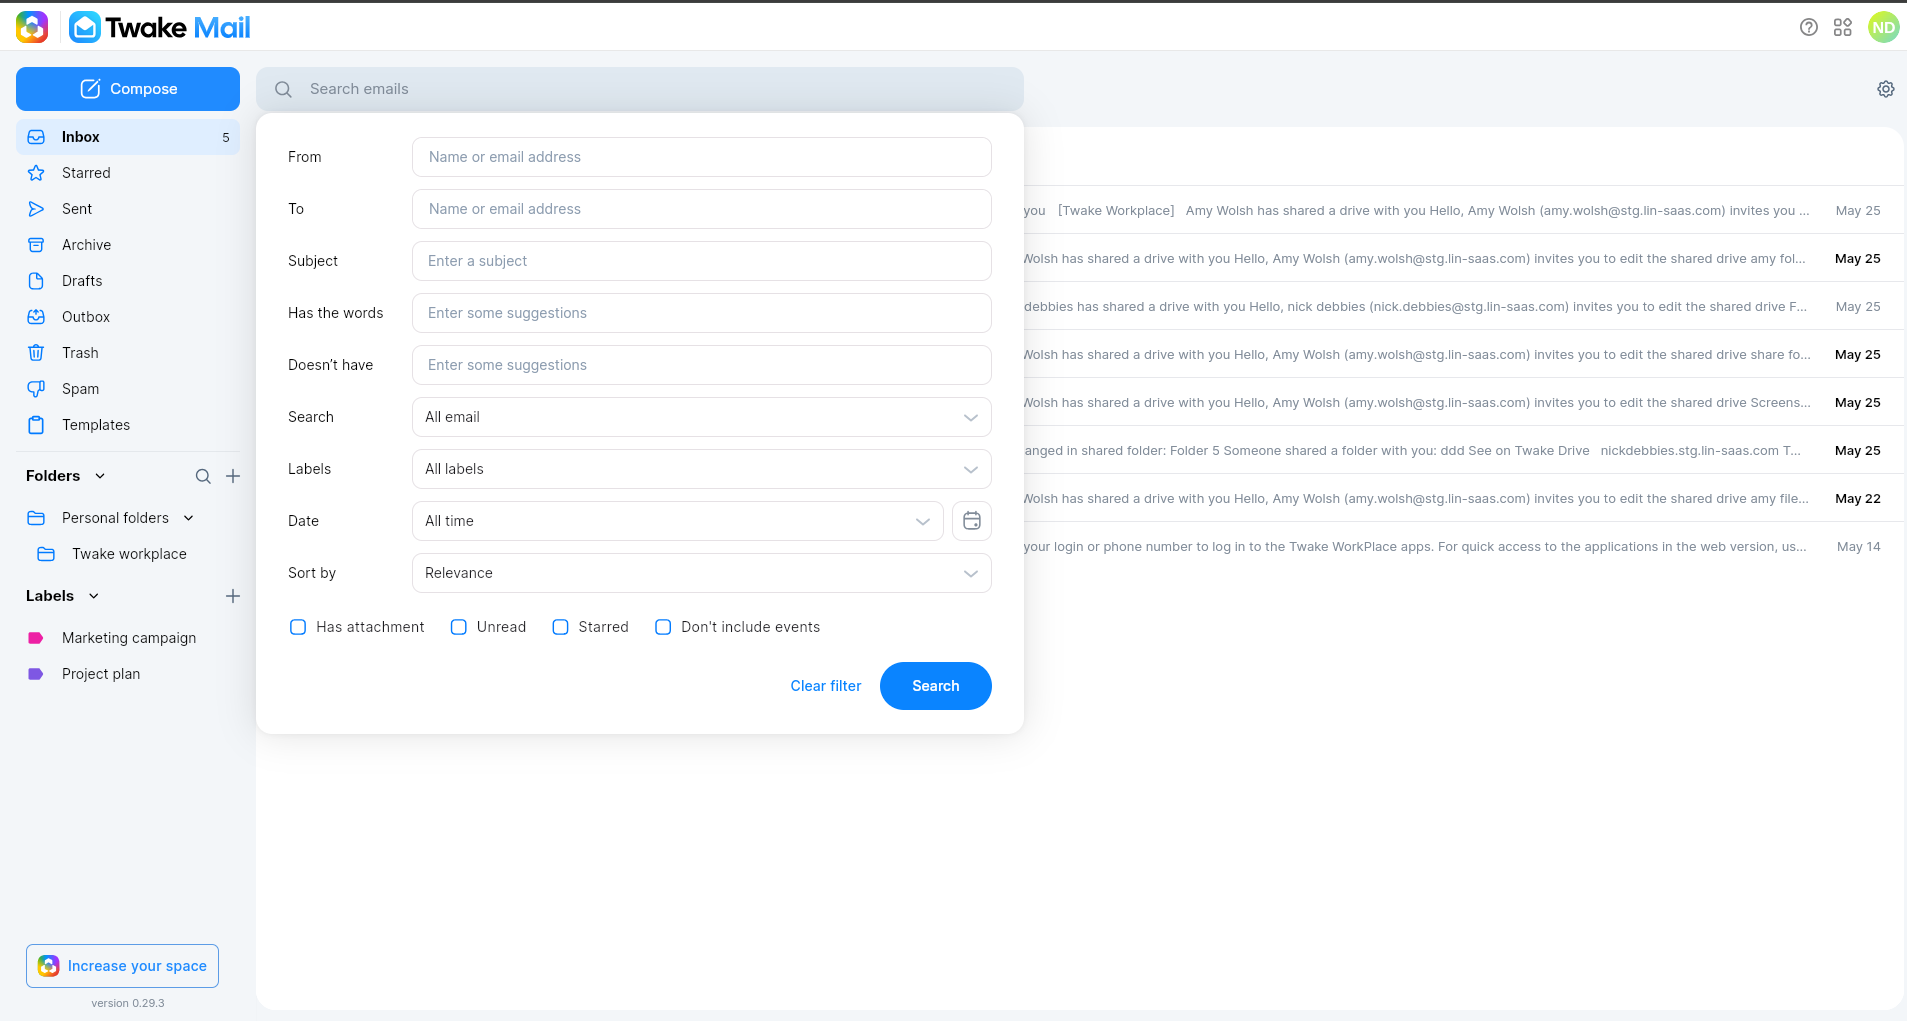
Twake Mail includes a powerful search engine that indexes the content of your messages, not just their subjects.
Use the search bar at the top of the interface to search by:
- Sender or recipient
- Subject
- Content (text inside the email)
- Specific folder, label
👉 Want to go deeper? Read the full guide
Step 7 — Configure your account
Twake Mail gives you several settings to personalise your experience. Access them via Settings (gear icon).
Signature
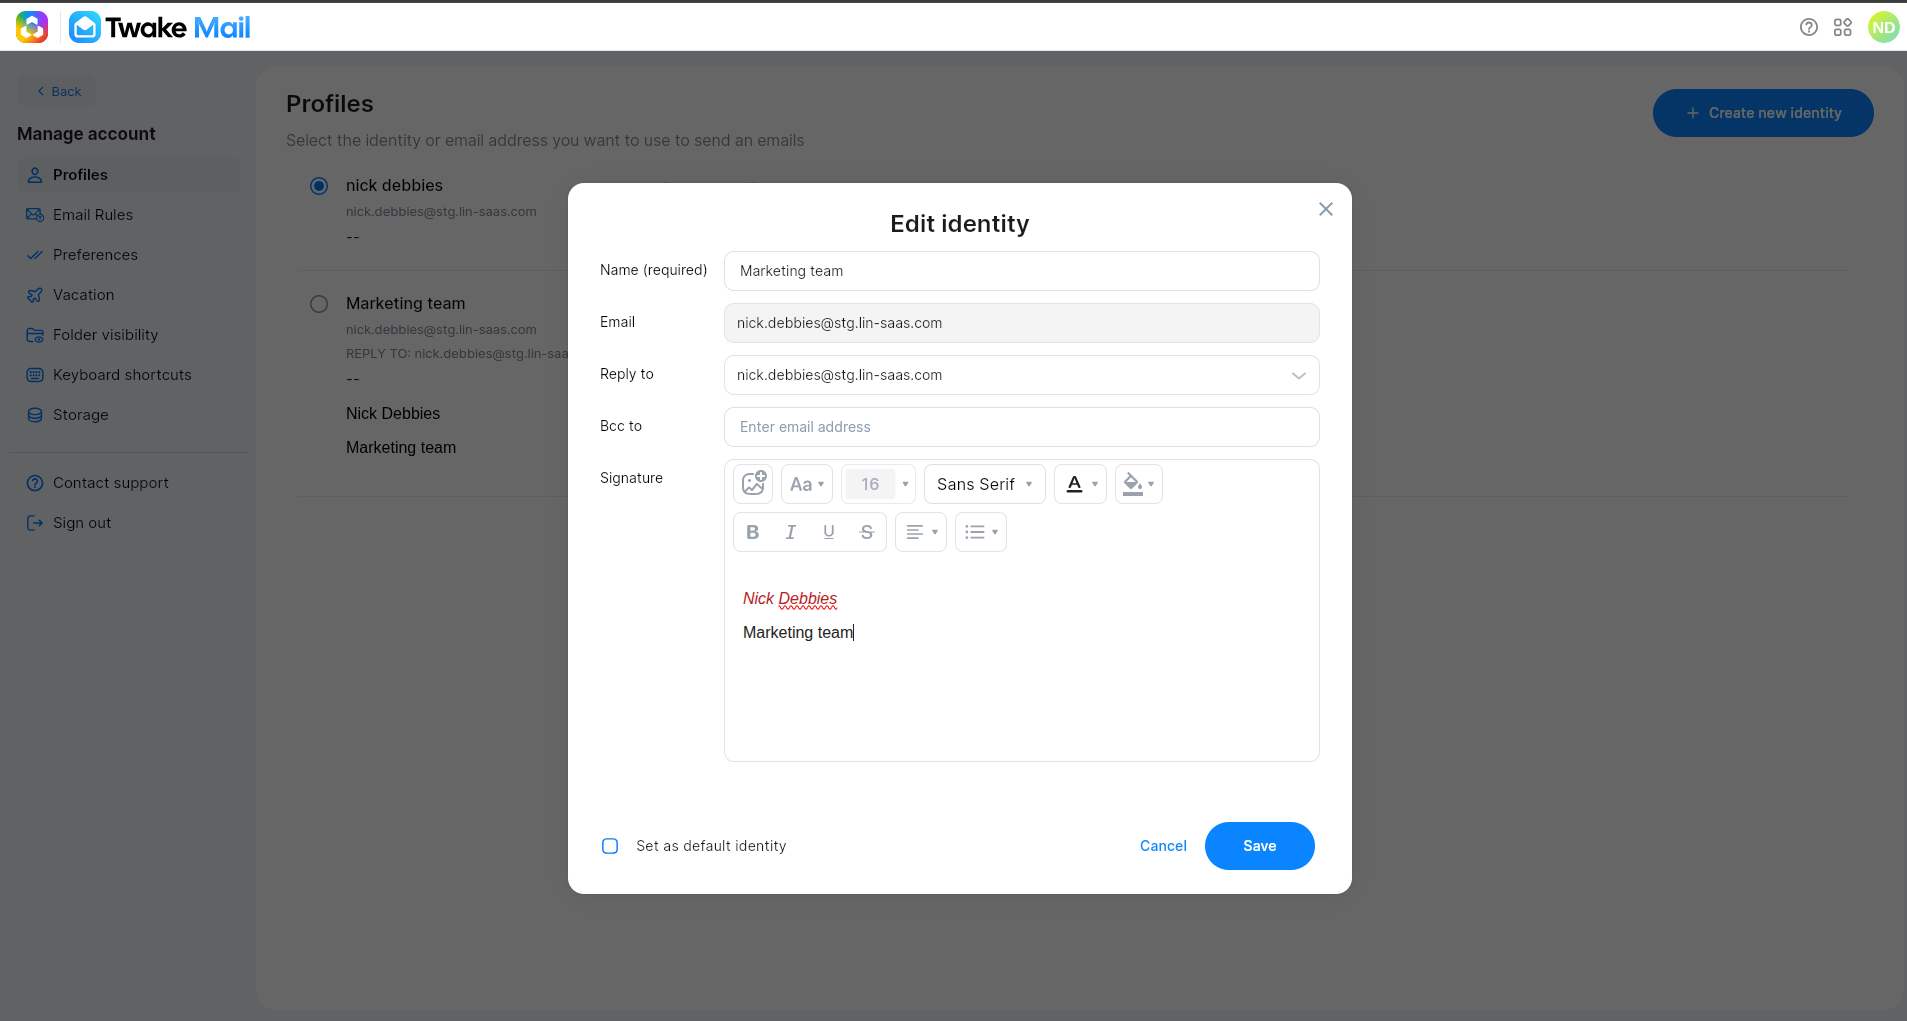
Create a personalised signature that is automatically appended to your emails:
- Go to Settings → Identities
- Select your identity
- Write your signature in the editor (rich text supported)
- Save
Vacation automatic response
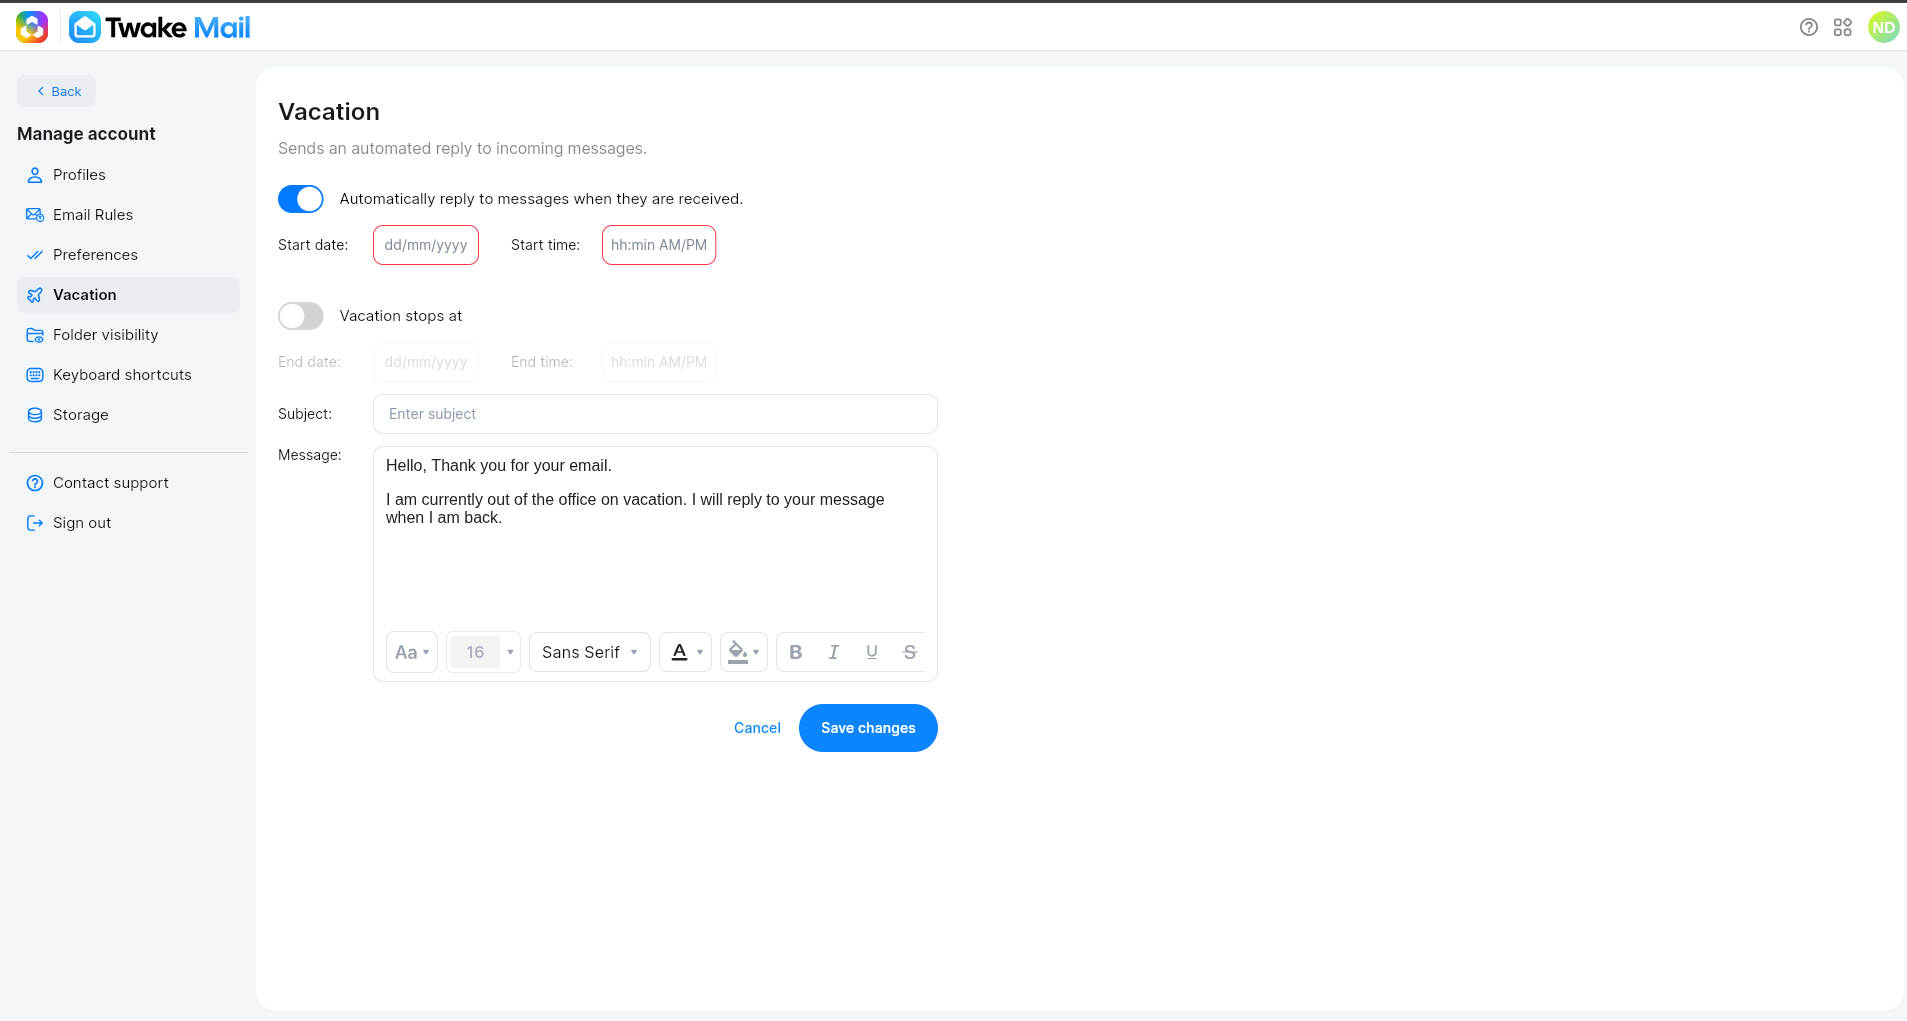
Set up an out-of-office reply when you are away:
- Go to Settings → Vacation responder
- Enable the vacation responder
- Set a start and end date
- Write your automatic reply message
- Save
💡 The vacation responder only sends one reply per sender during the active period.
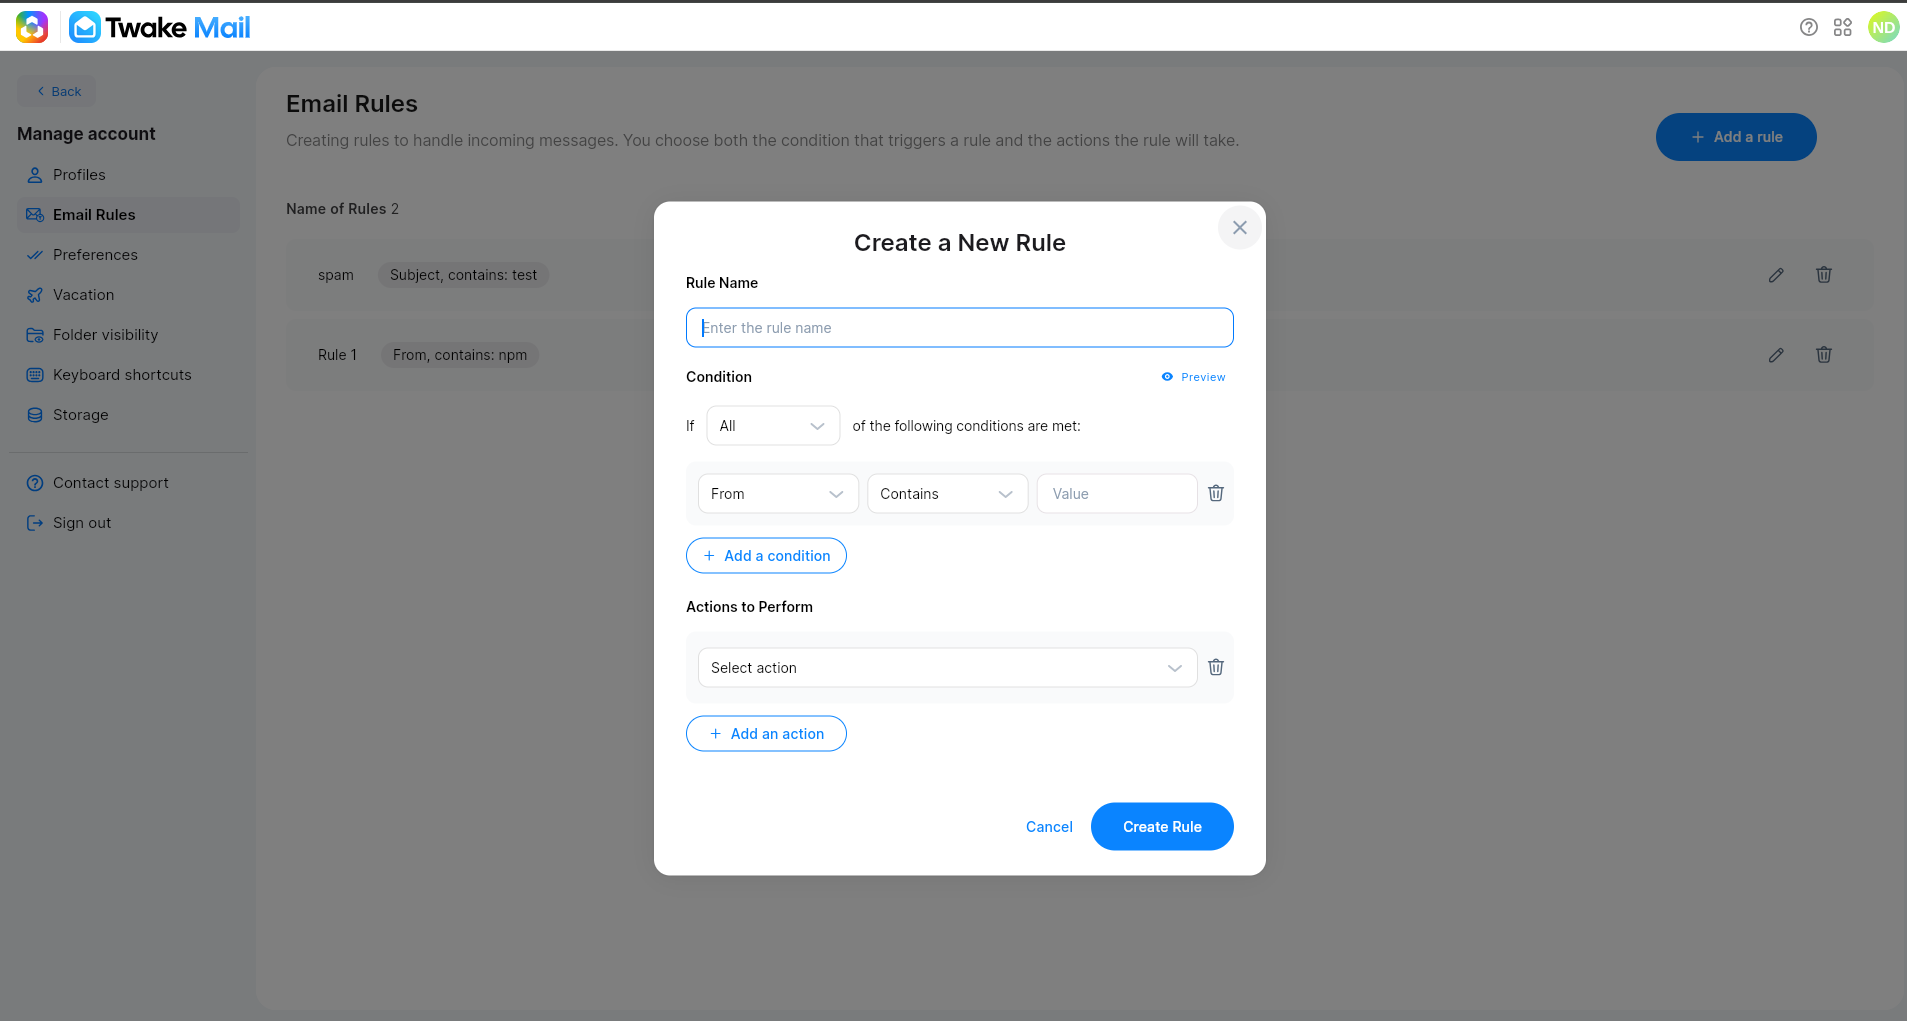
Customize rules (email filters)
Automatically sort, label, or forward incoming emails based on conditions:
- Go to Settings → Rules
- Select + New rule
- Define the condition (sender, subject, recipient…)
- Define the action (move to folder, apply label, mark as read, forward…)
- Save
Rules are applied in order from the most recently created to the oldest.
👉 Want to go deeper? Read the full guide
Step 8 — Understand your data security
Twake Mail puts confidentiality at the heart of how it works:
- Built-in antispam — protection against phishing and spam, natively integrated
- Data sovereignty — your data stays in Europe, fully GDPR-compliant
- Open source — the code is public and auditable on GitHub
- On-premise option — deploy Twake Mail on your own servers for complete control
You're all set! 🎉