
Discover Twake Drive in 8 steps
Your step-by-step onboarding guide
Step 1 — Find your way around the interface
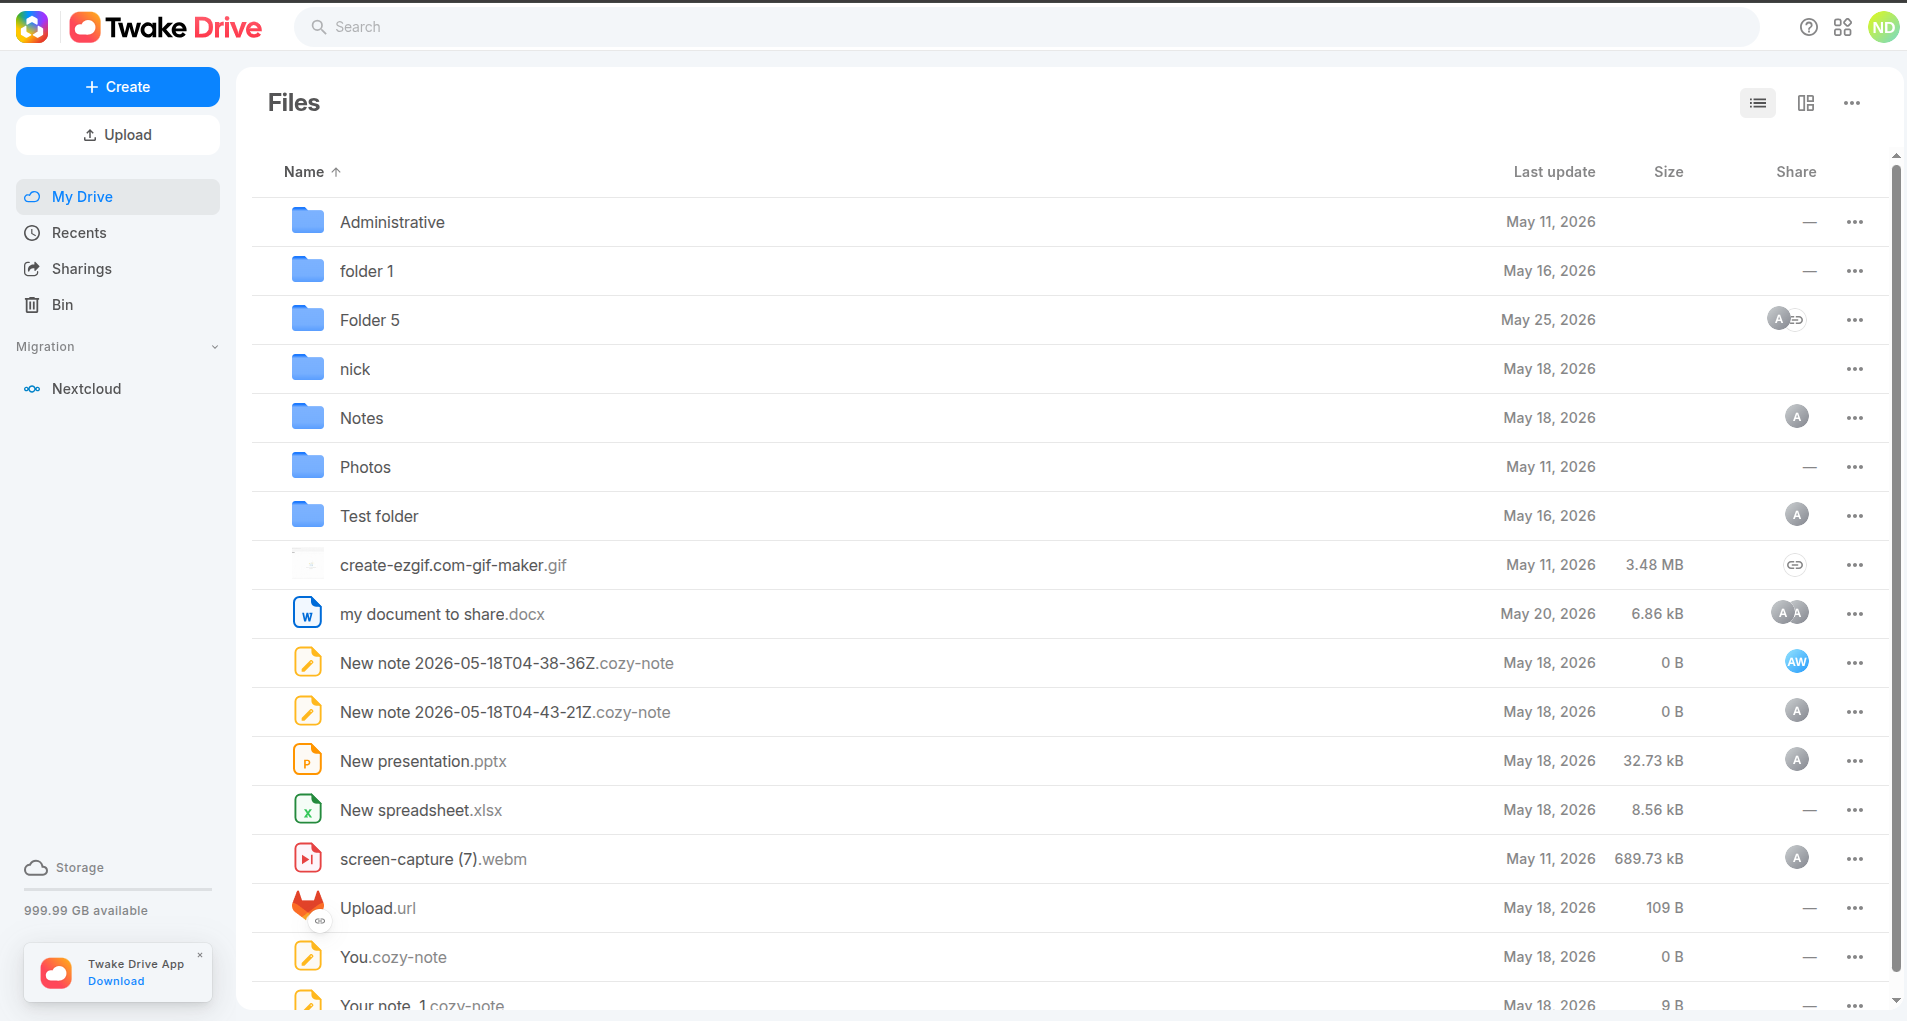
When you first log in, you land on your personal space. Here are the key landmarks:
- My Drive — your personal files
- Recent — all recent files order by date
- Sharings — files your colleagues have shared with you
- Shared Drive — shared team workspaces (only on Pro account)
- Trash — deleted files, recoverable before permanent removal
Navigation happens through the left-hand panel. You can switch between grid view and list view depending on your preference.
Step 2 — Import and organise your files
To add files to your space:
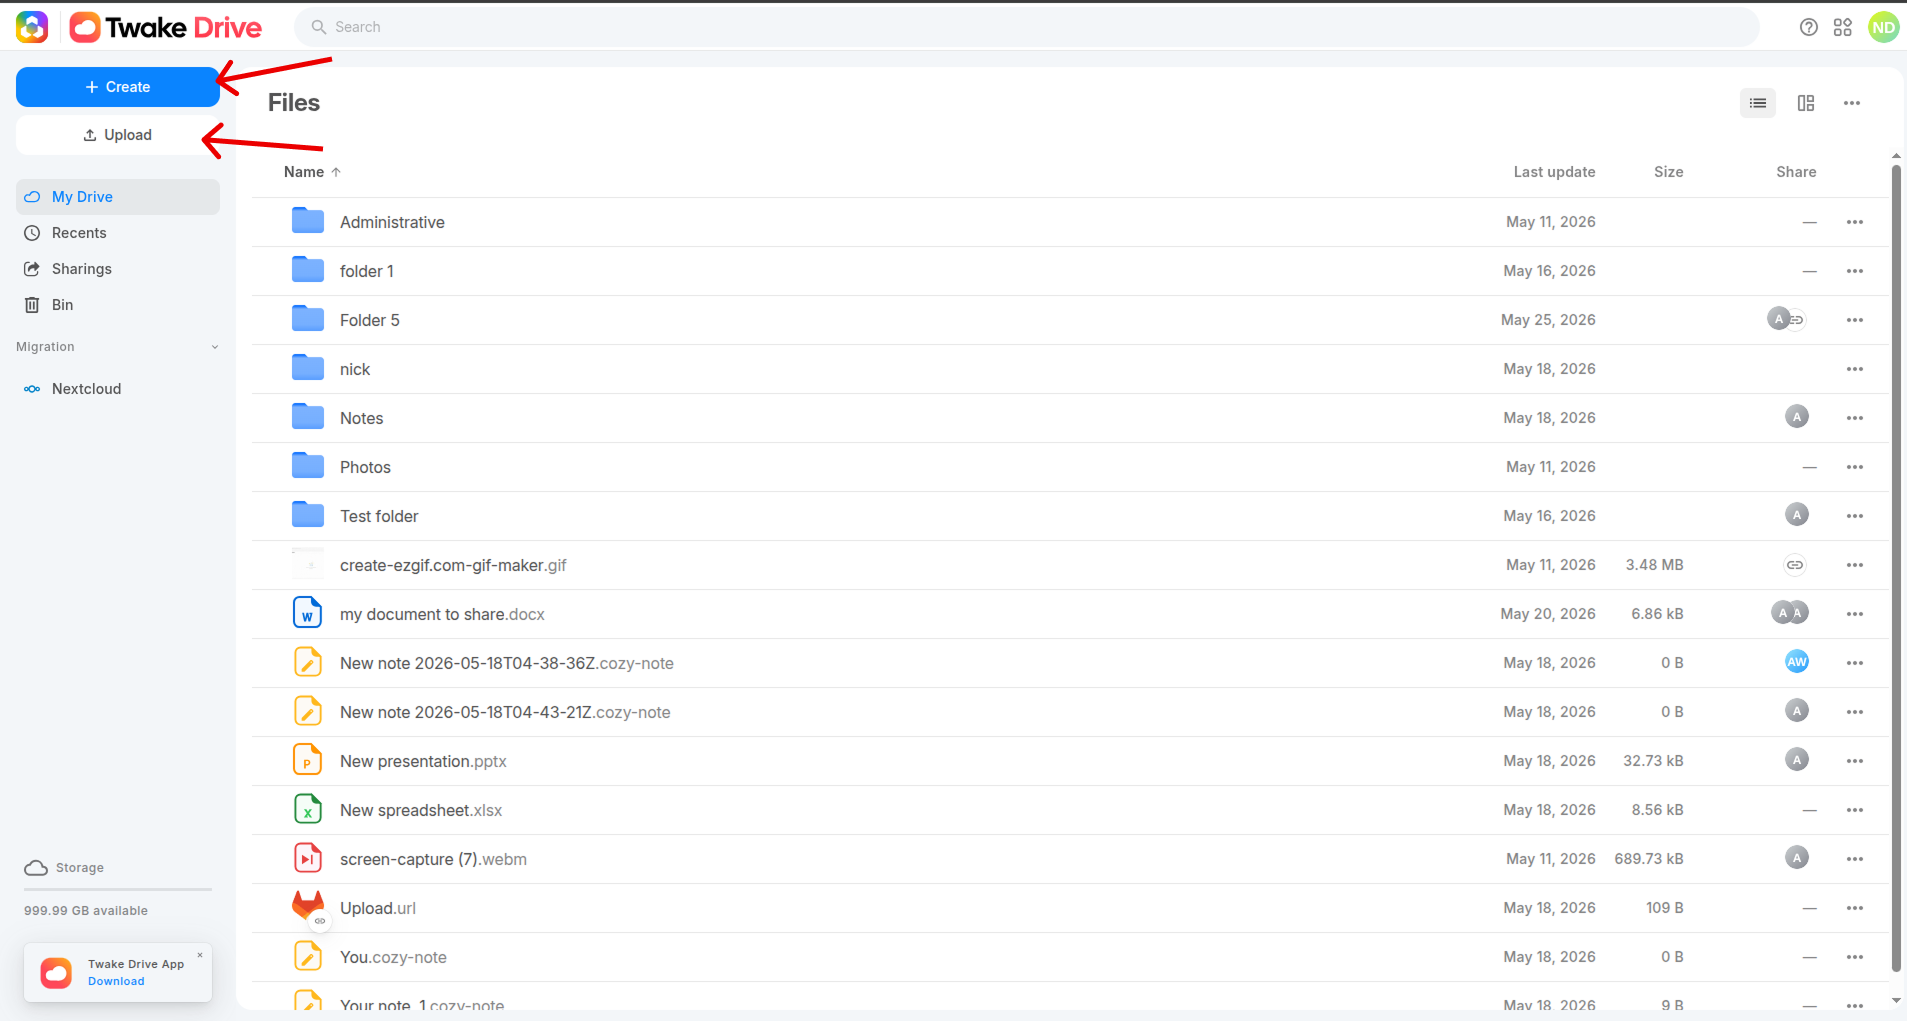
- Click the Upload button (↑ icon) in the toolbar
- Drag and drop your files or folders
- A progress indicator keeps you informed in real time
To organise your space:
- Create folders via the
+button or right-click - Move files by drag and drop
- Star important files to find them quickly
👉 Want to go deeper? Read the full guide
Step 3 — Create and edit documents online
Twake Drive includes OnlyOffice, a full office suite running directly in your browser.
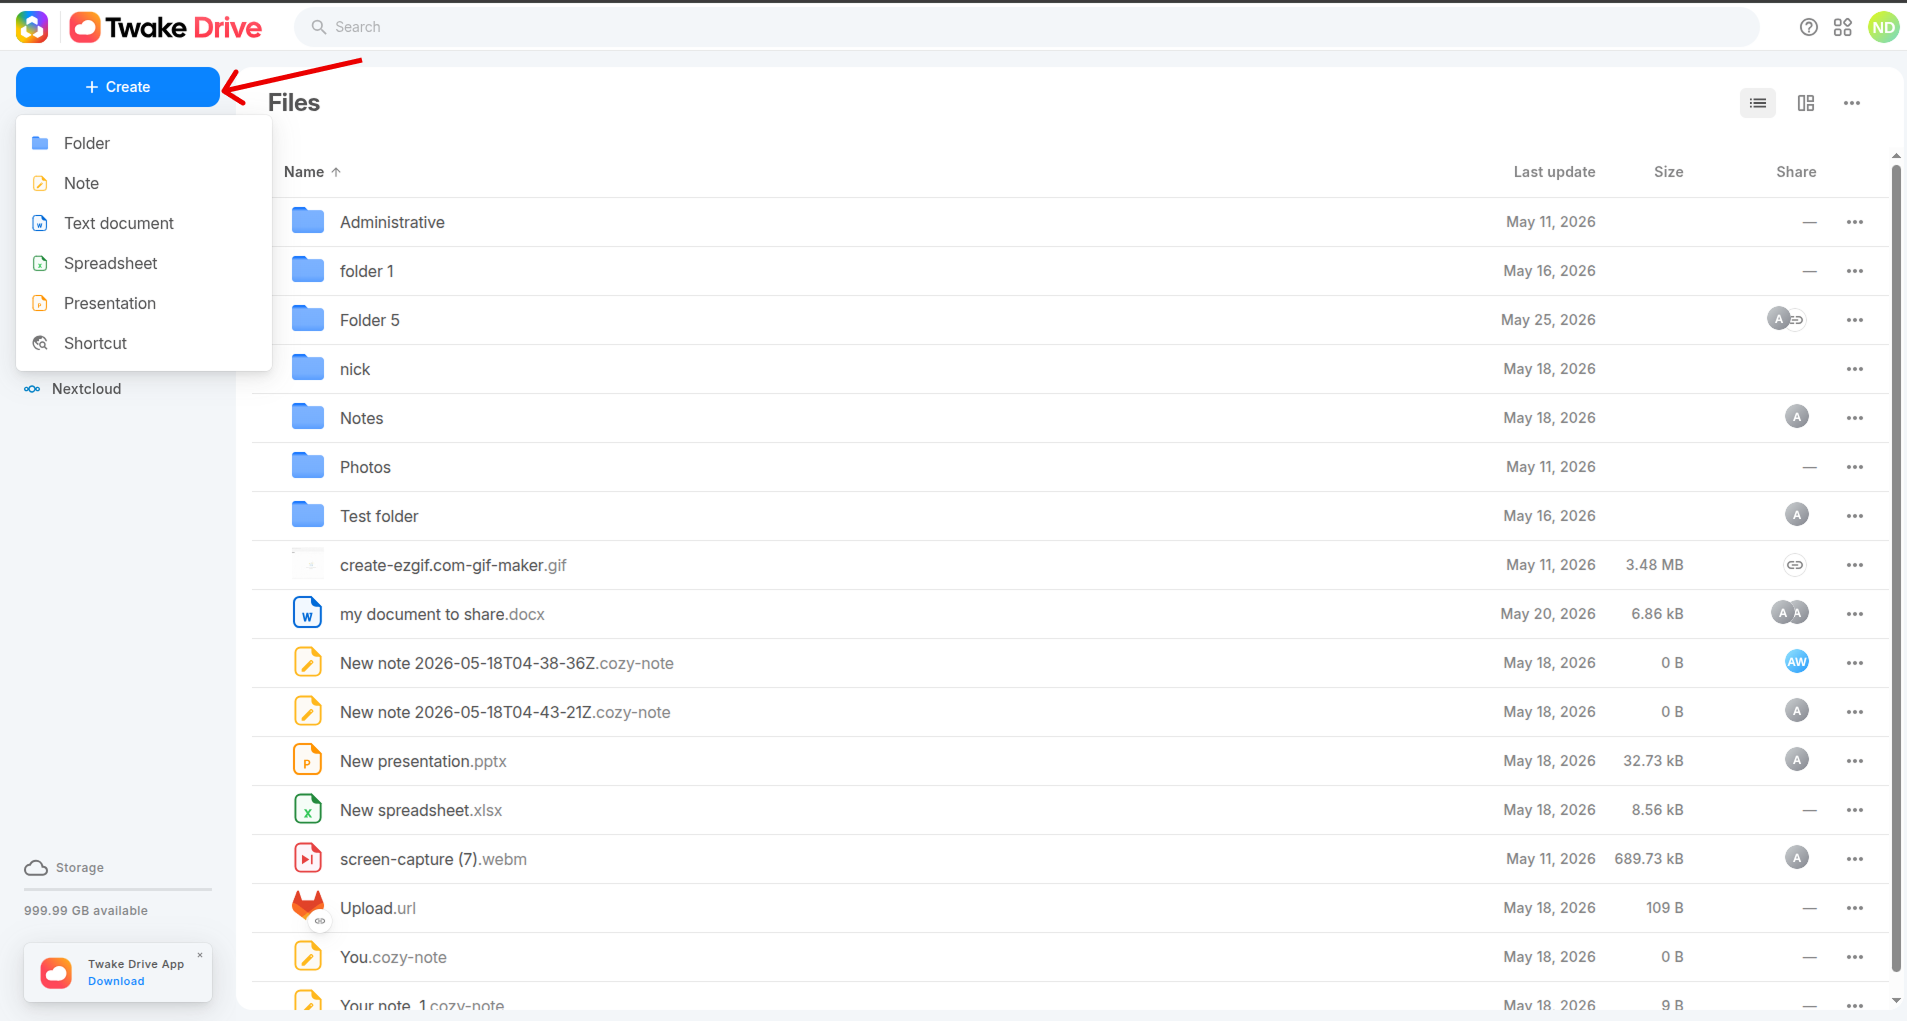
From the interface, click + New to create:
- A text document
- A spreadsheet
- A presentation
Editing is real-time and collaborative: multiple team members can work on the same file simultaneously, with live cursors and changes visible to everyone.
👉 Want to go deeper? Read the full guide
Step 4 — Share a file or folder
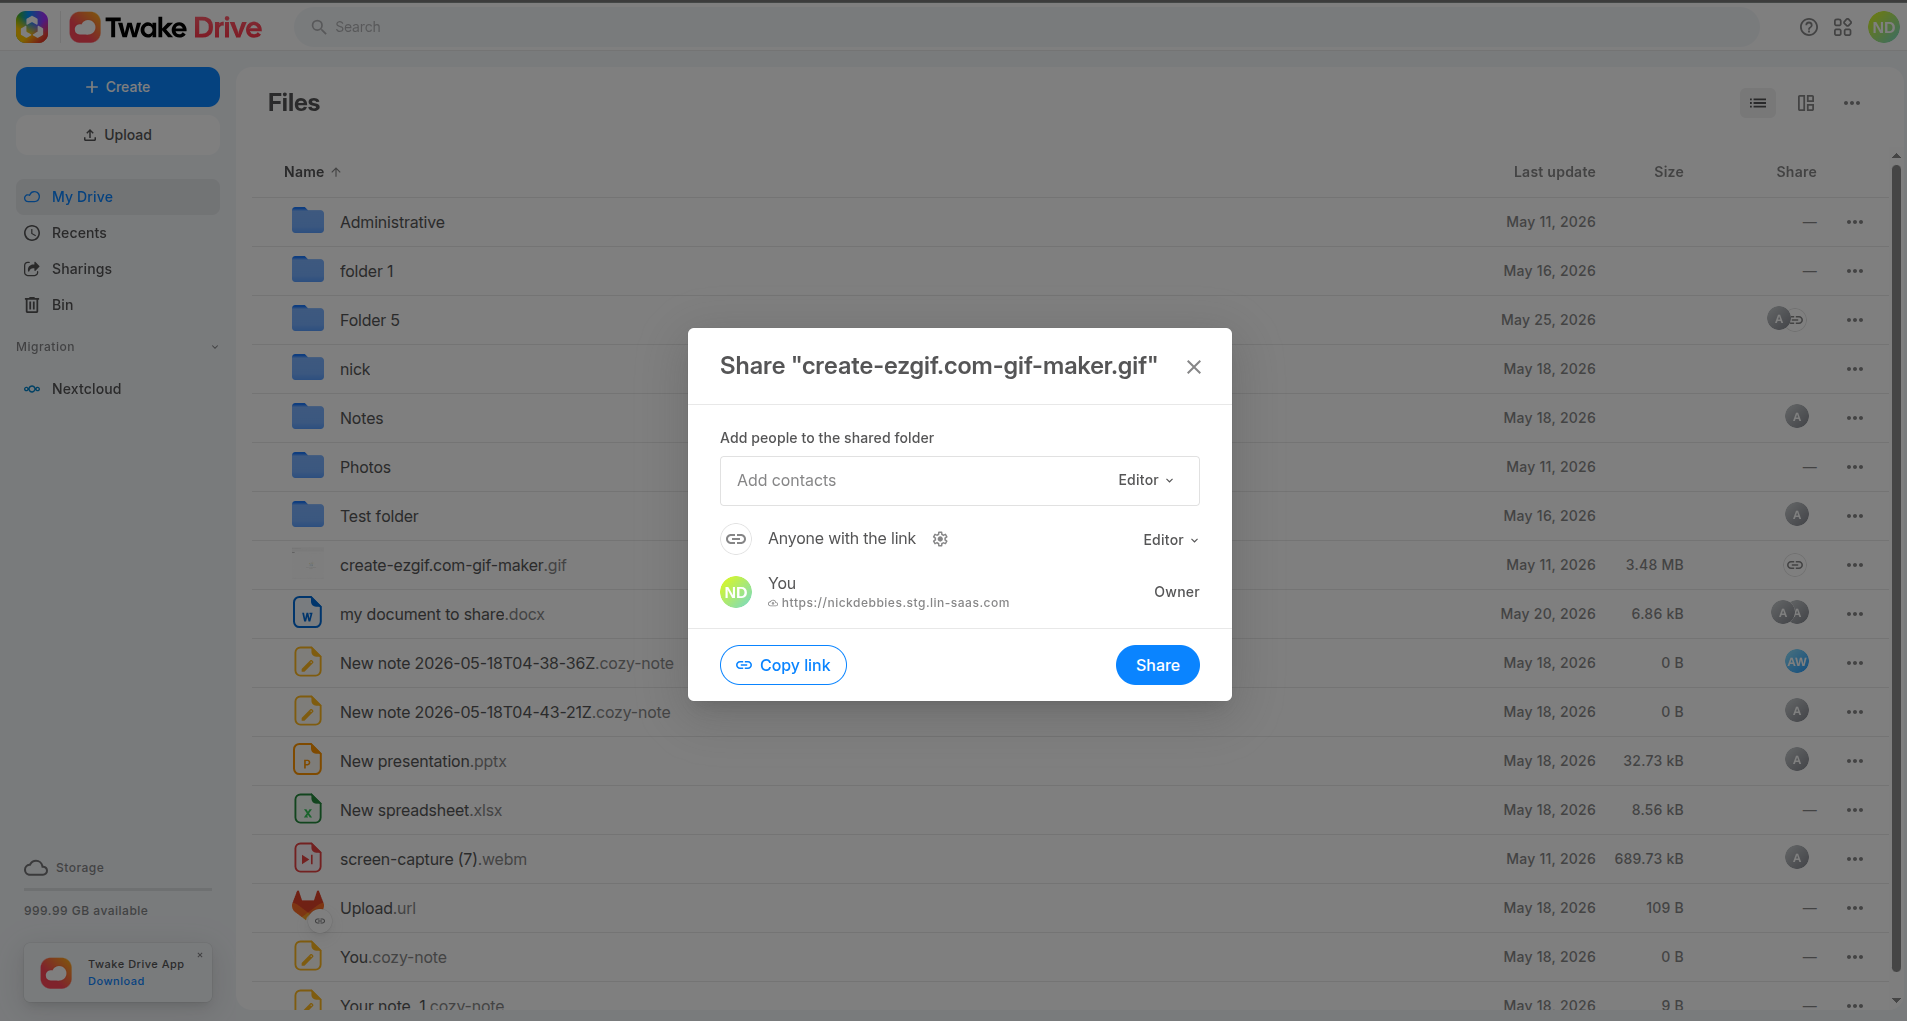
Share with a colleague:
- Right-click the file → Share
- Enter your colleague's email address
- Choose the access level: Viewer or Editor
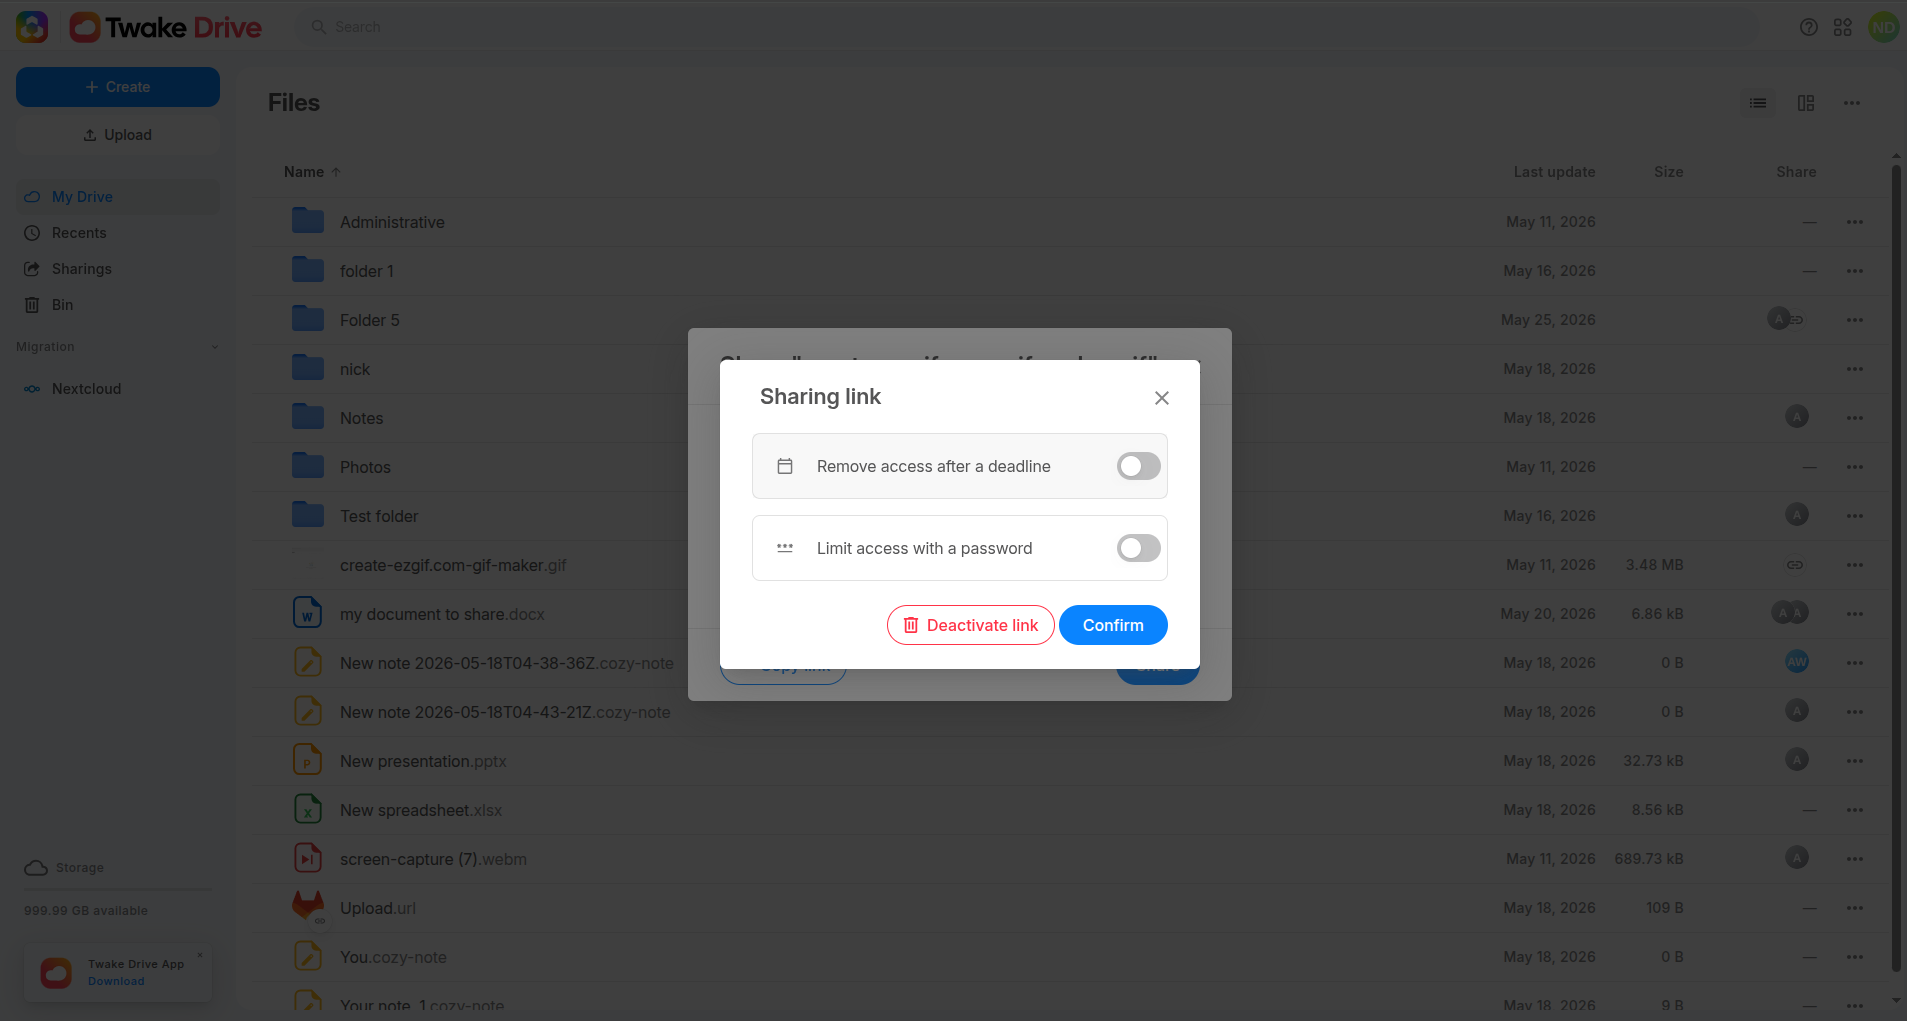
Share via public link:
- Right-click → Create a sharing link
- Set the permissions (read-only, expiry date, password,…)
- Copy and share the link — recipients do not need a Twake account
💡 You can revoke a public link at any time from the sharing settings.
👉 Want to go deeper? Read the full guide
Step 5 — Use Shared Drives (team spaces)
Shared Drives give your entire team a common workspace. Files belong to the organisation, not to any individual — they remain accessible even if a team member leaves.
To create one, you must be an administrator of your organization and go to the admin panel.
Invite your members and assign their roles. Perfect for team projects or shared resources.
💡 Files stored in a Shared Drive are always available to the whole team, regardless of who uploaded them.
Step 6 — Search your files
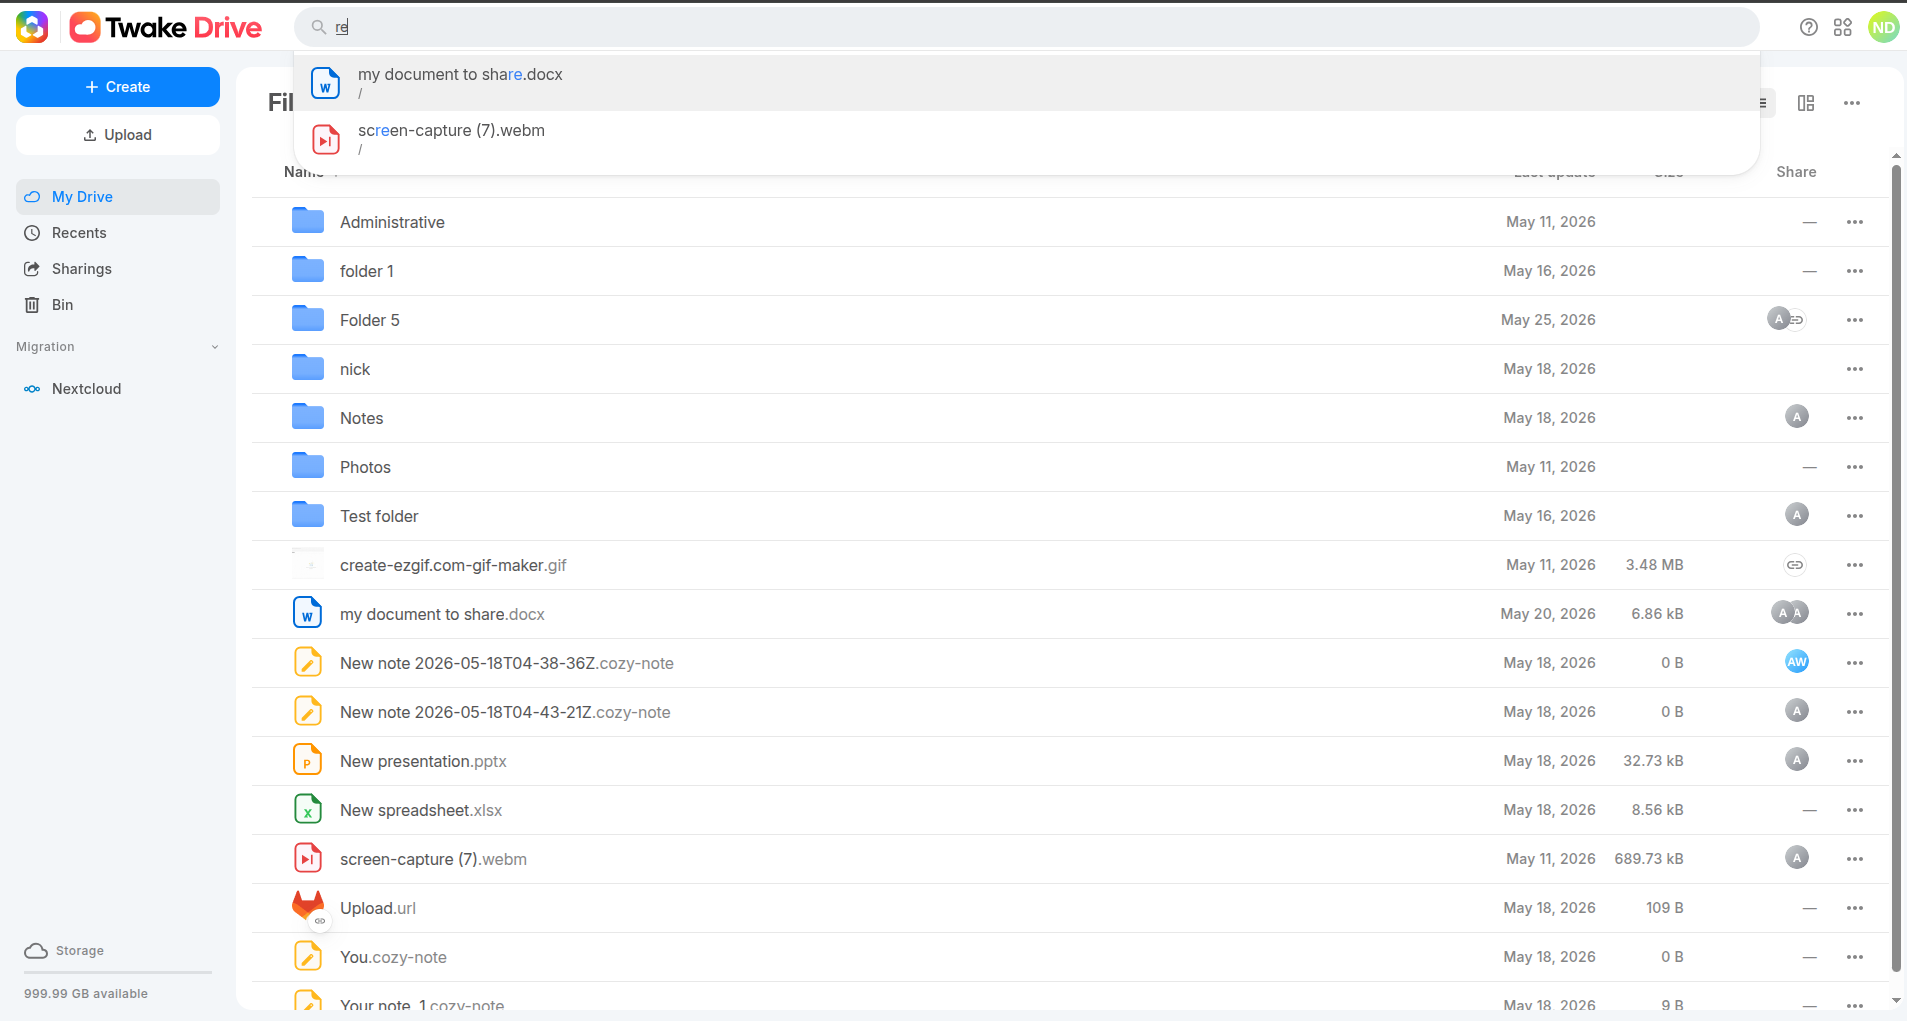
Twake Drive includes a powerful search engine that indexes the content of your files, not just their names.
Use the search bar at the top of the interface to search by:
- File name
- Content (text inside the document)
- Sender (for shared files)
Step 7 — Understand your data security
Twake Drive puts confidentiality at the heart of how it works:
- Data sovereignty — your data stays in Europe, fully GDPR-compliant
- Open source — the code is public and auditable on GitHub
- On-premise option — deploy Twake Drive on your own servers for complete control
Step 8 — Go further
You now know the essentials of Twake Drive. To keep learning:
- Read the technical documentation on GitHub
- Read the complete user documentation
You're all set! 🎉